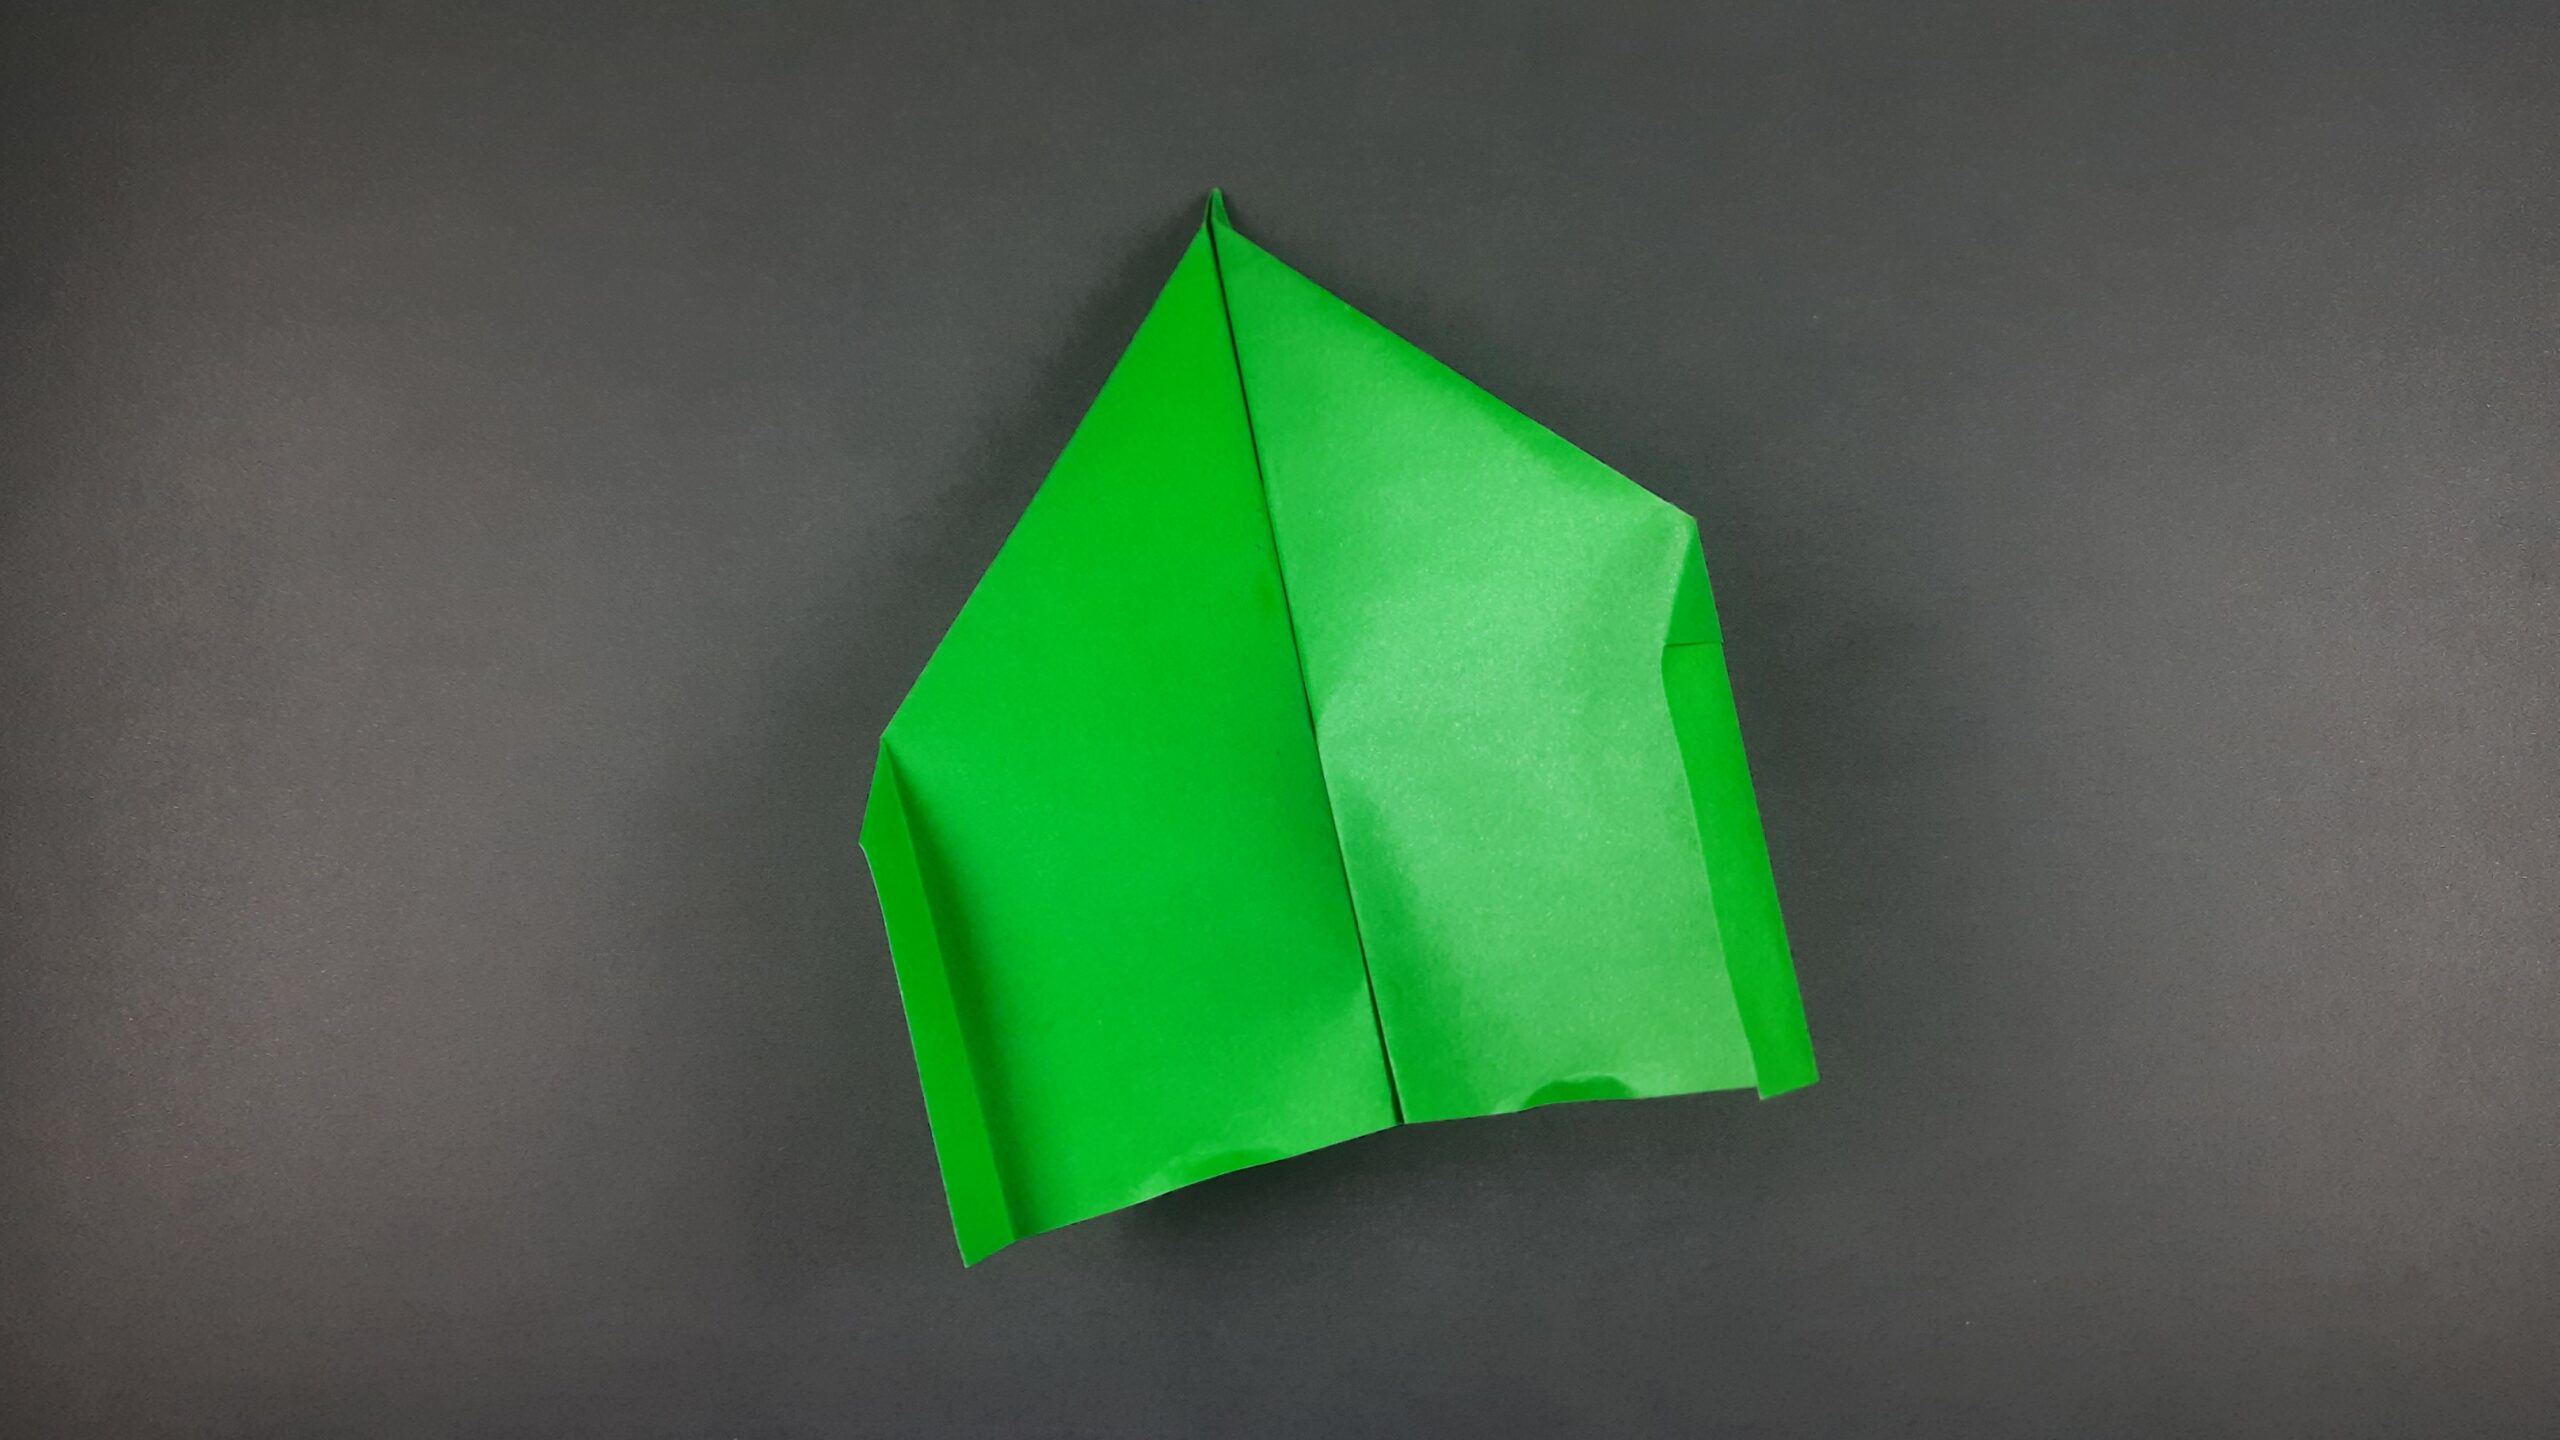
Whether you’re a kid or just young at heart, there’s something exhilarating about making a paper airplane and watching it soar through the air. With just a few simple steps, you can easily teach your kids how to make a paper airplane that will have them entertained for hours on end.
Or if you are a kid, these instructions are super easy to follow! So why not get started today? Let’s take a look at the step-by-step guide on how to make a paper airplane for kids down below!
How To Make A Paper Airplane For Kids Video Walkthrough
There you go! I hope this video I have made has made it more than easy enough to create this awesome paper airplane for kids! You should have no problem following along as this is a super simple design!
If you prefer learning a different way though, I have also created a step-by-step illustrated guide that you can follow down below!
If you enjoy this design make sure to check out all my other Origami Vehicles!
How To Make A Paper Airplane For Kids: Step-By-Step Instructions
1. Creating the Initial Folds and Plane Front
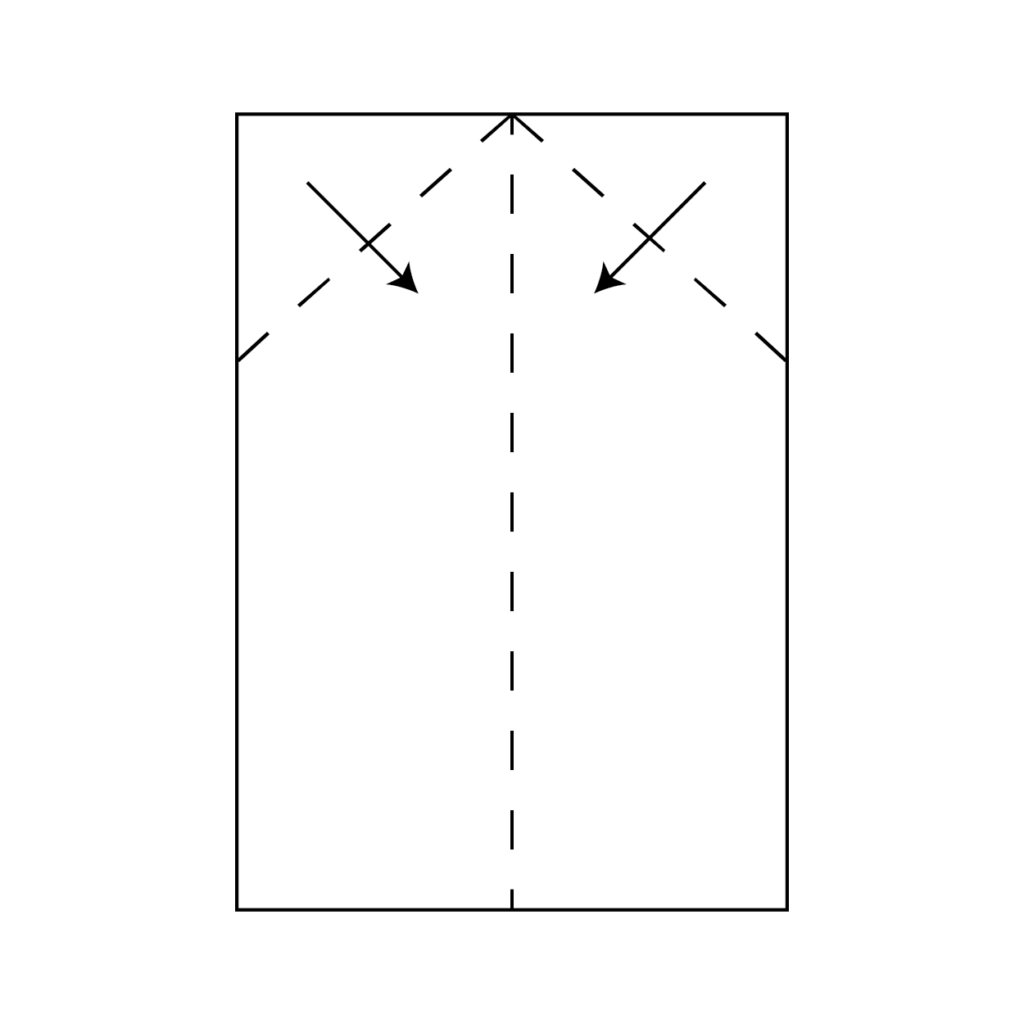
Take your full printer-size sheet of paper and fold it in half vertically and then unfold it to create a crease. Then take the top left and right corners of the paper and fold them downwards toward the center crease to meet each other. You Can use the dotted lines above as a reference. This fold will create the front of the plane as seen above.
2. Giving the Plane a Jet Shape
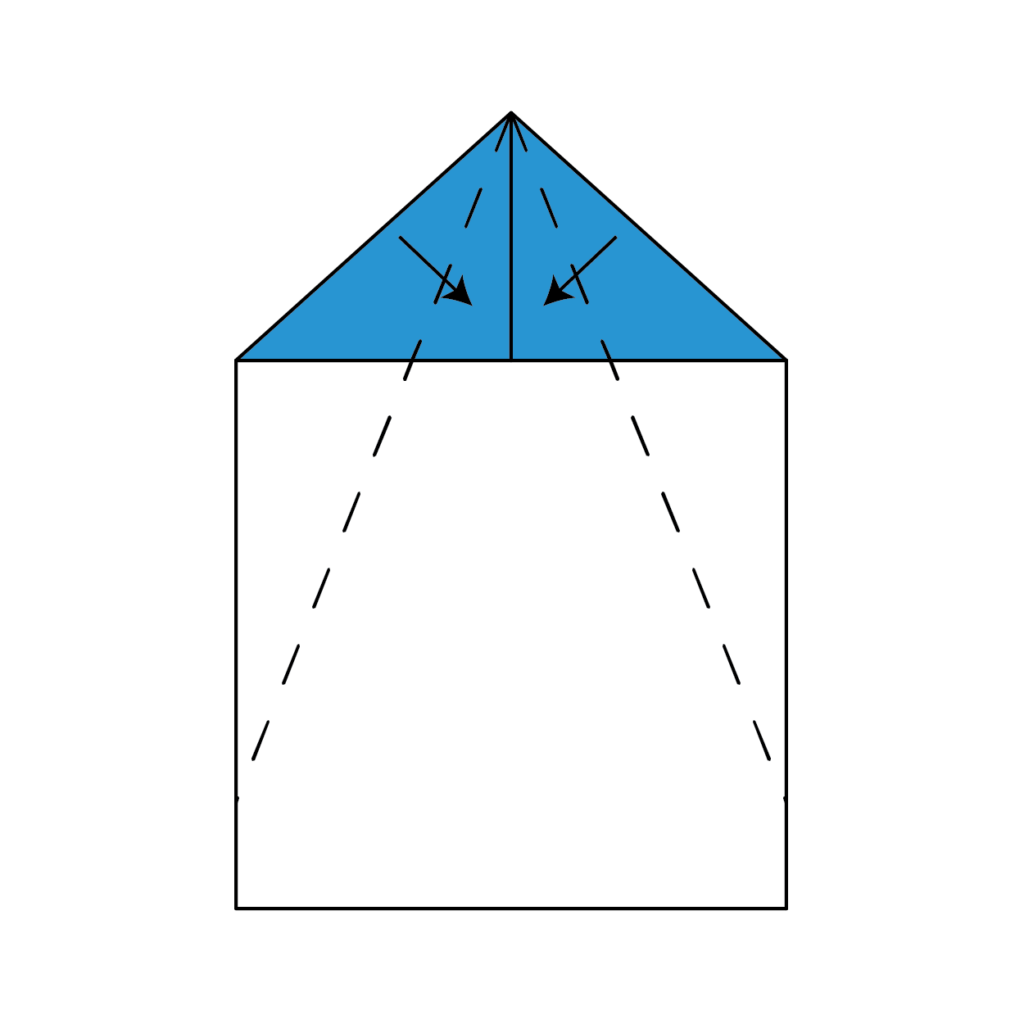
Once again you are going to fold the left and right sides of the paper towards the center crease that you made in step one to meet each other. Fold over the dotted lines that you see above in the image. This is to give the plane more of a jet shape.
3. Folding the Paper Model in Half
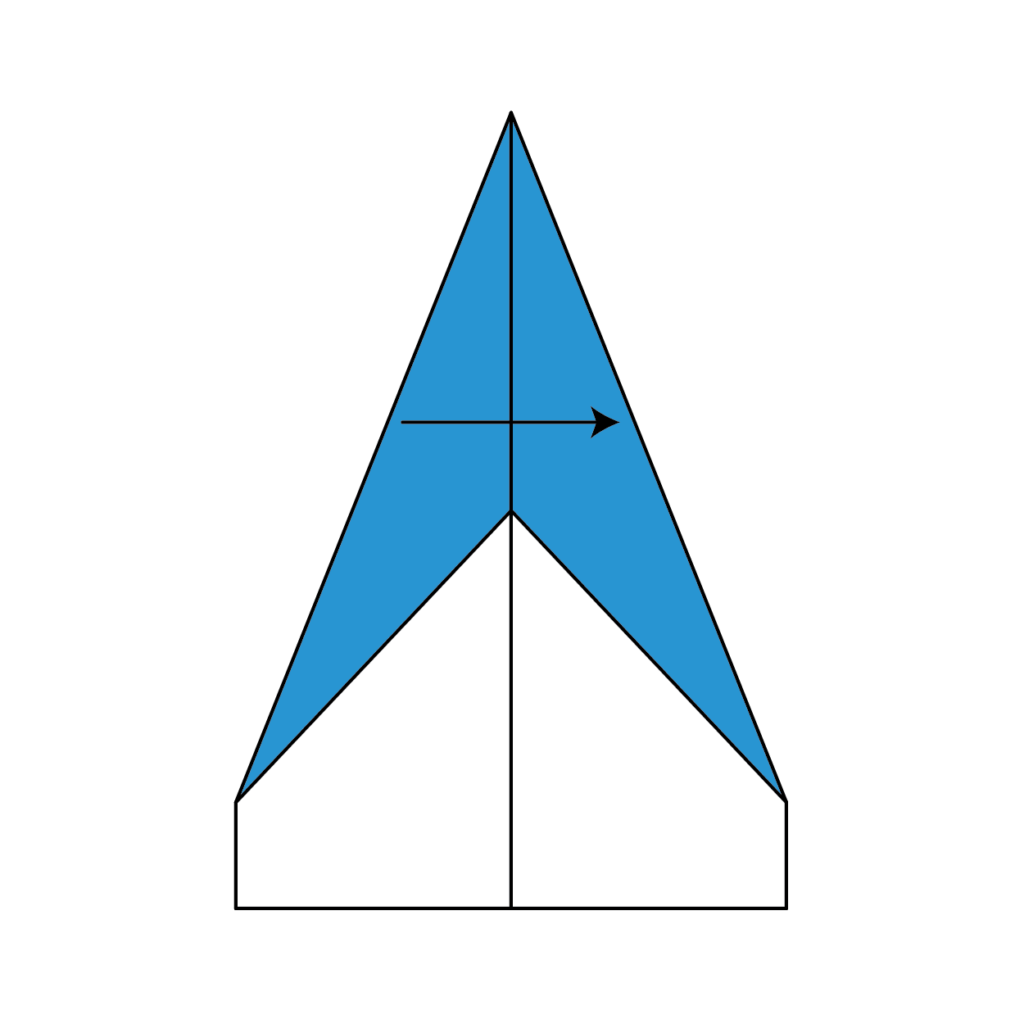
This is what you should have now. Now, take the current model and fold it in half by taking the left side and folding it over to the right side, and aligning the edges.
4. Crafting the First Wing
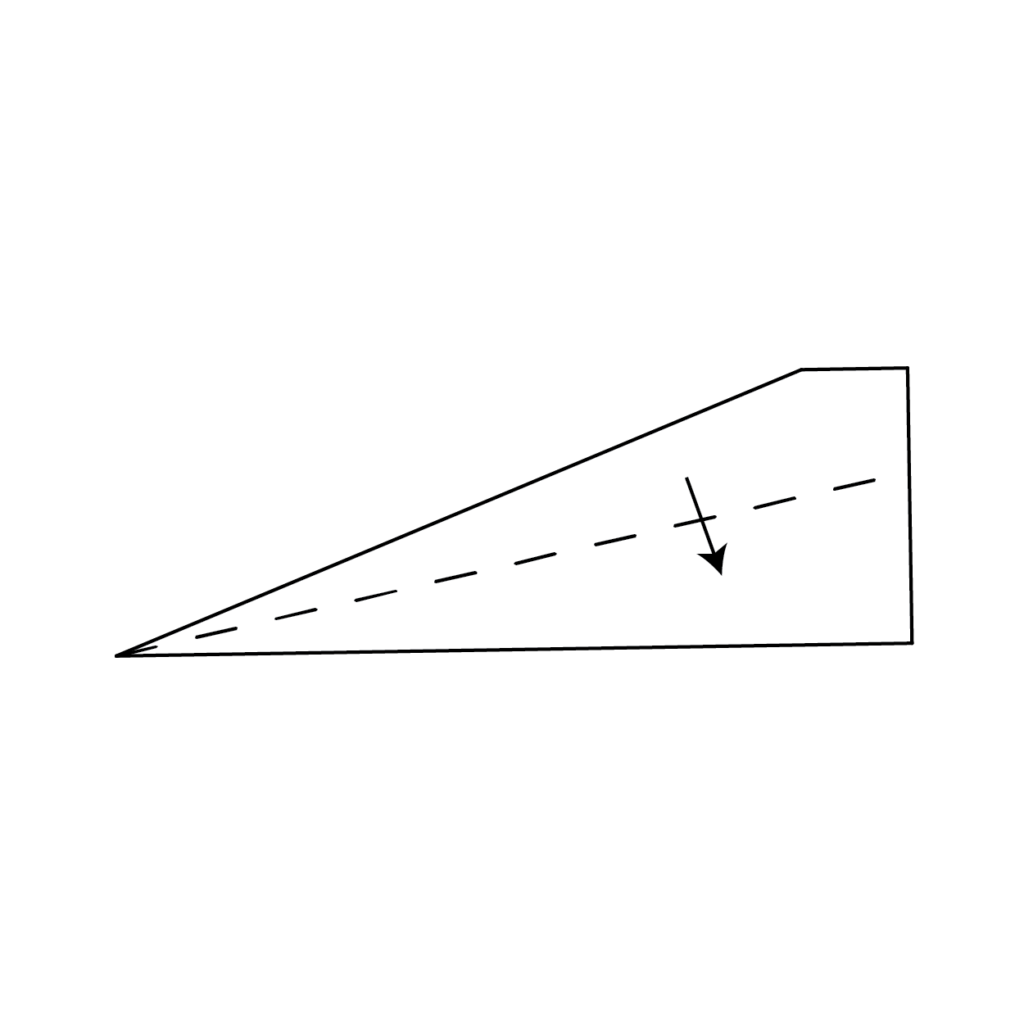
Turn the paper so that it’s aligned with how the image above looks. Next, we’re going to make the wings. Pick a side and fold the flap down to meet and align with the bottom of the plane. Use the dotted line as a reference to help you create this wing.
5. Completing the Second Wing
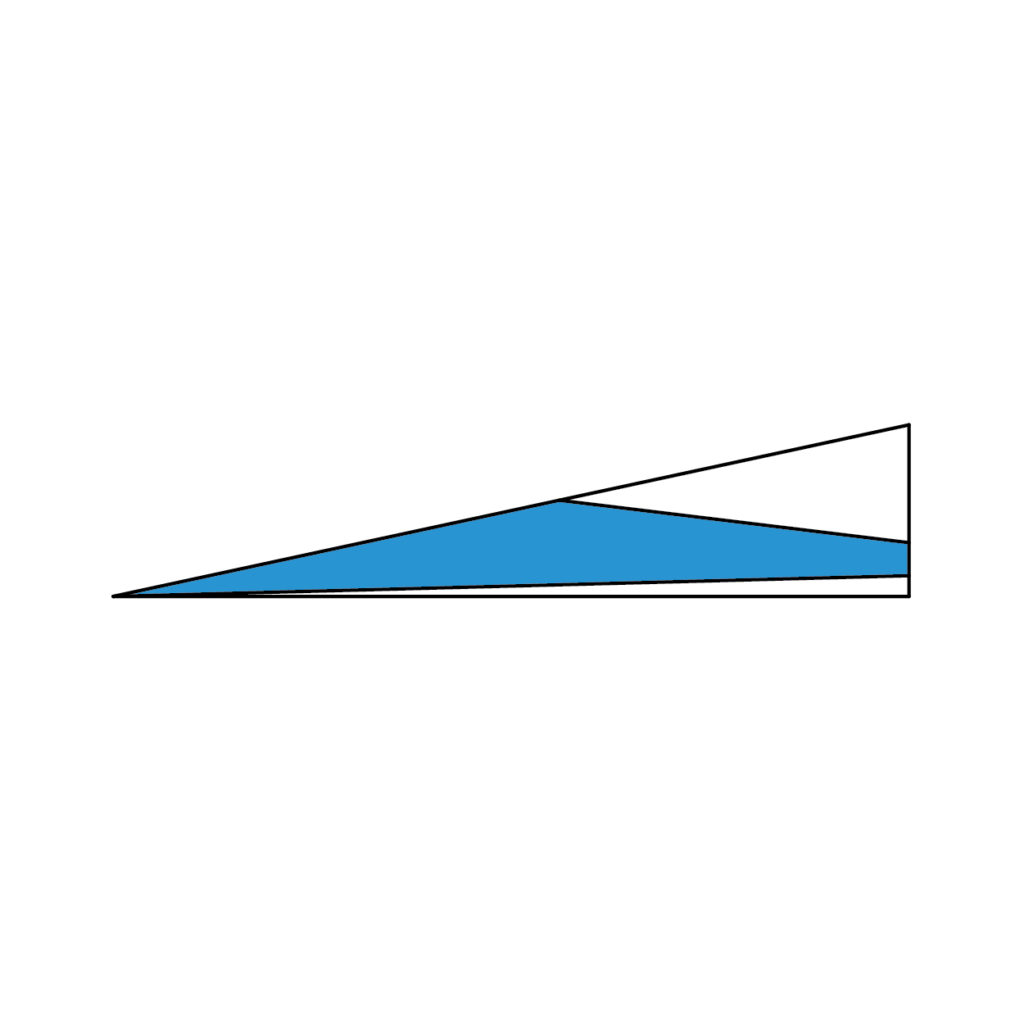
Flip the plane over and do the same thing with the other side to create the other wing.
6. Admiring the Finished Origami Airplane
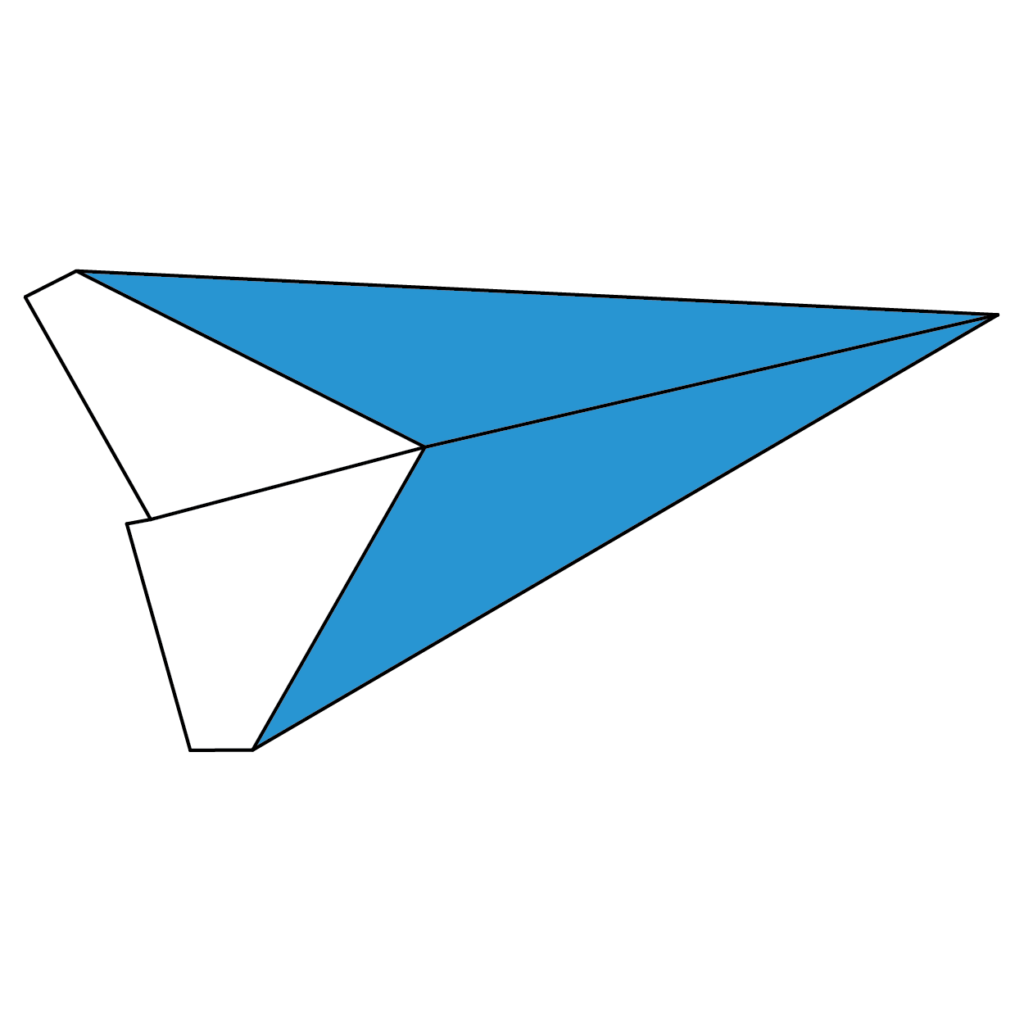
Congratulations! Your final design should resemble the reference image. Enjoy your completed origami airplane and consider making more to share or race with friends and family.
There you go! If you enjoy instructions more than videos I hope that these were simple and easy to follow! Now that you have a video and graphic instructions at your disposal, you should be a near pro at creating this paper airplane for kids!
This is a fun and simple design that anyone can follow along too! Below you’ll find the same instructions but in one large printable graphic!
How To Make A Paper Airplane For Kids Printable Instructions
Paper airplanes are a classic childhood toy. They’re easy to make and can provide hours of entertainment. In this post, I’ve shown you how to make a paper airplane for kids using an illustrated step-by-step guide.
If you want to keep learning the art of origami, be sure to check out my other origami creations. Thanks for reading!

