Origami guns are becoming more and more popular, as people search for new and innovative ways to have fun. While they may seem complicated to make at first, with this complete guide you will be able to fold your own origami gun in no time!
I will go step by step through the process, making it easy for even beginners to follow along. So what are you waiting for? Grab some paper and get started!
How To Make An Origami Gun Video Walkthrough
There you go! The video I have made above should have provided you with everything you need to create your first origami gun! As you can see, this design isn’t complicated at all. Even if you are just starting your origami journey you should have very easily been able to follow along.
You can get as creative as you’d like with this origami gun and use different colored papers and even put some cool designs on it! Now, if you enjoy learning in ways other than watching videos, I’ve got you covered! Down below you’ll find step-by-step illustrated instructions on how to make an origami gun.
- If you enjoy making this origami gun, make sure to check out all my other Origami Weapons!
How To Make An Origami Gun Step-By-Step Instructions
1. Creating the Initial Folds: Begin with a Full-Sized Sheet of Printer Paper
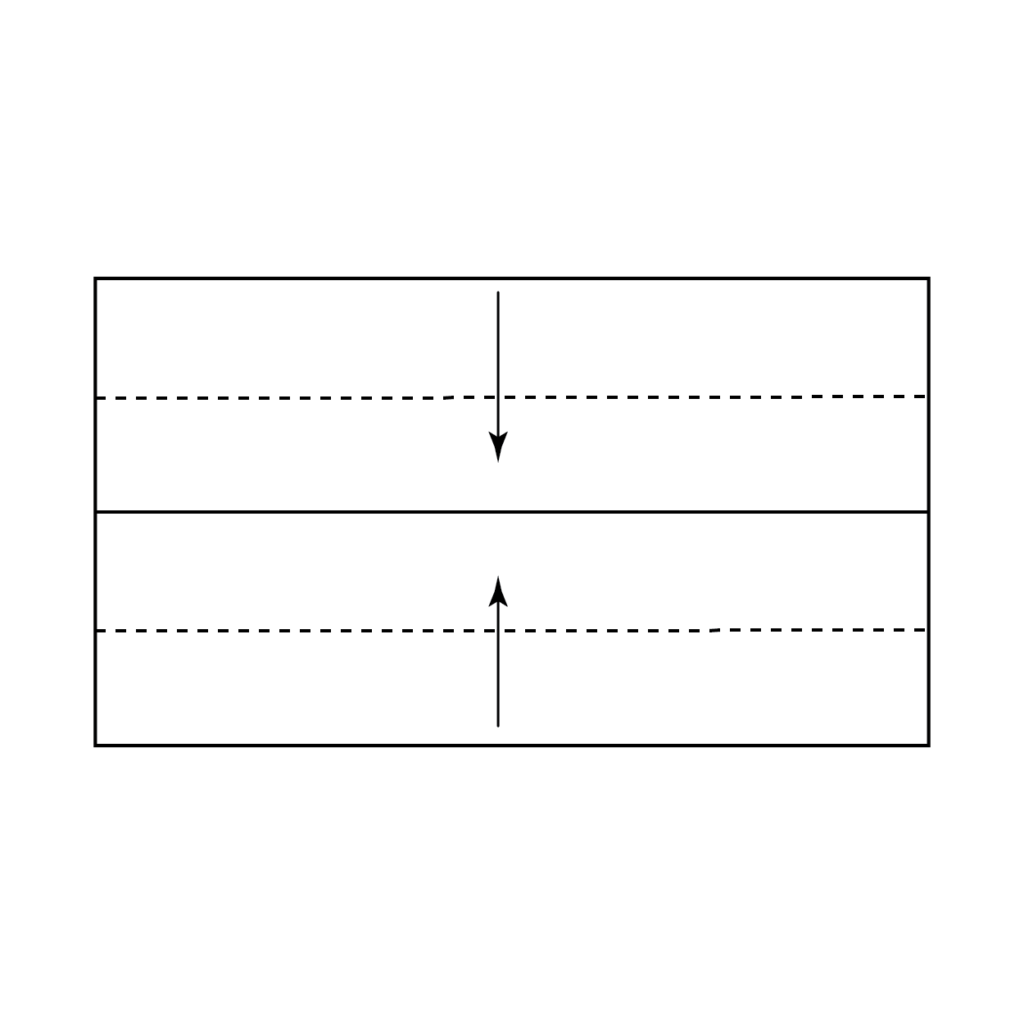
Start with a full-sized piece of printer paper. Lay it horizontally and fold both the top and bottom parts of the paper towards the middle, following the dotted lines shown in the provided image.
2. Folding Top and Bottom Halves: Move Toward the Middle
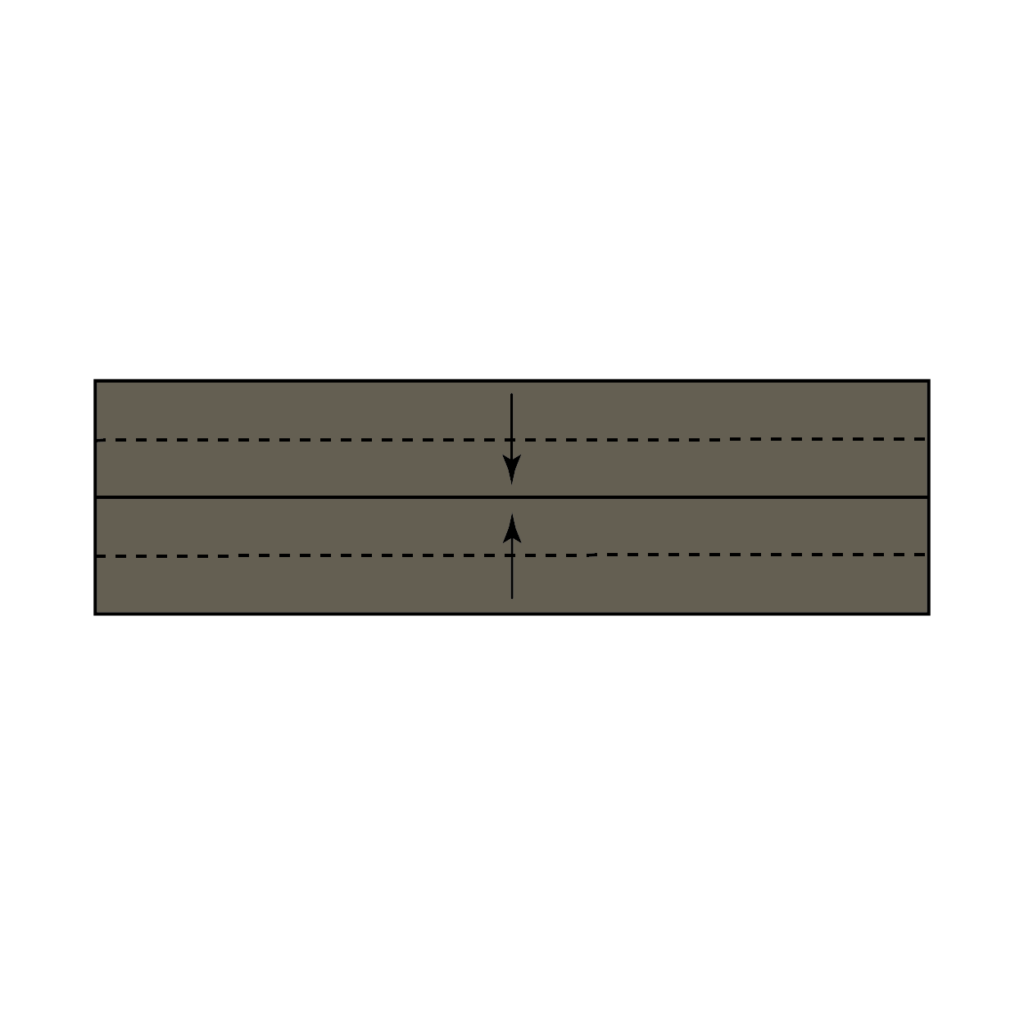
Again, take the bottom and top of the paper and fold them in half over the dotted lines, moving them towards the middle.
3. Folding the Top Half Downward: Create a New Crease
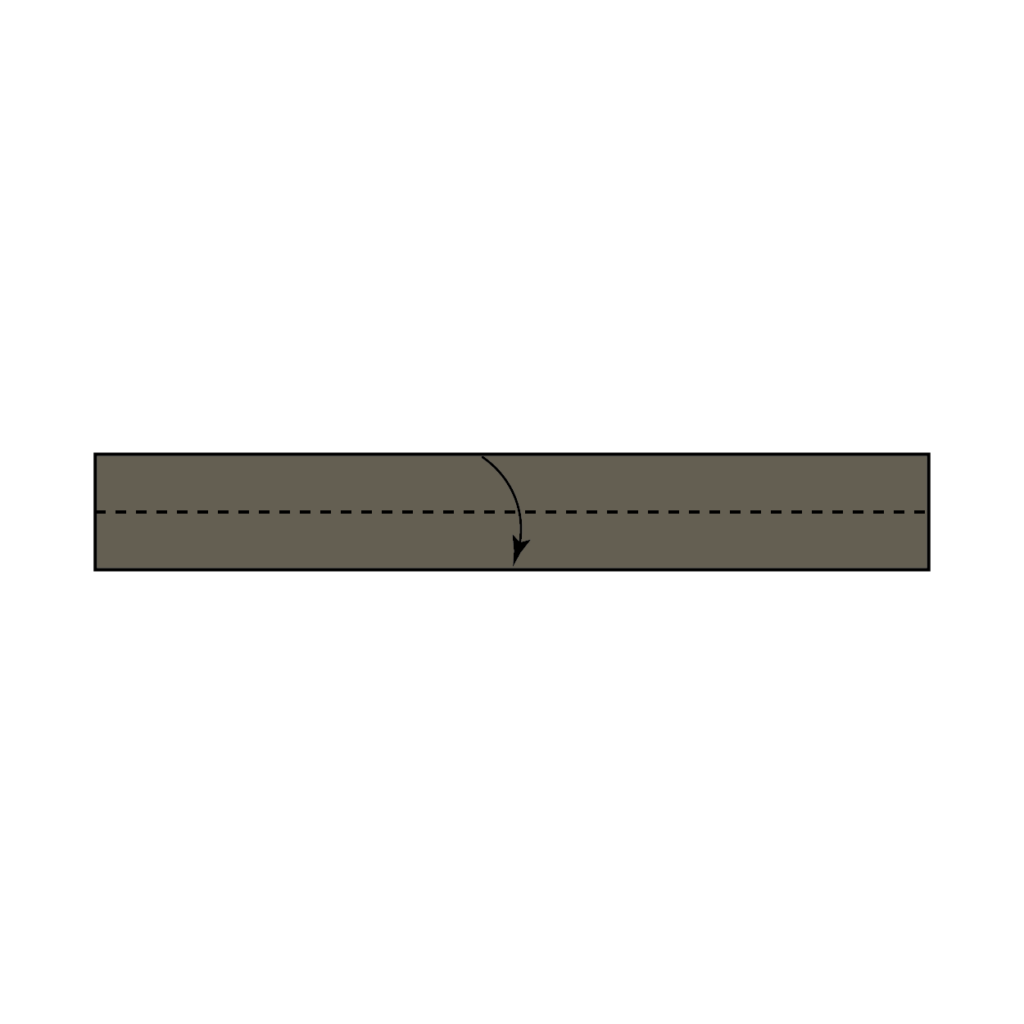
Now, fold the top half of the paper downward along the dotted line.
4. Creating a Long Strip: Fold the Paper in Half
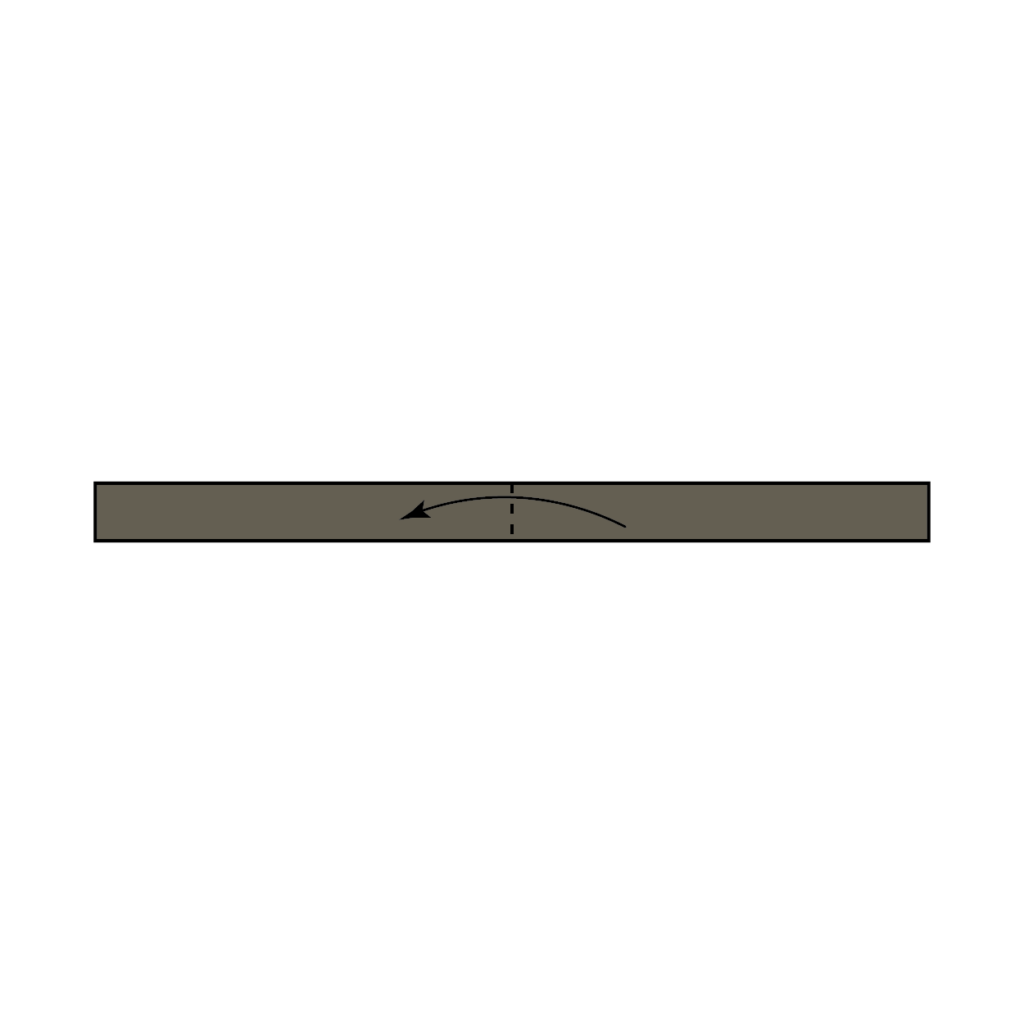
You should now have a long strip of paper. Fold this strip in half, as demonstrated in the provided image.
5. Diagonal Downward Fold: Begin Shaping the First Design
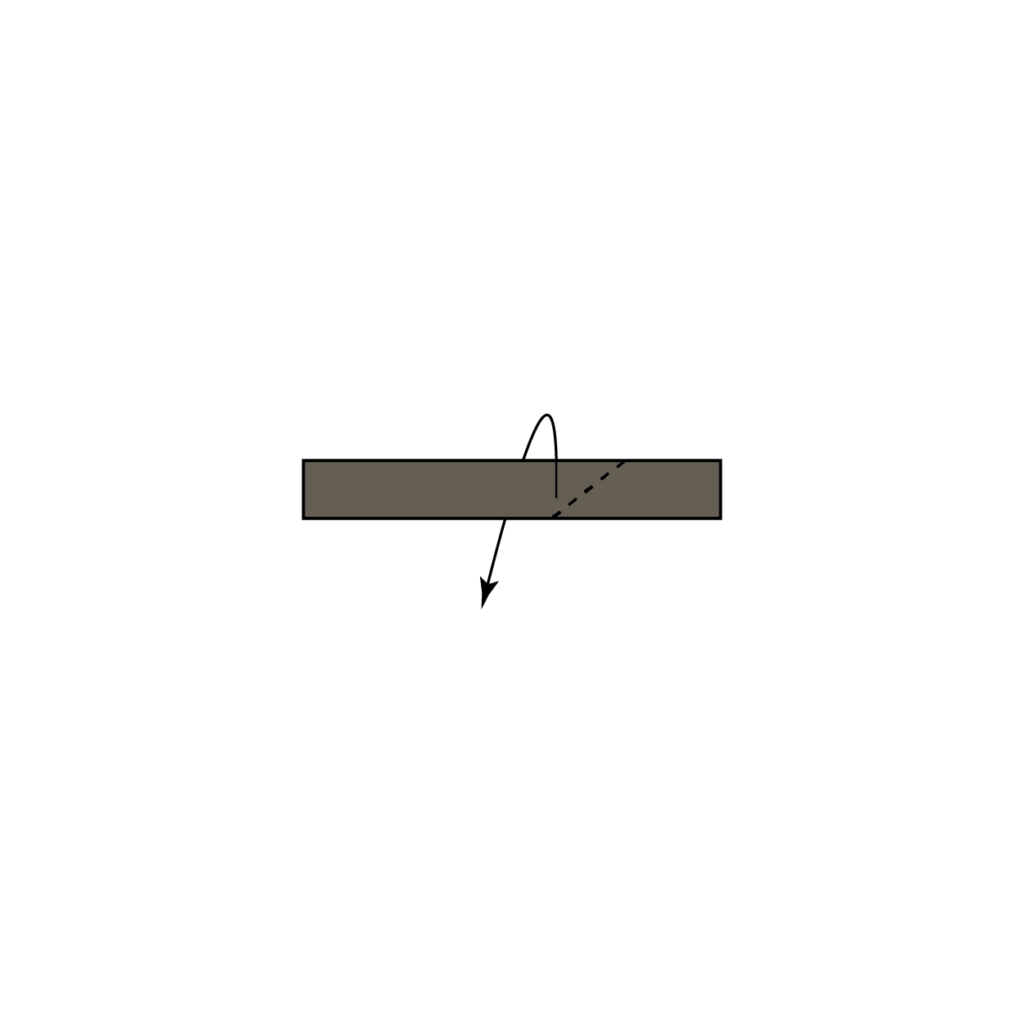
Next, fold the top flap of the paper diagonally downward and inward. Refer to the image in the next step for guidance.
6. Folding the Other Side: Mirror the Previous Fold
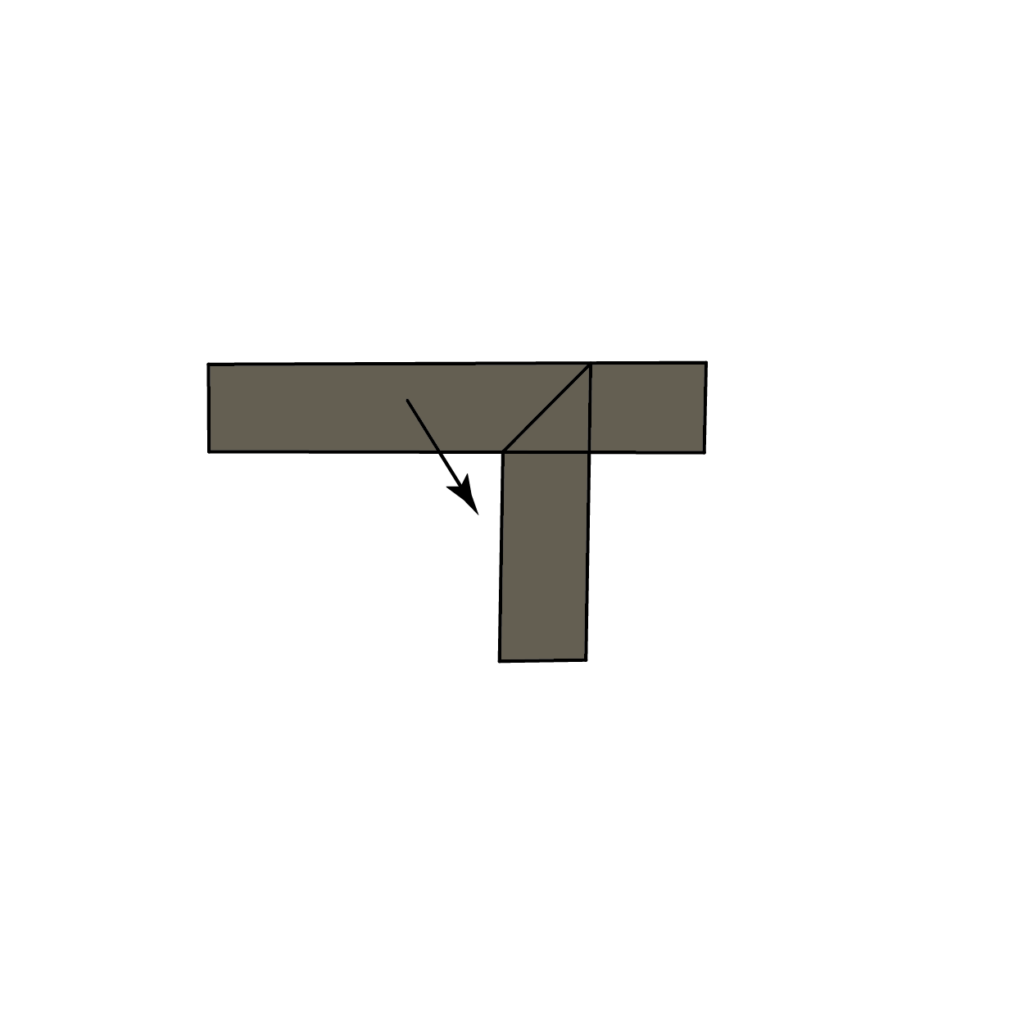
Repeat the diagonal downward fold on the other side of the paper.
7. Finished First Design: Set Aside for Later
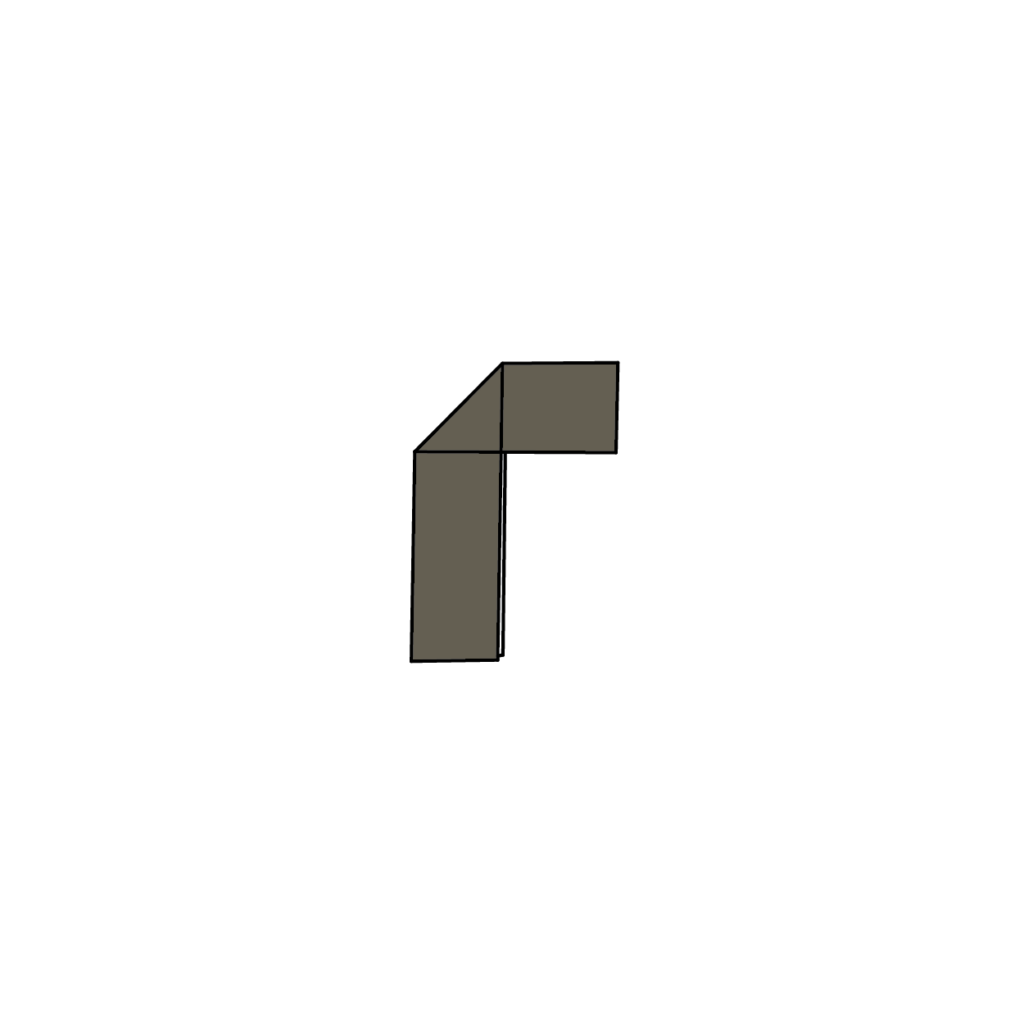
You should now have a shape resembling the provided image. Once completed, set it aside temporarily.
8. Preparing the Second Sheet: Cut Off 25% and Save the Rest
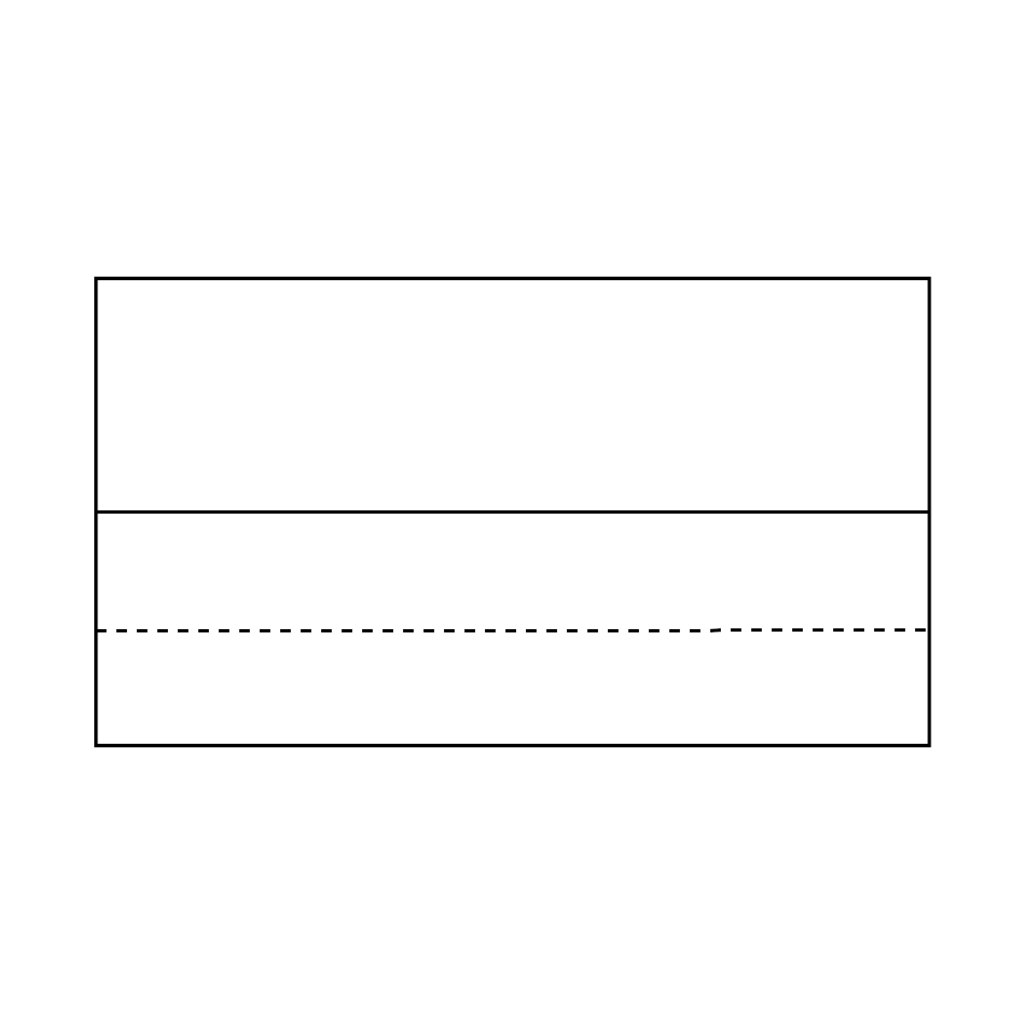
Grab another sheet of paper and cut off approximately 25% along the dotted line. Put the smaller strip aside for later use.
9. Folding the Remaining Paper: Position Vertically and Fold Top and Bottom
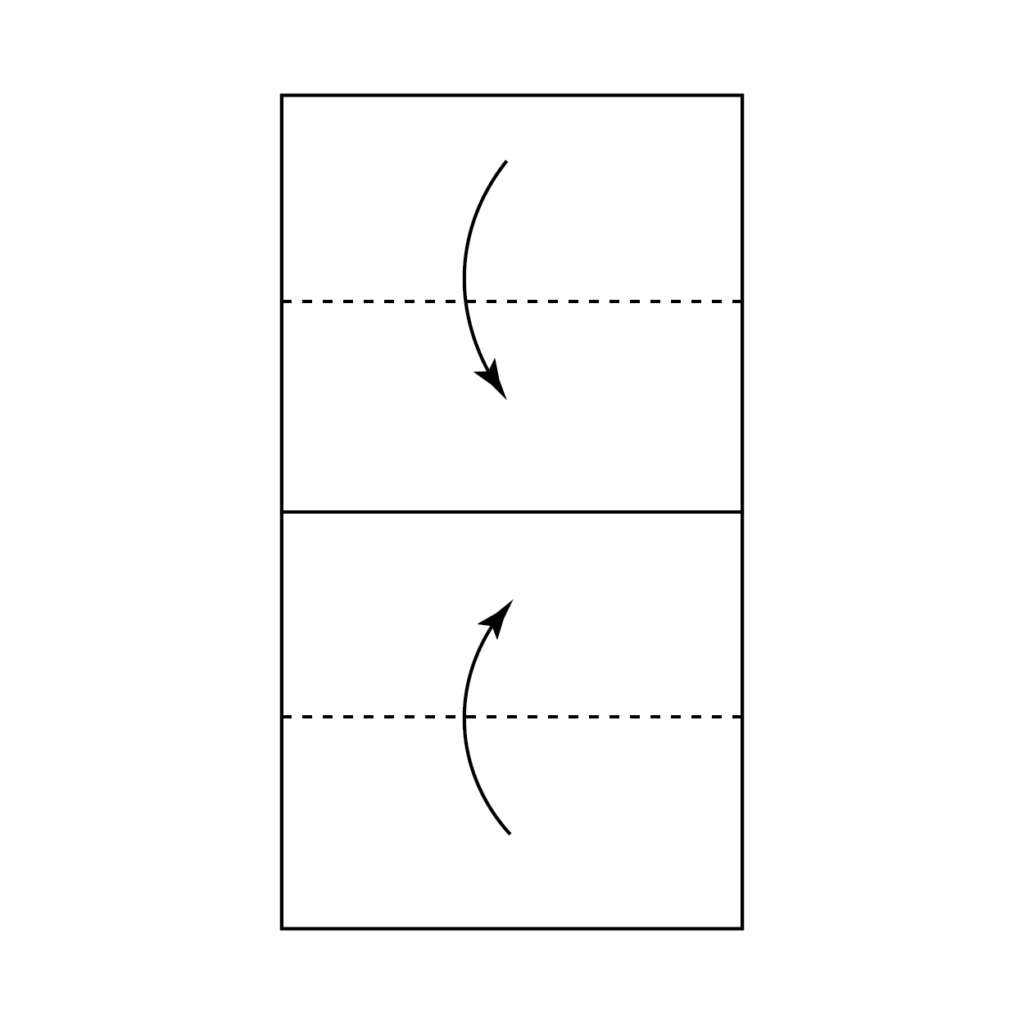
Turn the remaining paper vertically and fold the top and bottom sections over the dotted lines towards the center.
10. Repeat the Folding Process: Move Top and Bottom Edges to the Center
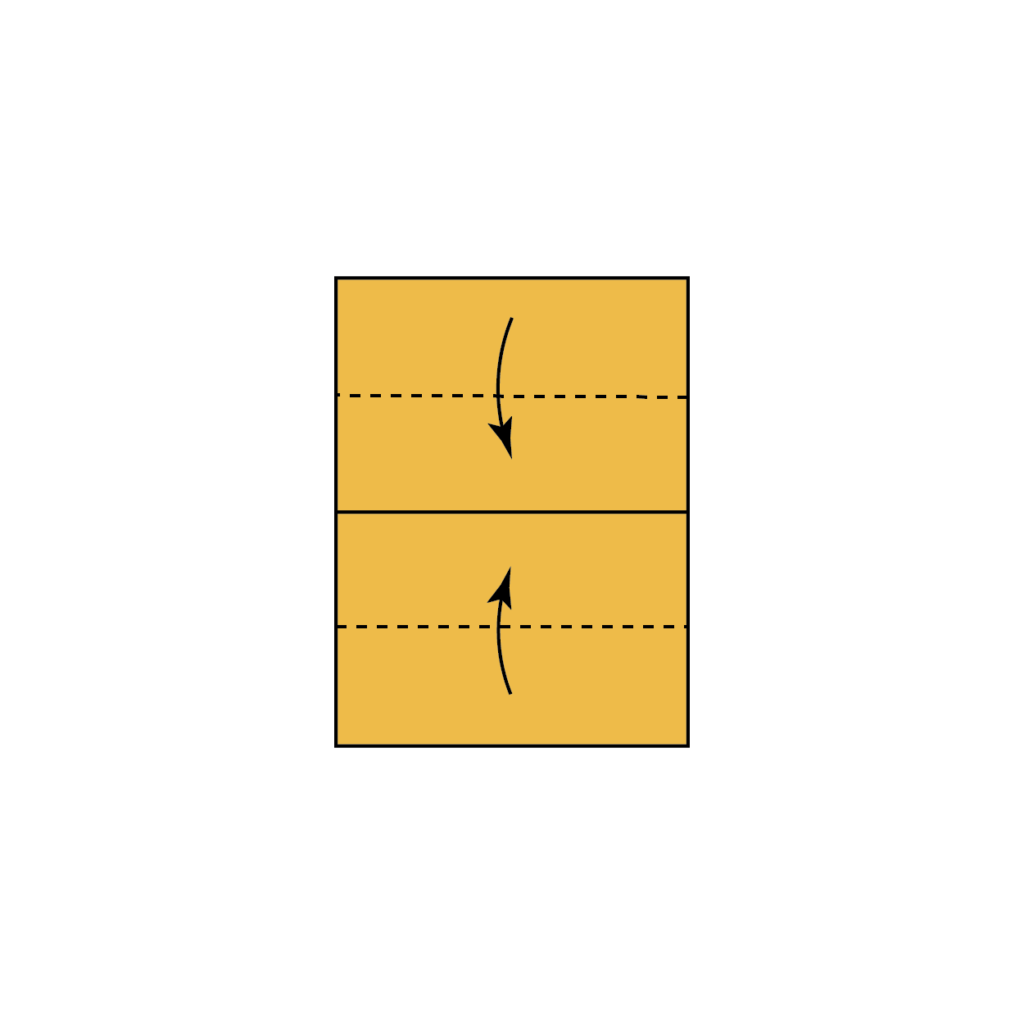
Once again, take the bottom and top edges and fold them over the dotted lines towards the center.
11. Final Fold for Second Design: Fold the Top Section Downward
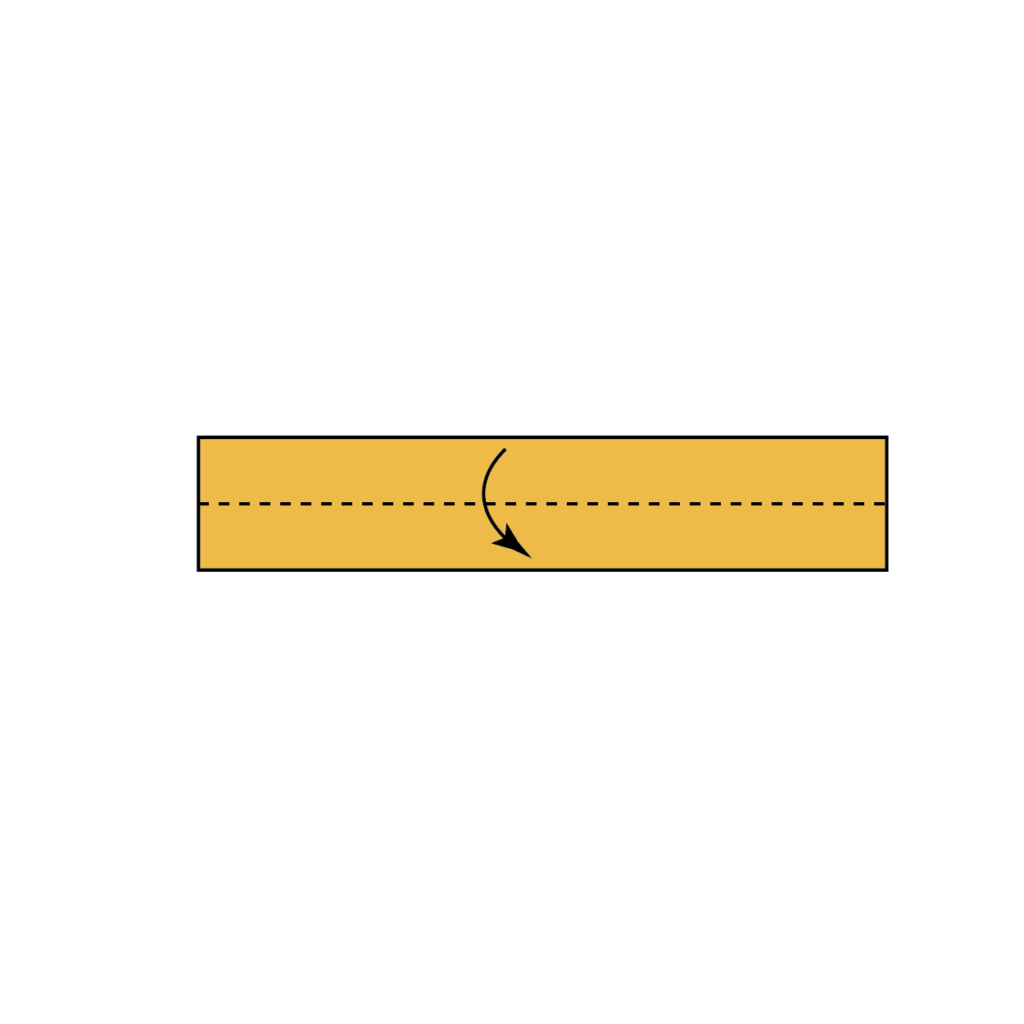
Fold the top of the paper down along the dotted line.
12. Assess the Second Design: Check for Proper Folding

This is what your second design should look like at this point.
13. Combining the Two Designs: Align and Wrap the Second Design Around the First
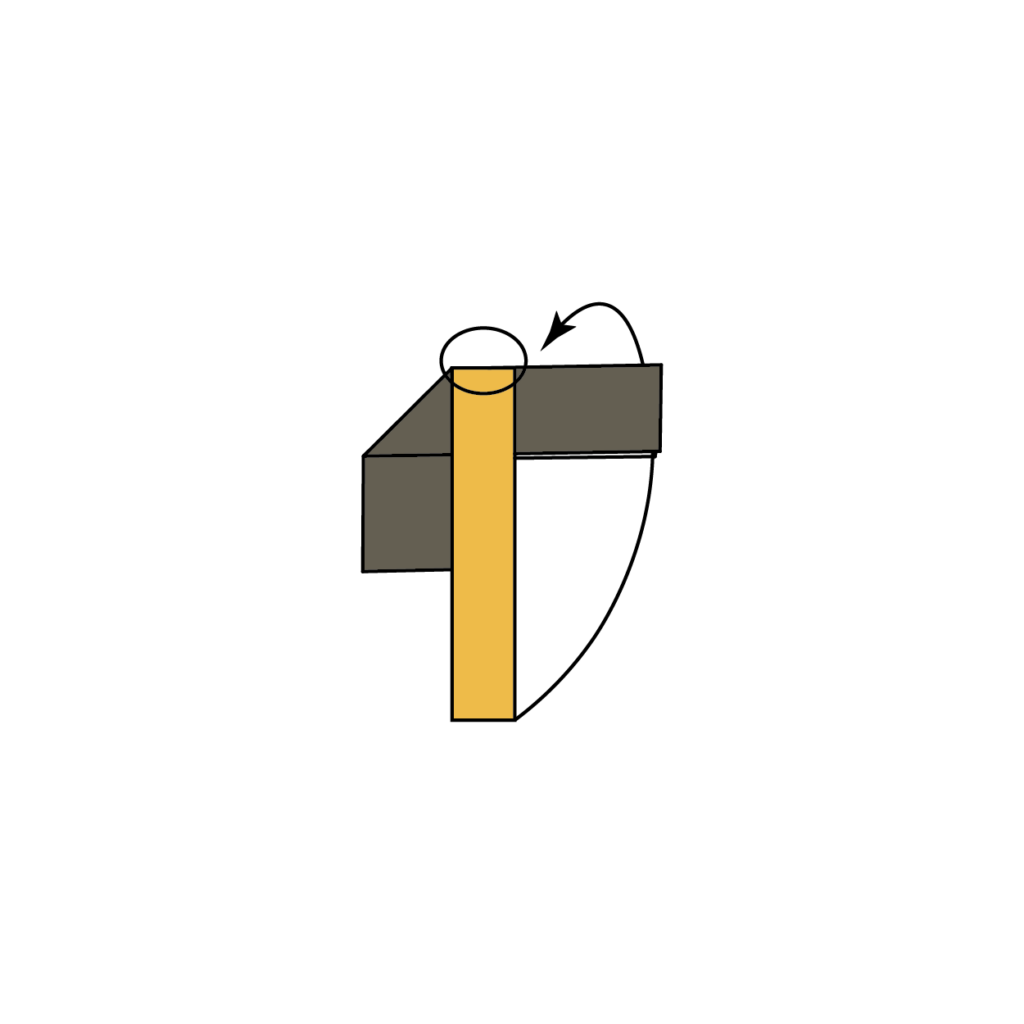
Grab the first design you made and align the new strip of paper with it, as shown in the provided image. Hold the papers together, and wrap the second design around the gun-shaped first design until you can’t wrap it anymore.
14. Securing the Designs Together: Fold the Top Flap and Tuck It In
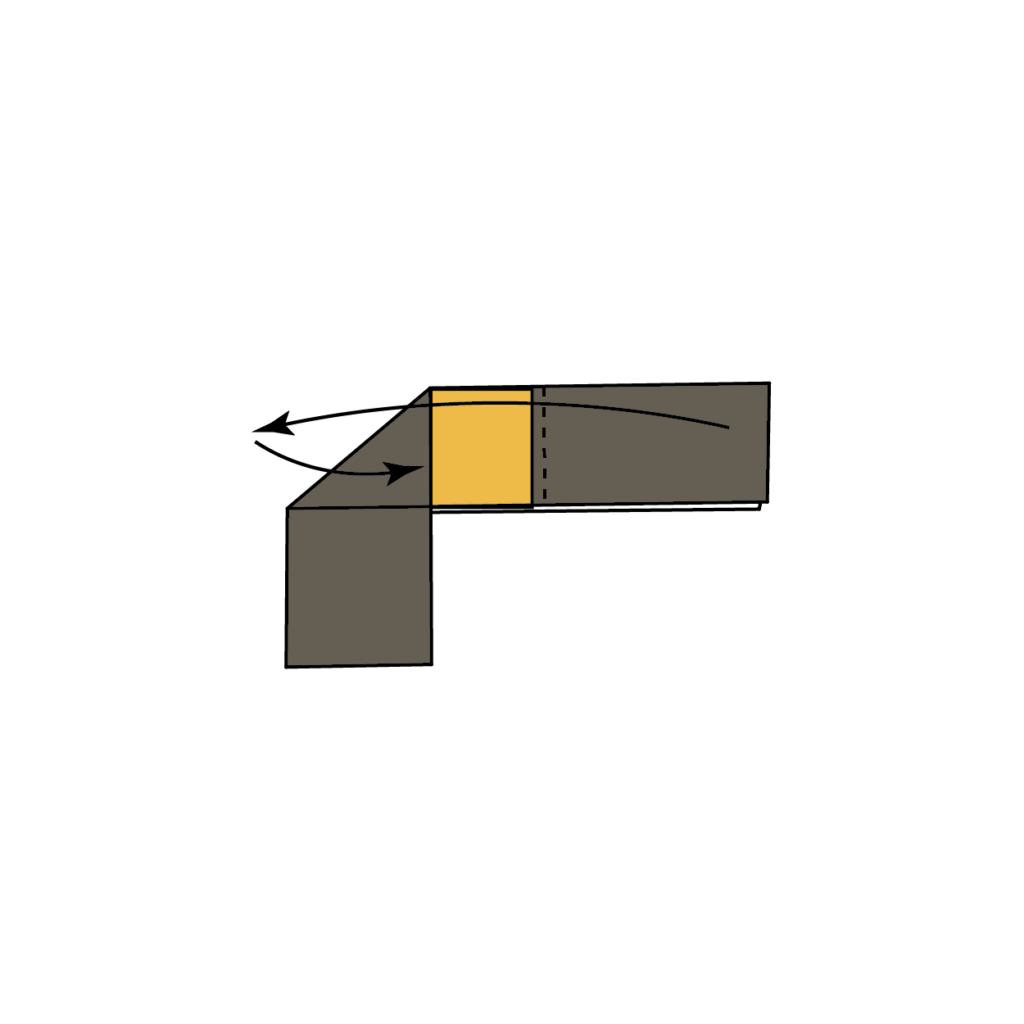
Continue to hold the designs together to prevent them from coming apart. Fold the top flap of the first design back over the dotted line and tuck it into the pocket created by wrapping the strip of paper around the first design.
15. Visual Aid: Reference the Image for Clarity
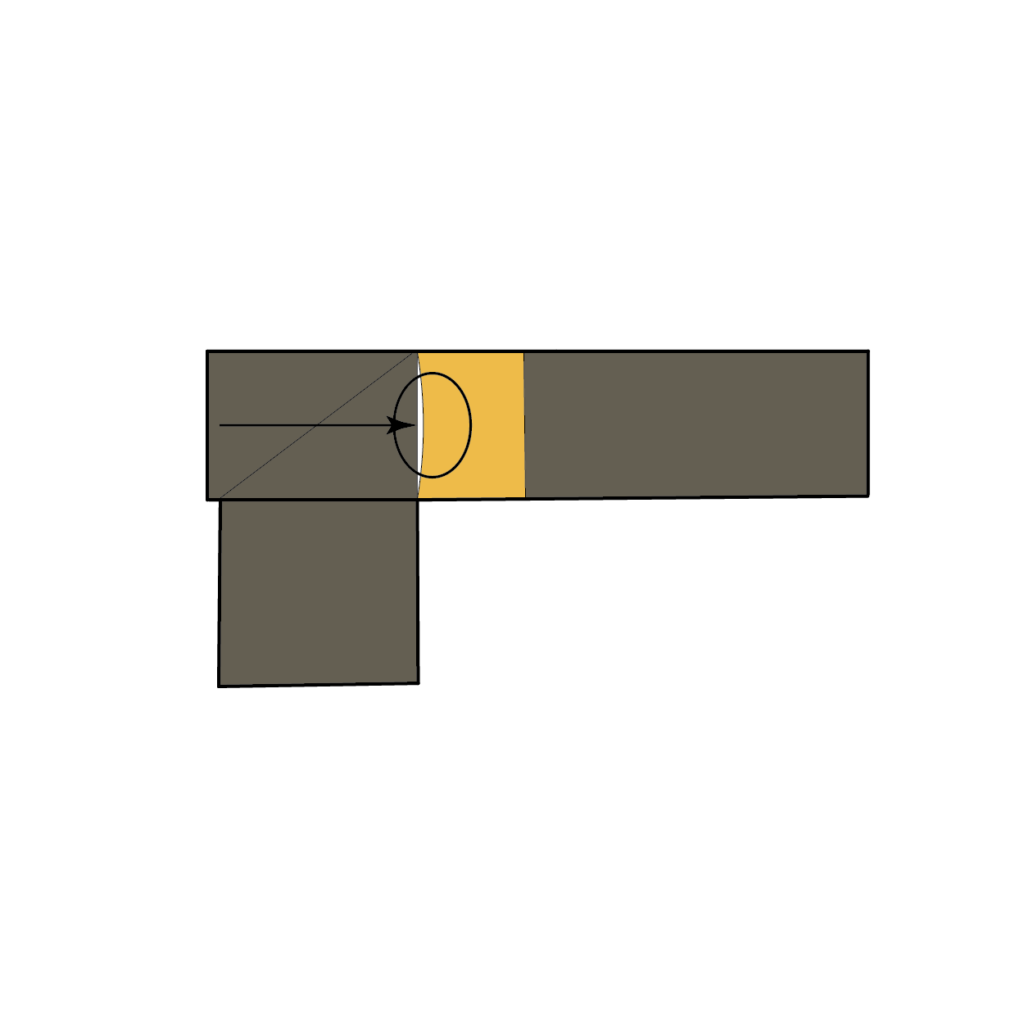
This image is to help you see what you’ll be doing. The thicker lines are what you can see and the thinner lines are what are hidden after you folded the flap back.
16. Assessing Your Progress: Hardest Part of the Paper Gun Complete
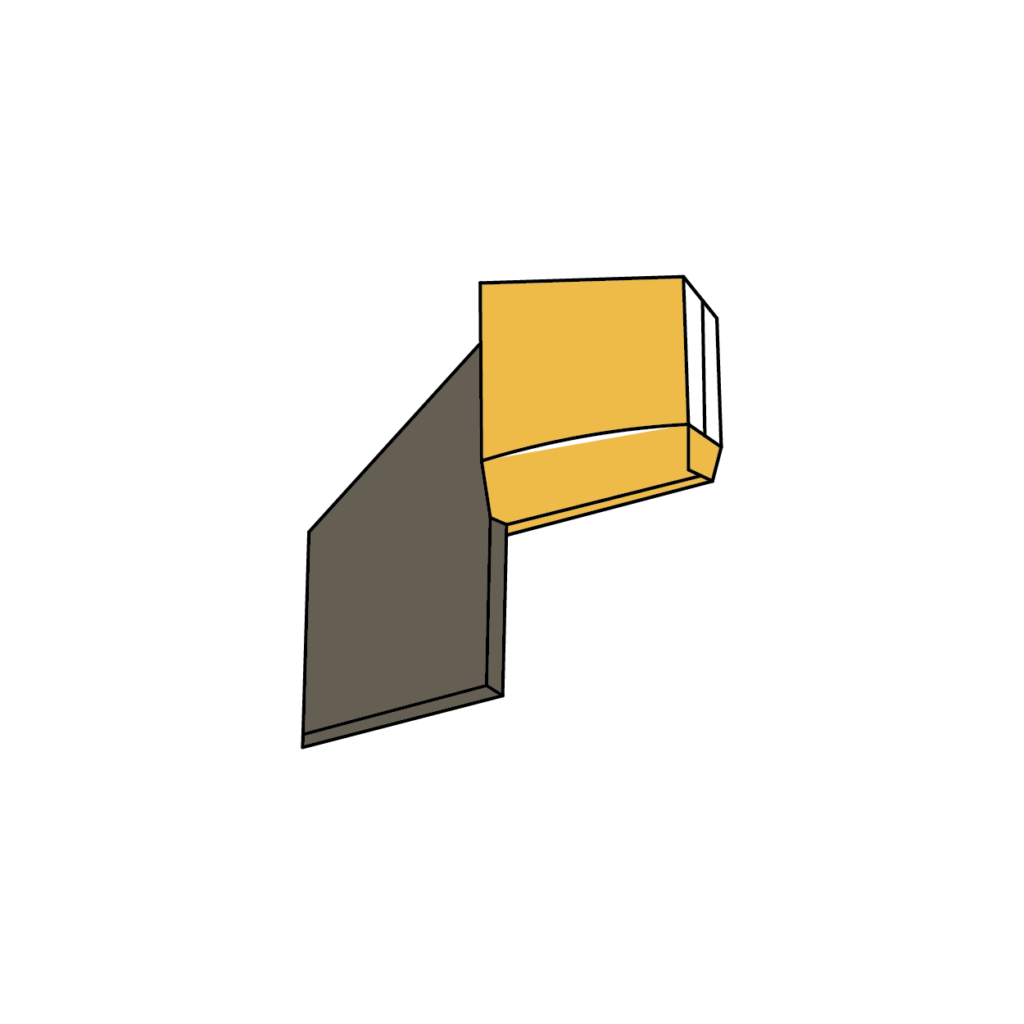
This is what your paper gun should look like at this point. The most challenging part is now complete!
17. Creating the Gun Barrels: Roll Up and Tape the Remaining Strip
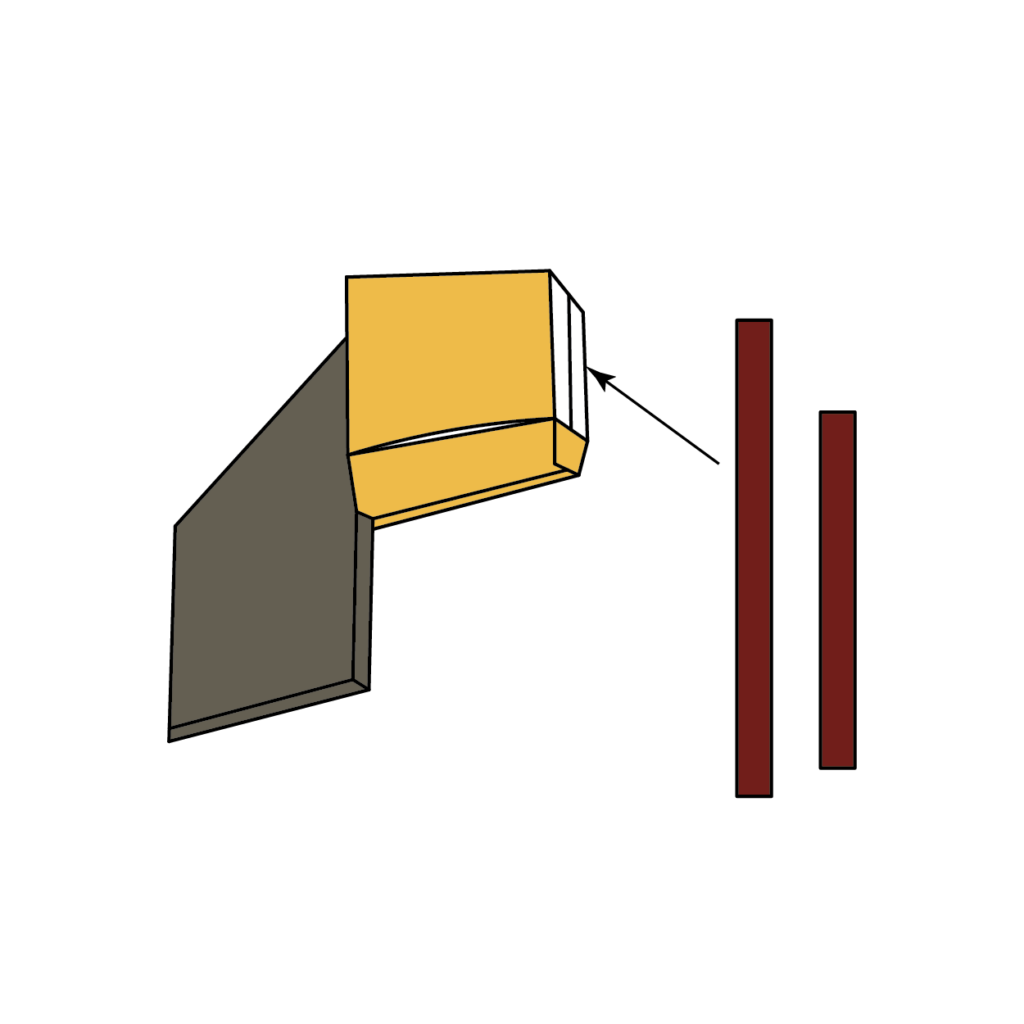
Take the remaining strip of paper you set aside earlier, roll it into a cylinder shape, and tape it together. Cut it into two pieces, one longer than the other. Fit these pieces inside the handle’s pocket of the origami gun, as shown in the provided image. Adjust the fit until you reach the desired length for your paper gun barrels.
18. Adding a Hammer: Final Touches for Your Origami Gun
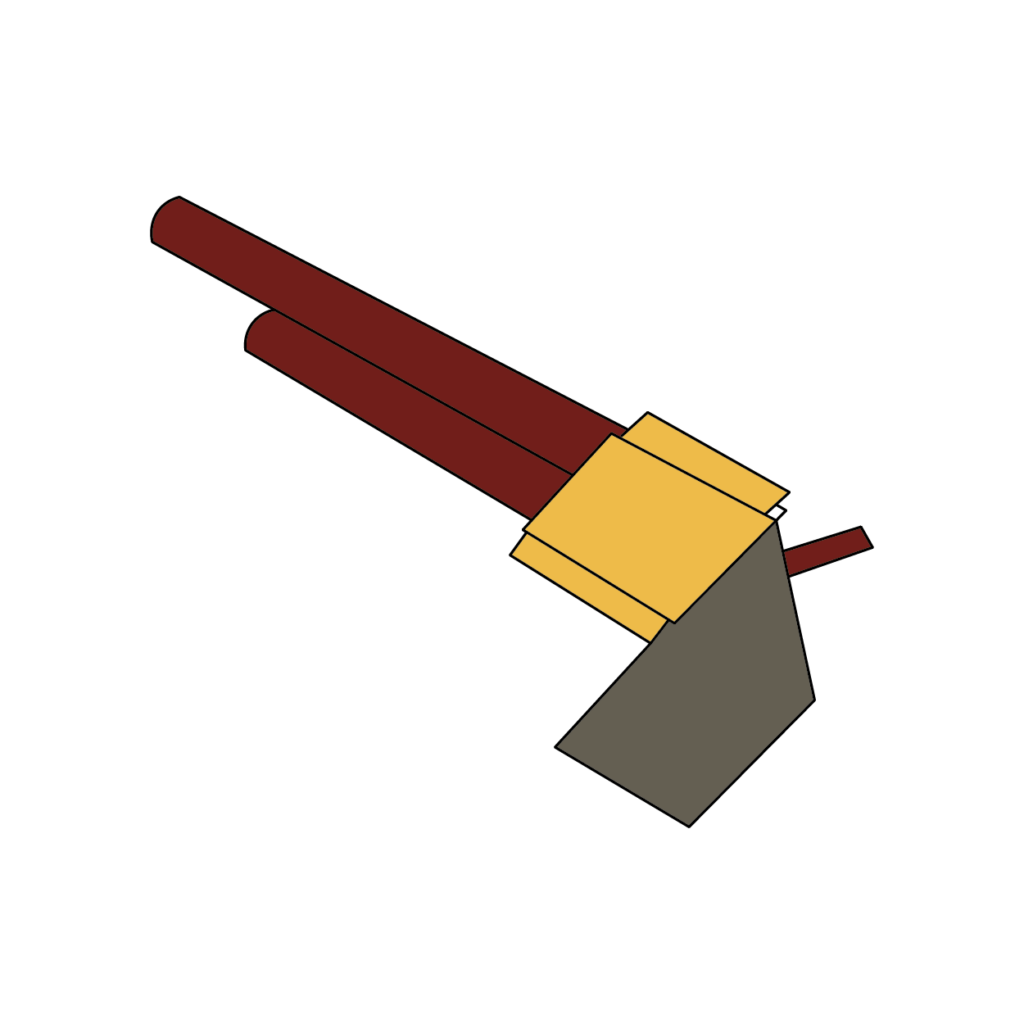
You can use another small piece of paper and fold it into a little rectangle and fit it into the gun to create a small hammer for your origami gun. After all that this is what your final paper gun should look like!
There you have it! You should be an expert at making this origami gun design now! You’ve had video and illustrated instructions to follow along too. For the best result, I recommend making this design a few times until you perfect it.
Plus, you’ll have multiple origami guns laying around if you decide to go that route. The more the better! Down below you’ll find the same instructions as above but in a downloadable and printable format for future reference!
How To Make An Origami Gun Printable Instructions
That’s it! You now know how to make an origami gun! Just follow the simple steps outlined above and you’ll be able to make your own origami gun in no time. Have fun and be creative with it.
There’s no limit to what you can do with origami. So get out there and start folding! If you’re done with this design, go ahead and check out my other origami weapon designs as well!
