Have you ever wanted to learn how to make an origami heart? It’s a really fun and easy project, and in this guide, I’ll show you how to do it.
You’ll need some basic origami skills, but if you can follow along with the steps I’ve outlined here, you’ll be able to create a beautiful origami heart in no time. So let’s get started!
How To Make An Origami Heart Video Walkthrough
There you have it! This video should have made it more than easy enough for you to complete your first origami heart! As always feel free to get as creative as you want with this project. You can use any color paper you want and you can even decorate your creation to your heart’s content! Just have fun with it!
Now, if you prefer to learn a different way than with a video, don’t worry, I’ve got you covered. Down below you’ll find an easy illustrated guide you can follow to make this simple origami heart.
If you enjoyed this design make sure to check out all my other Origami Shapes!
How To Make An Origami Heart: Step-By-Step Instructions
1. Creating the Initial Creases on the Square Paper
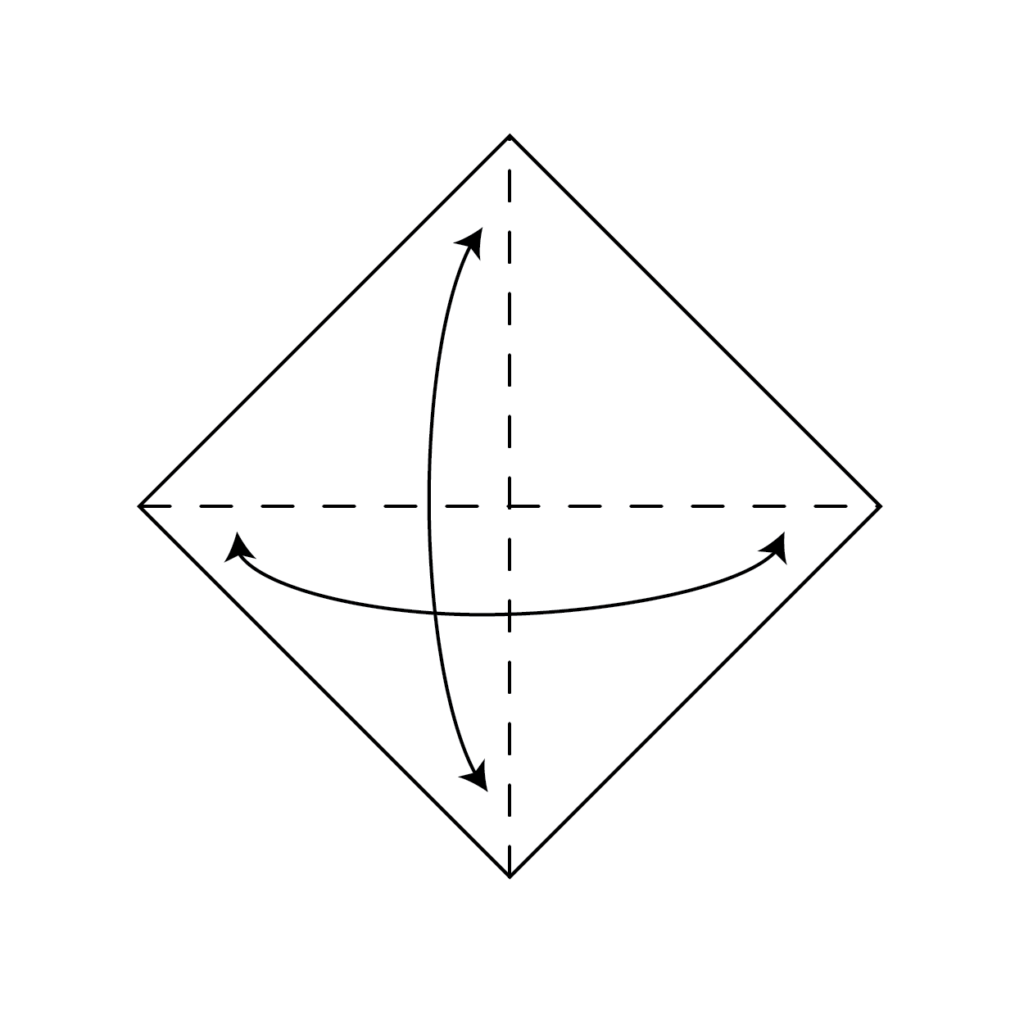
Start with a square piece of paper and place it in front of you so that when you look down at it, it looks like a diamond. Now, fold the right corner to the left corner and then unfold. Then fold the top corner down to the bottom corner and then unfold. Use the above image as a reference.
2. Folding the Top Corner Downward
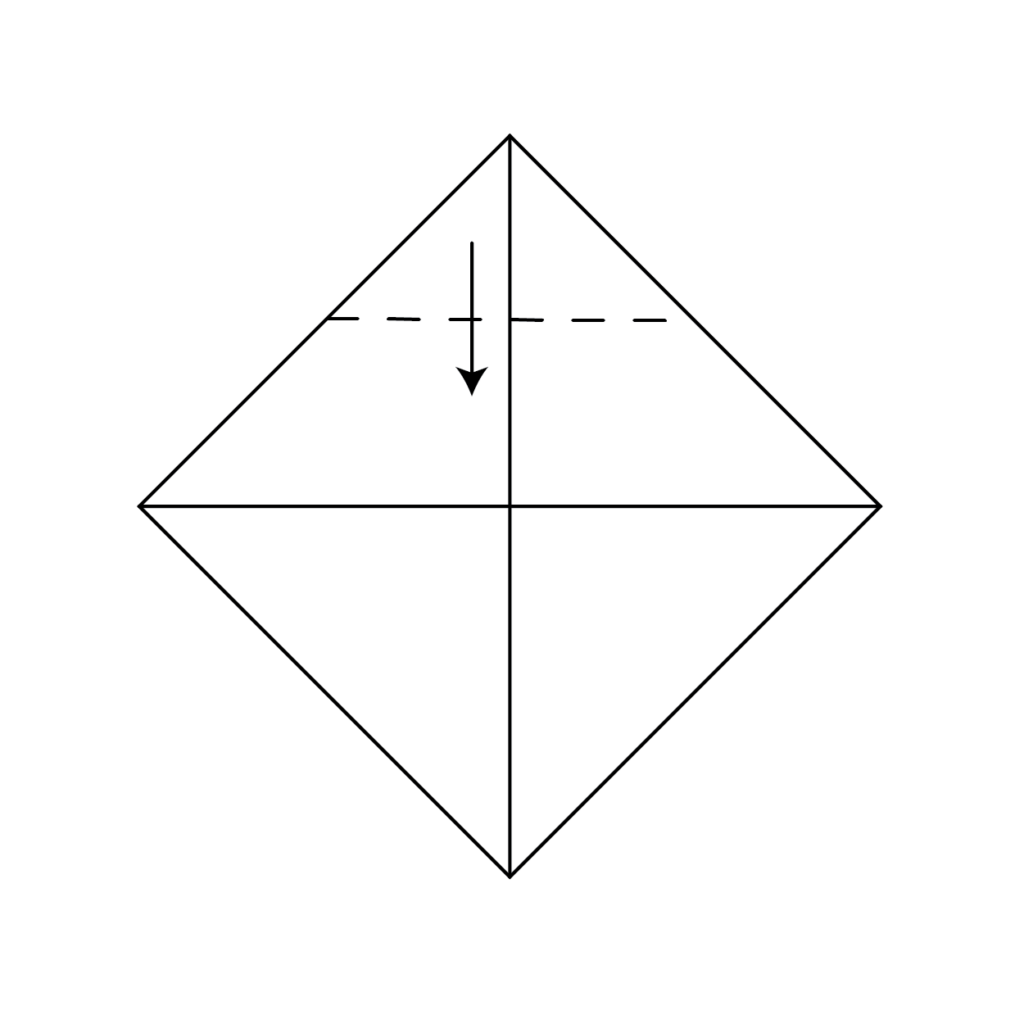
Once you have those creases made, you’ll take the top corner of the paper and fold it down to meet the center crease as the image above depicts.
3. Folding the Bottom Corner Upward
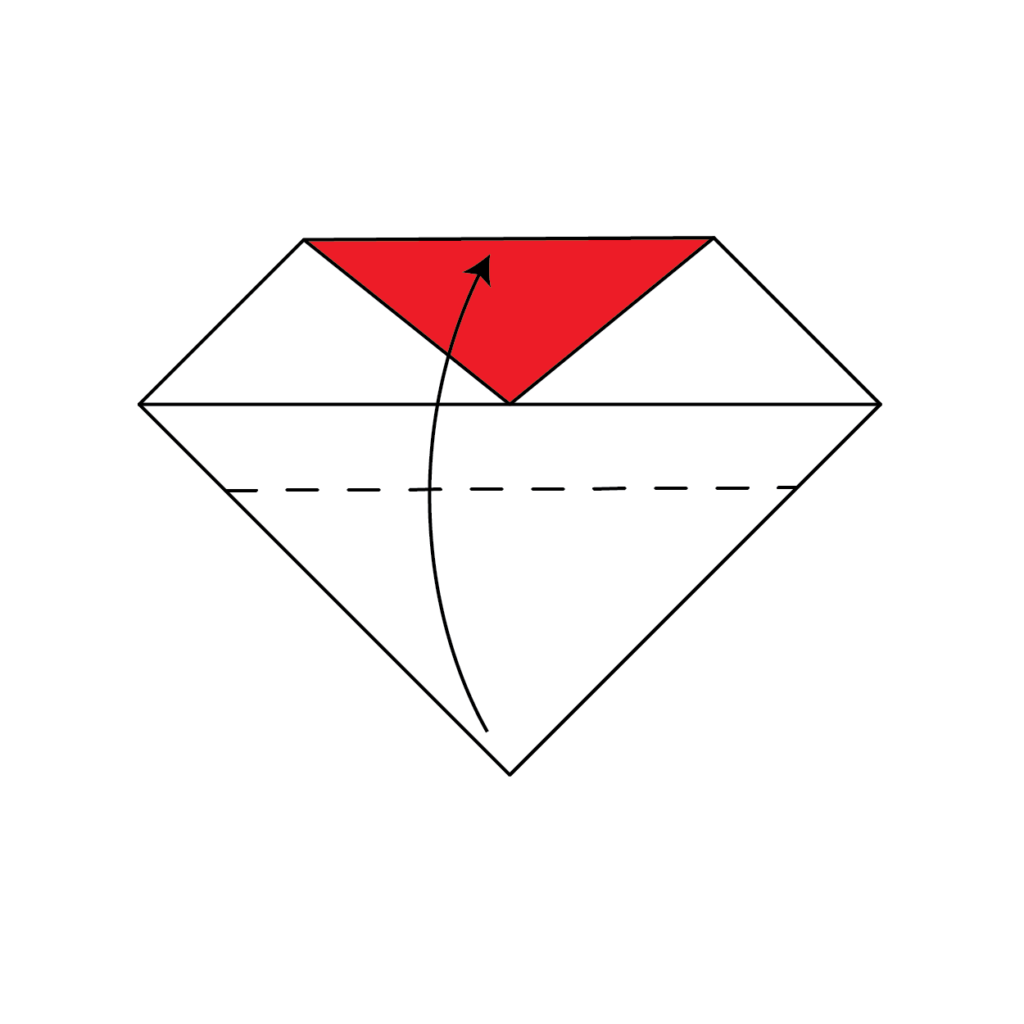
Now, you will take the bottom corner and fold it upwards to meet the top edge of the paper as the image shows.
4. Folding the Left and Right Bottom Edges Diagonally

Take the left and the right bottom edges and fold them diagonally up towards the center and line them up with each other as shown in the above picture.
5. Rounding the Heart’s Edges

As you can see, the heart shape is starting to form and you are nearly finished. Now we’ll be giving the heart a more rounded shape so that it’s not so pointy on all the edges. To do that you must fold back all the corner points except for the bottom-most point. It should be around half an inch that you are folding back. This will round out the edges of the heart. Use the image above as a good reference.
6. Admiring the Completed Origami Heart

Congratulations! Your origami heart is now complete. Enjoy your beautifully crafted creation!
There you go! If you enjoy instructions more than videos I hope that these were simple and easy to follow! As you can see it’s quite easy and short with only 6 steps to follow!
You should be a pro now with both a video and drawn-out instructions you can use. Below you’ll find the same instructions but in one large downloadable and printable graphic!
How To Make An Origami Heart Printable Instructions
I hope you enjoyed this beginner’s guide to origami hearts. Be sure to check out my other origami creations and continue learning the art of origami.
It’s a challenging but rewarding activity that can keep you busy for hours on end. And who knows? You may just come up with your own unique designs in the process. Thanks for following along – I hope you enjoy this beginner’s guide to origami hearts.
