Origami cranes are a classic symbol of luck and good fortune. They’re also really fun to make! In this step-by-step guide, I will show you how to fold an origami crane.
It’s a challenging but rewarding project, and once you’ve mastered it, you can make them in all sorts of colors and sizes. Let’s get started!
How To Fold An Origami Crane Video Walkthrough
There you go! That video tutorial should make it more than easy enough for you to fold an origami crane! You can use whatever colored paper you want and you can make your origami crane unique to you! You can also draw on it and be as creative as you would like to be!
Now, if you aren’t a fan of video instructions I have also put together a step-by-step graphic guide on how to fold an origami crane. Just keep scrolling if you would prefer to learn how to fold this creation that way instead!
- If you enjoy this design check out all my other Origami Animals!
How To Fold An Origami Crane Step-By-Step Instructions
1. Folding the Paper into a Triangle
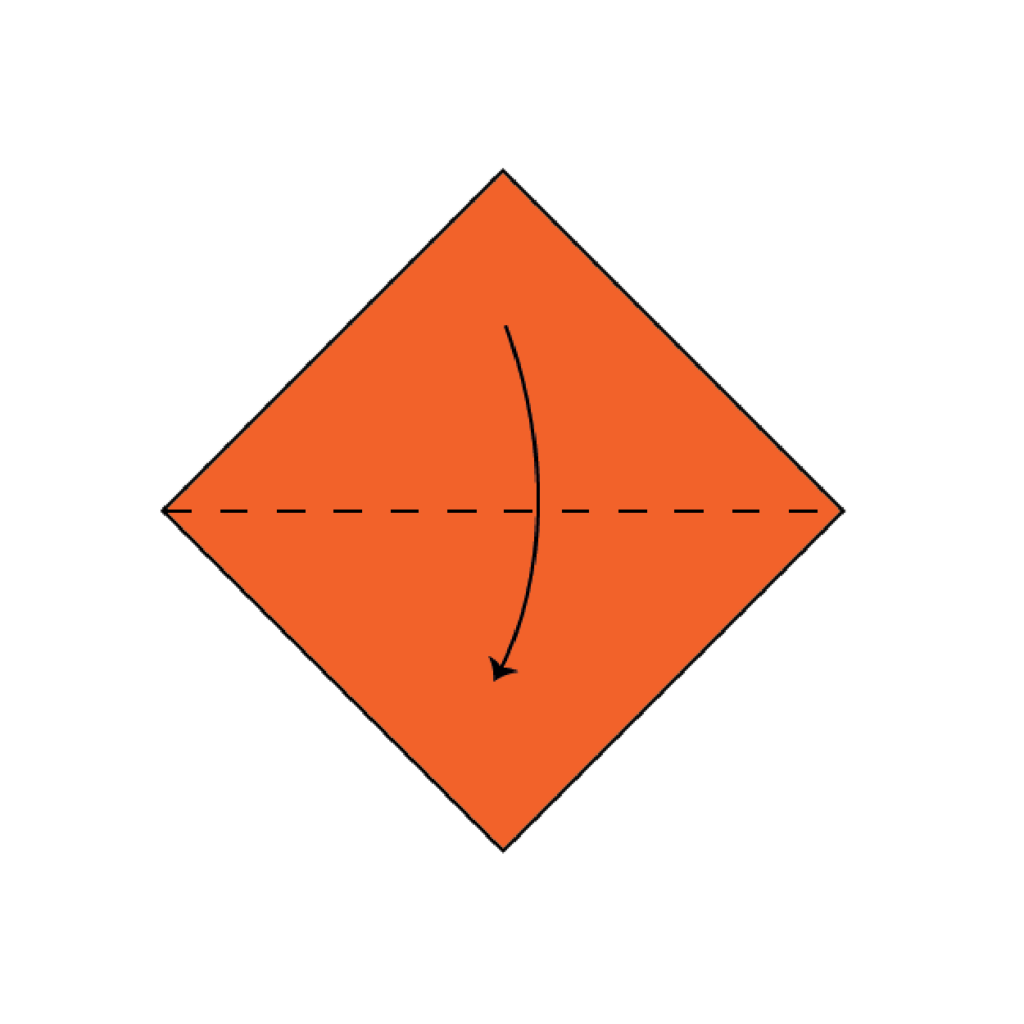
Start with a square piece of paper and fold the top corner down to meet the bottom corner, creating a horizontal fold. This will result in a triangular shape.
2. Folding the Triangle in Half
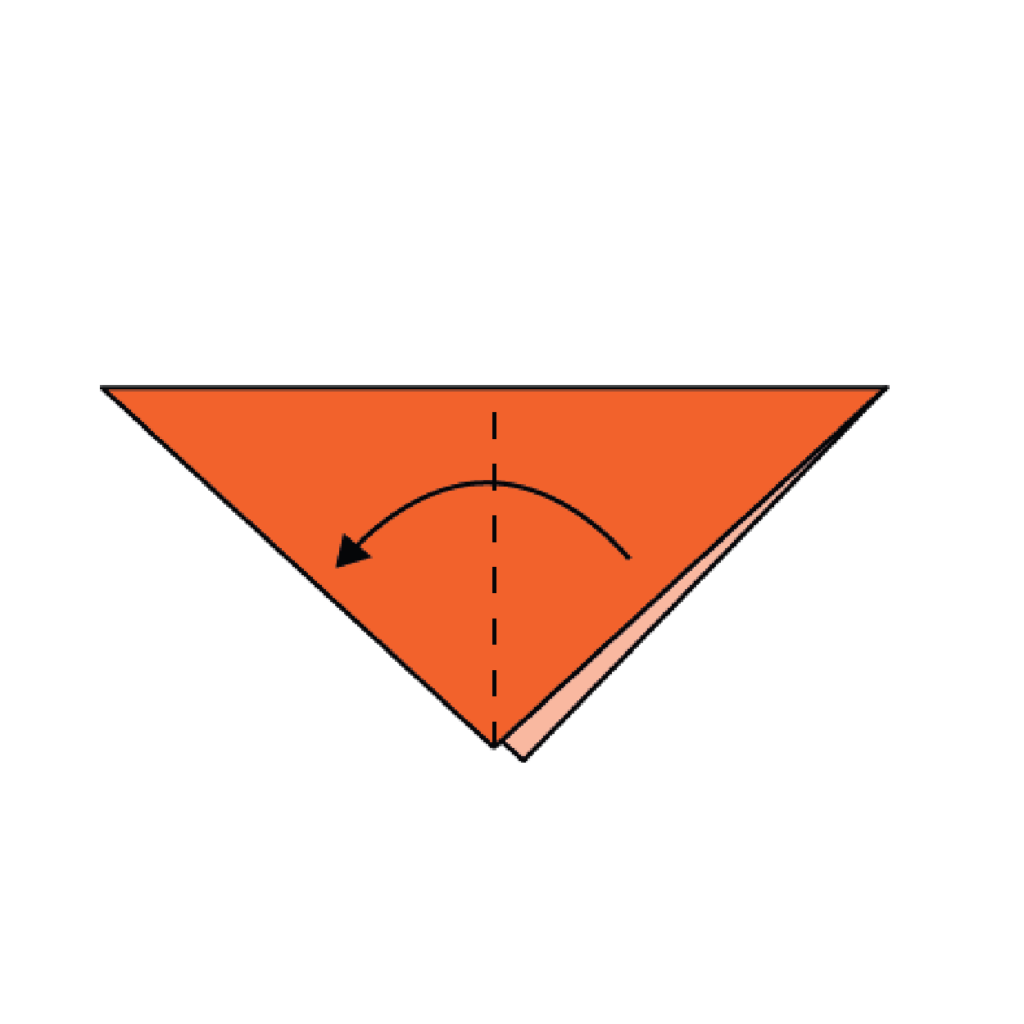
Now, take the paper and take the right corner and fold it in half over to the left corner. Use the dotted line above as a reference.
3. Creating a Small Square (Right Side)
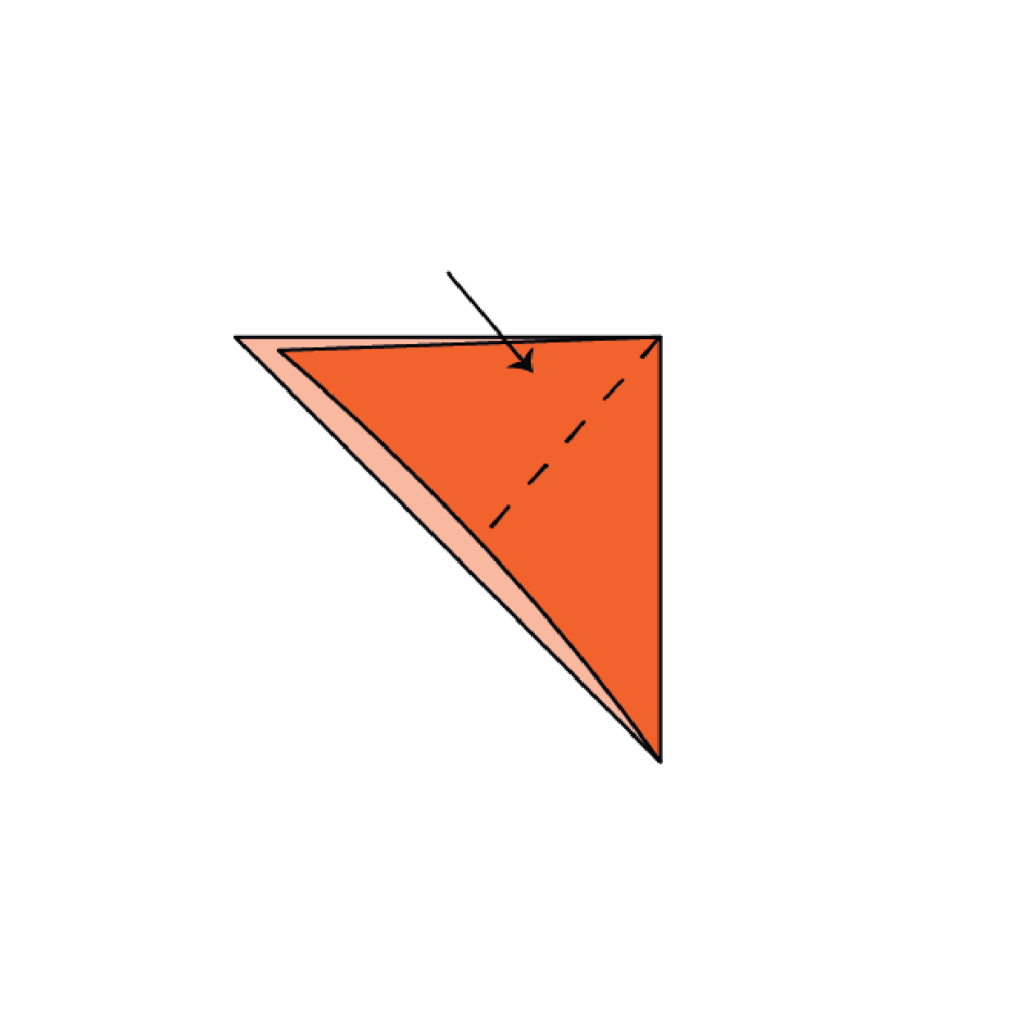
Spread the pocket from the top layer of the paper from the inside and fold it down to form a small square.
4. Completing the Small Square (Left Side)

Your paper should look like this, repeat step 3 on the left side and fold it over now.
5. Folding the Corners to the Center Line
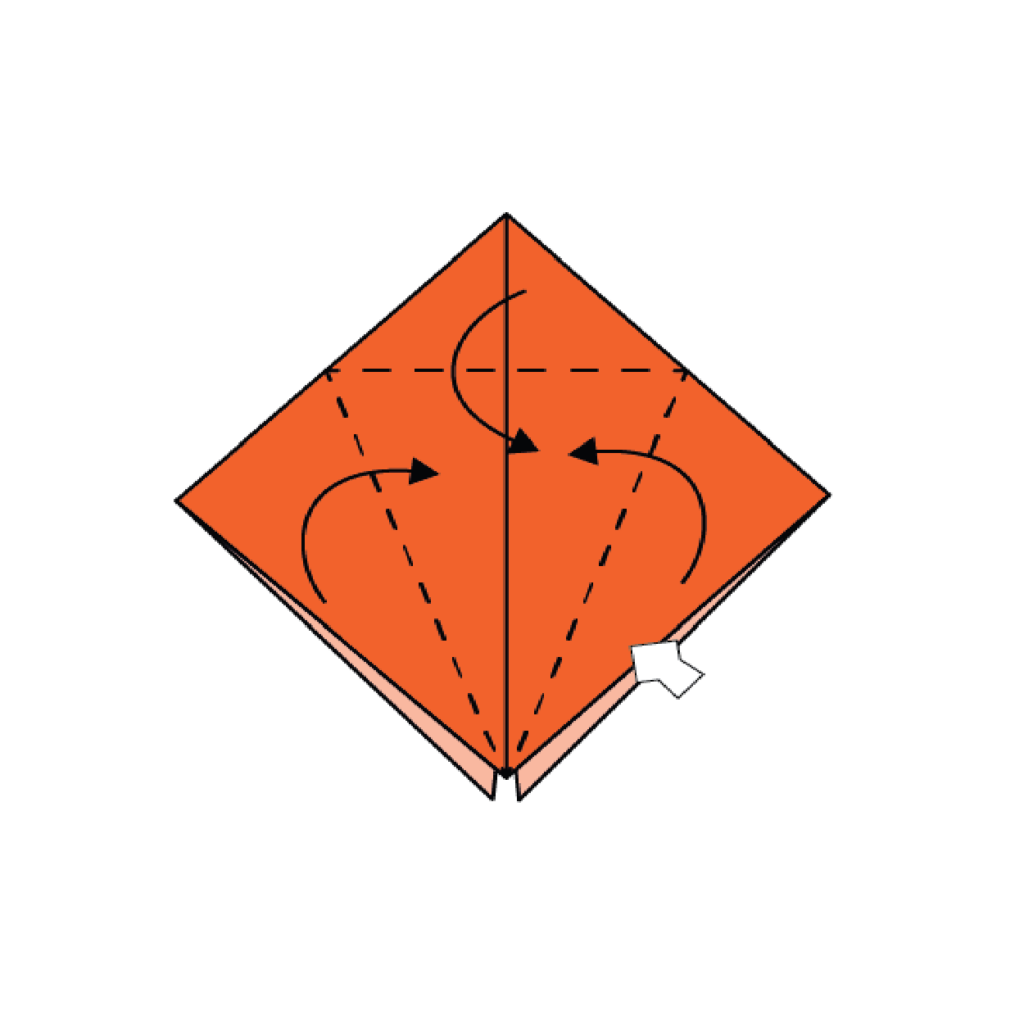
Fold the left and right corners to the center line as well as the top corner down over the dotted line. Use the Image above as a reference.
6. Checking the Folded Shape

If you’ve done it right, your paper should now look like this.
7. Opening the Pocket and Inverting Creases
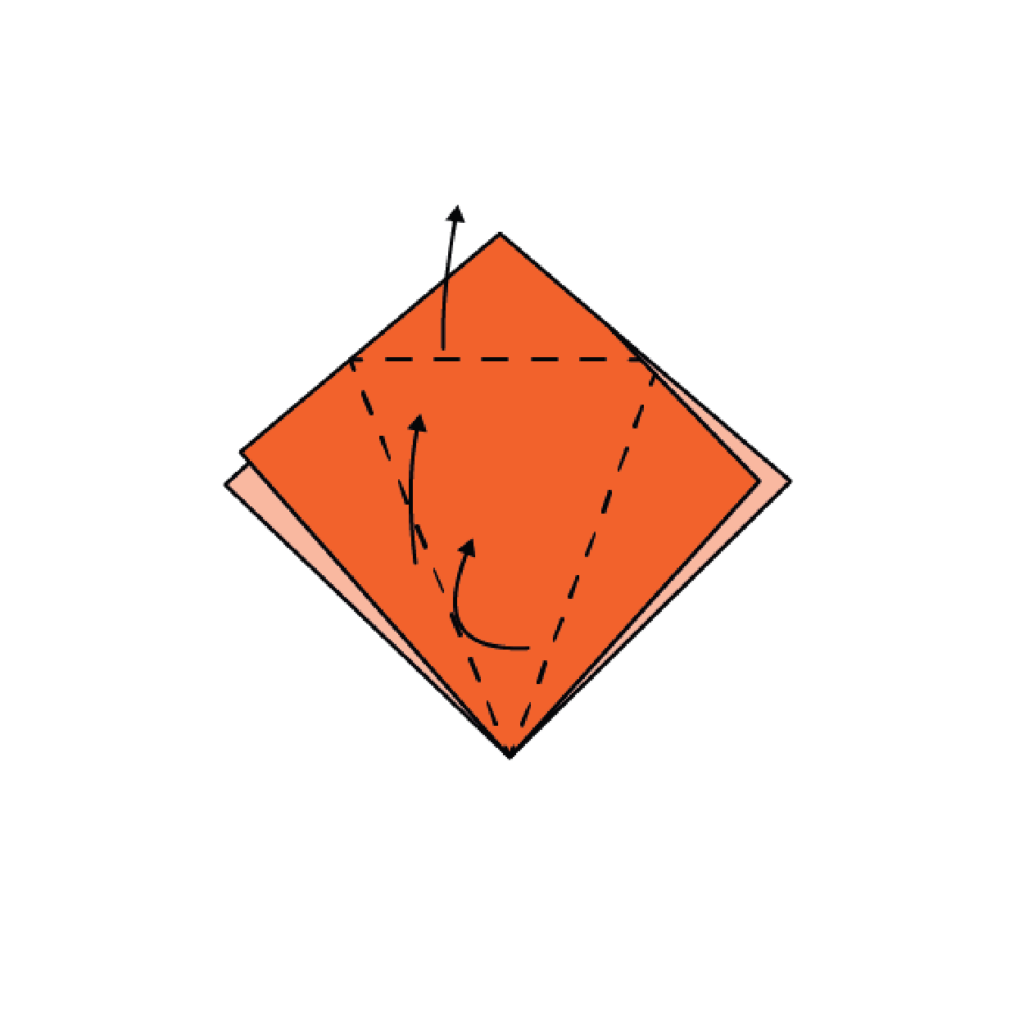
Open the pocket by taking the bottom corner, pulling it up, and folding it inwards along the crease. Some creases will become inverted.
8. Flattening the Shape and Turning Over
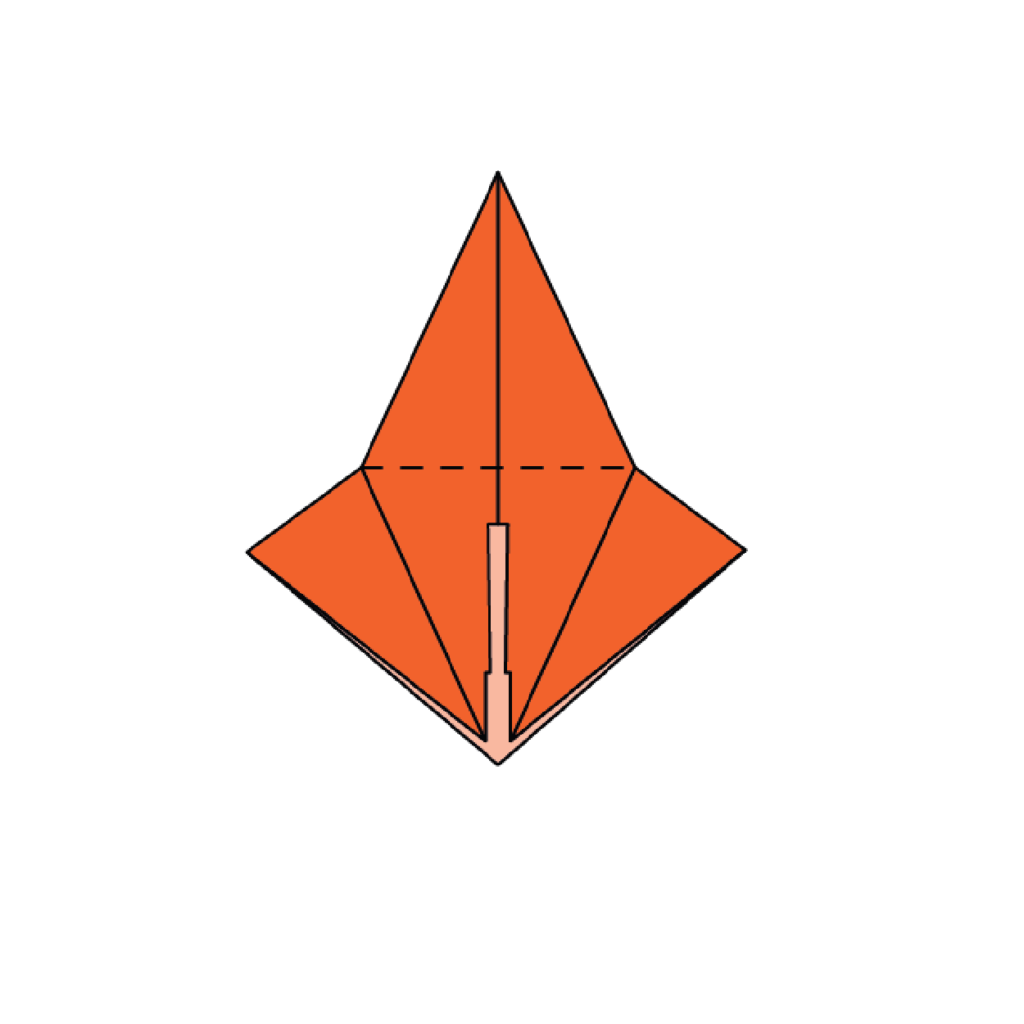
You should have a figure like this. Flatten all the lines for a cleaner look. Turn it over and repeat steps 5, 6, and 7 to arrive at the next shape.
9. Finishing the Double-sided Shape
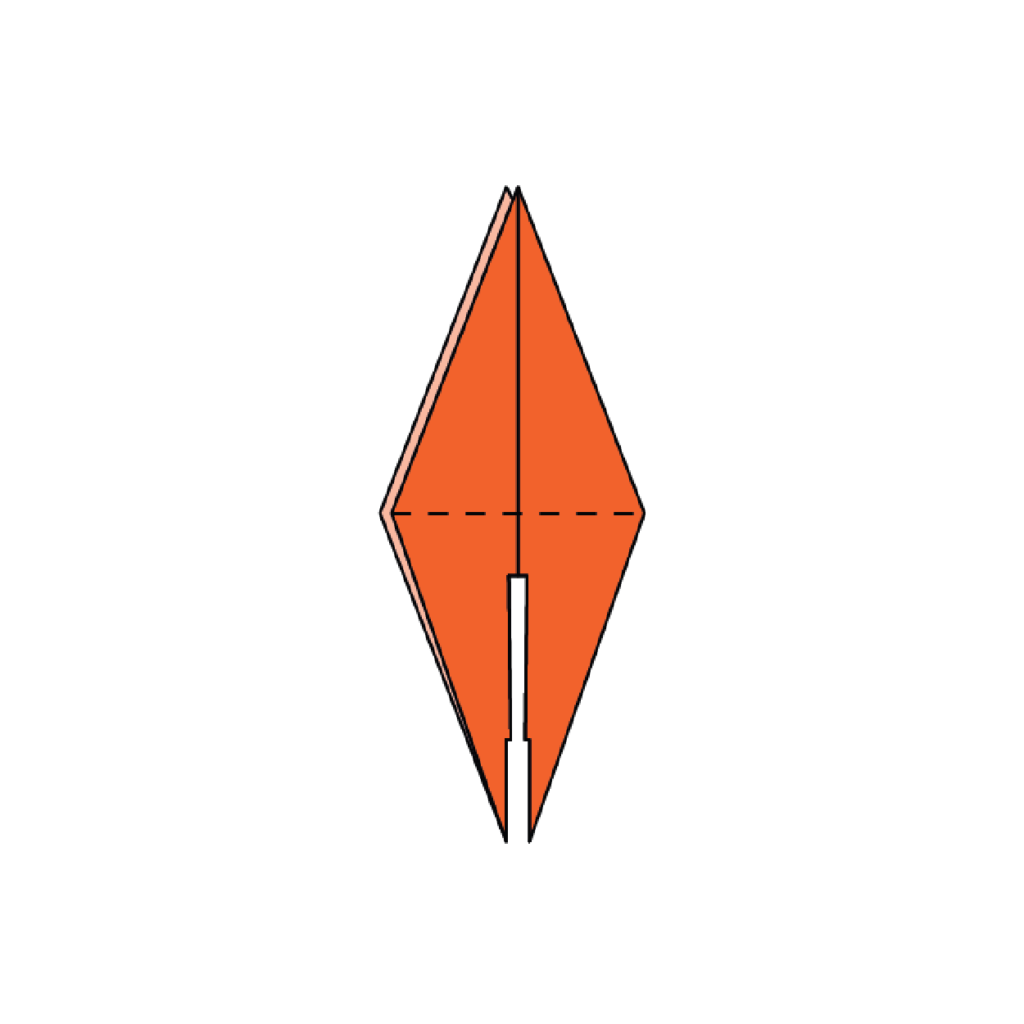
Once you are done repeating those steps, you should be left with this.
10. Folding the Corner Layers Inward (Front Side)
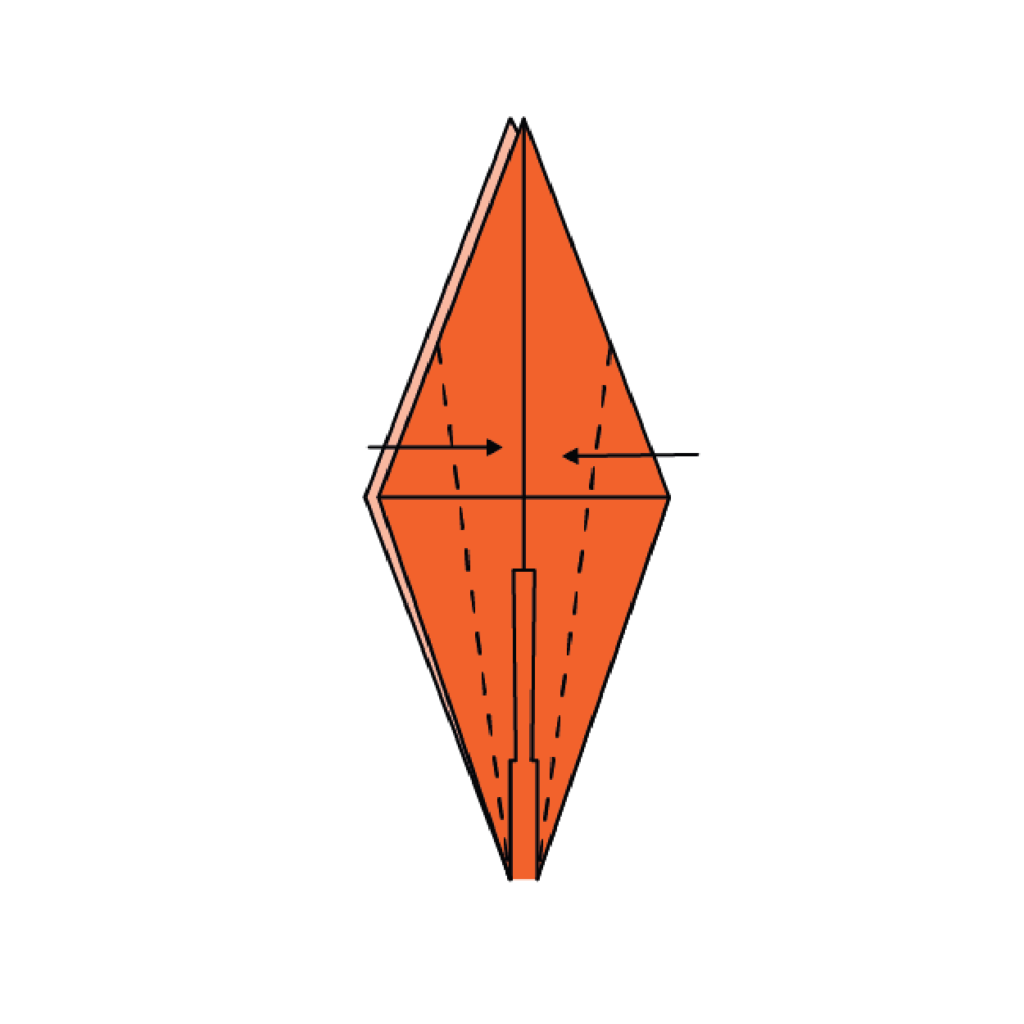
Fold the top left and right corner layers of the front side toward the center, using the dotted lines in the reference image as a guide.
11. Checking the Folded Front Side

After completing step 10, your figure should look like the one shown in the reference image. Turn it over.
12. Folding the Corner Layers Inward (Back Side)

Repeat step 10 on this side to match what you did on the other side.
13. Creating the Crane’s Neck
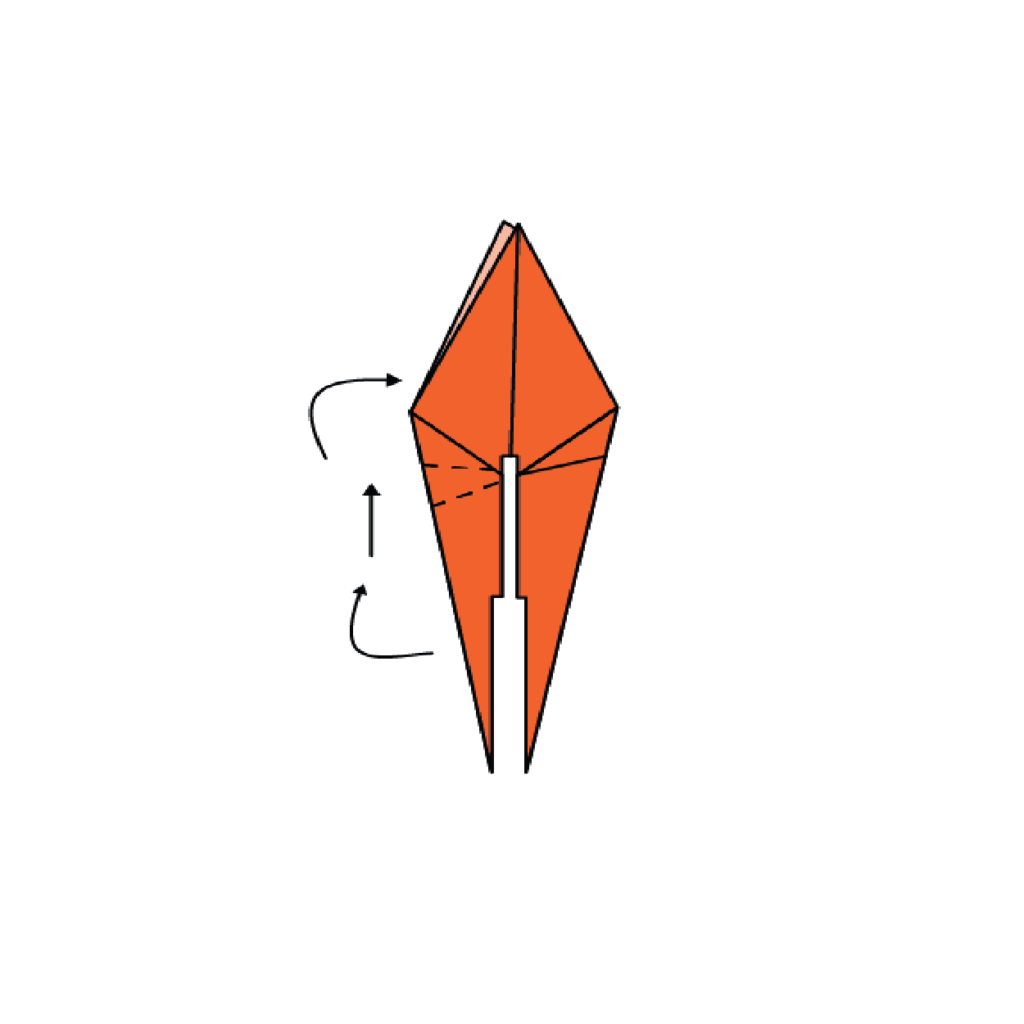
Reverse fold near center left to create the crane’s neck.
14. Forming the Neck and Tail
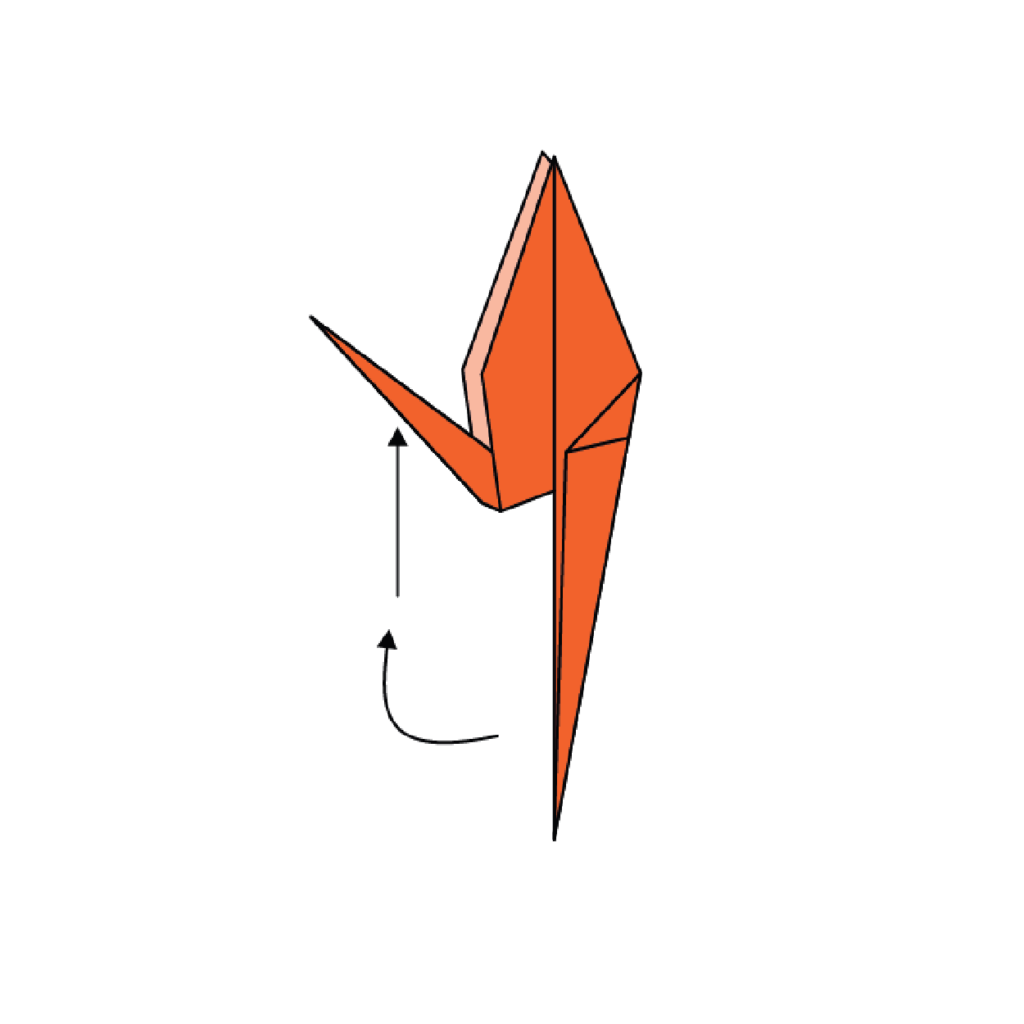
Lift the neck at the point indicated by the arrow and press down. Then, do the same to form the tail on the opposite side.
15. Shaping the Crane’s Tail
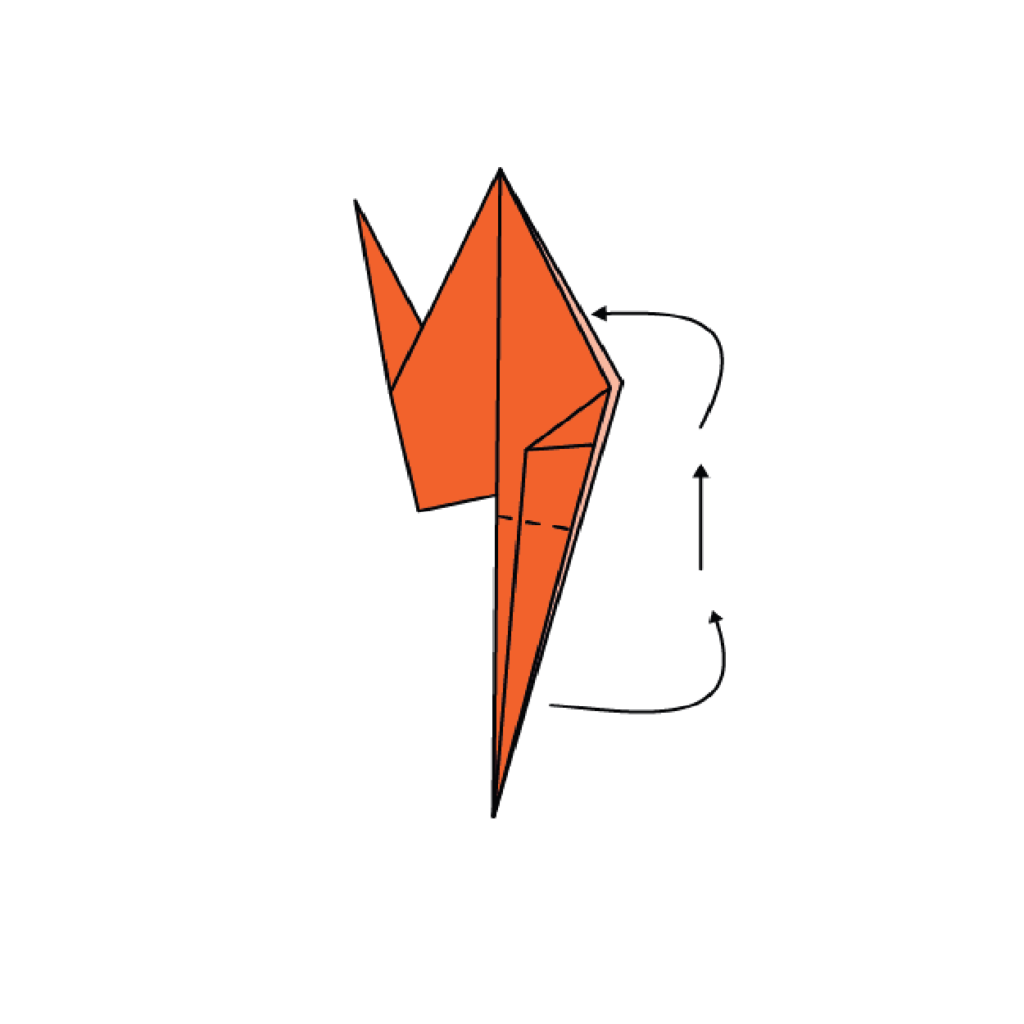
Follow the arrows in the image above to create the origami Crane’s tail.
16. Forming the Beak
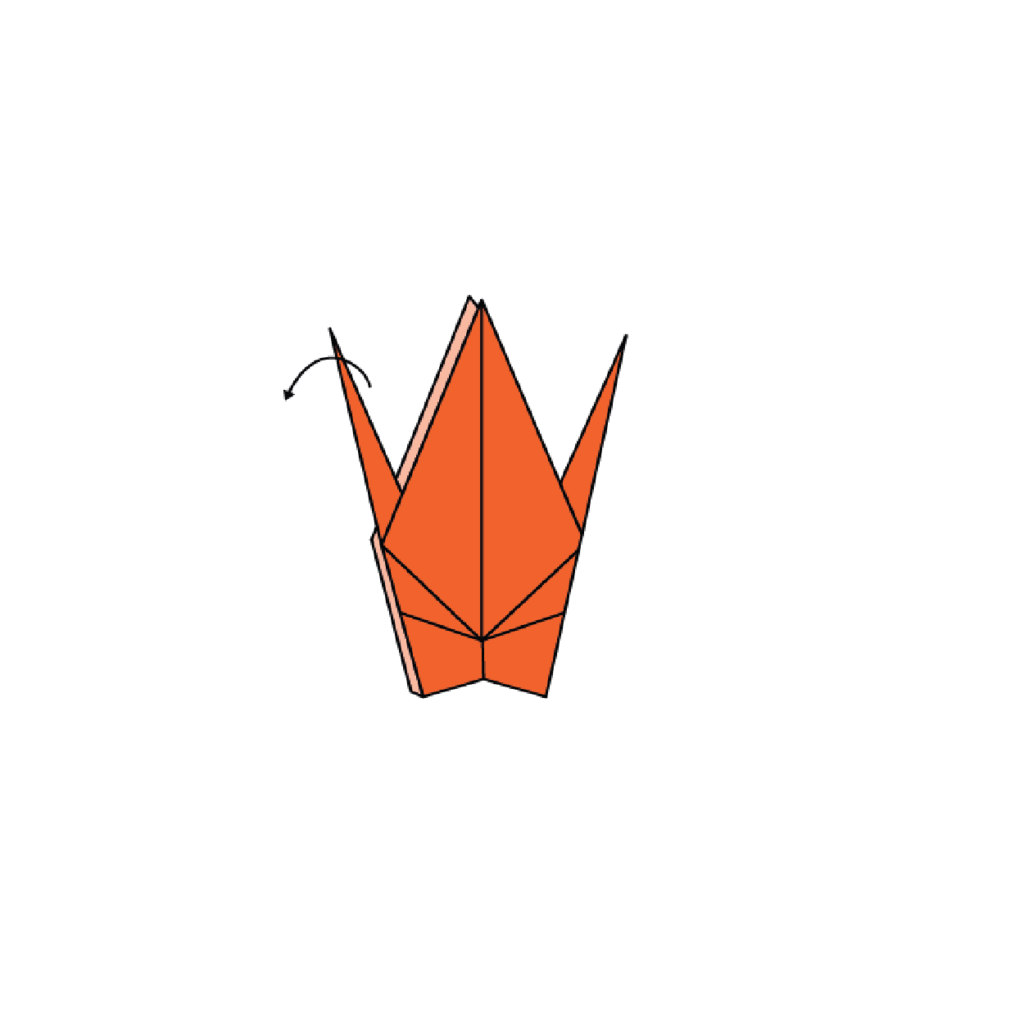
Reverse fold at dotted lines to form the beak. You can choose the beaks length.
17. Pulling Down the Wings and Flattening the Body
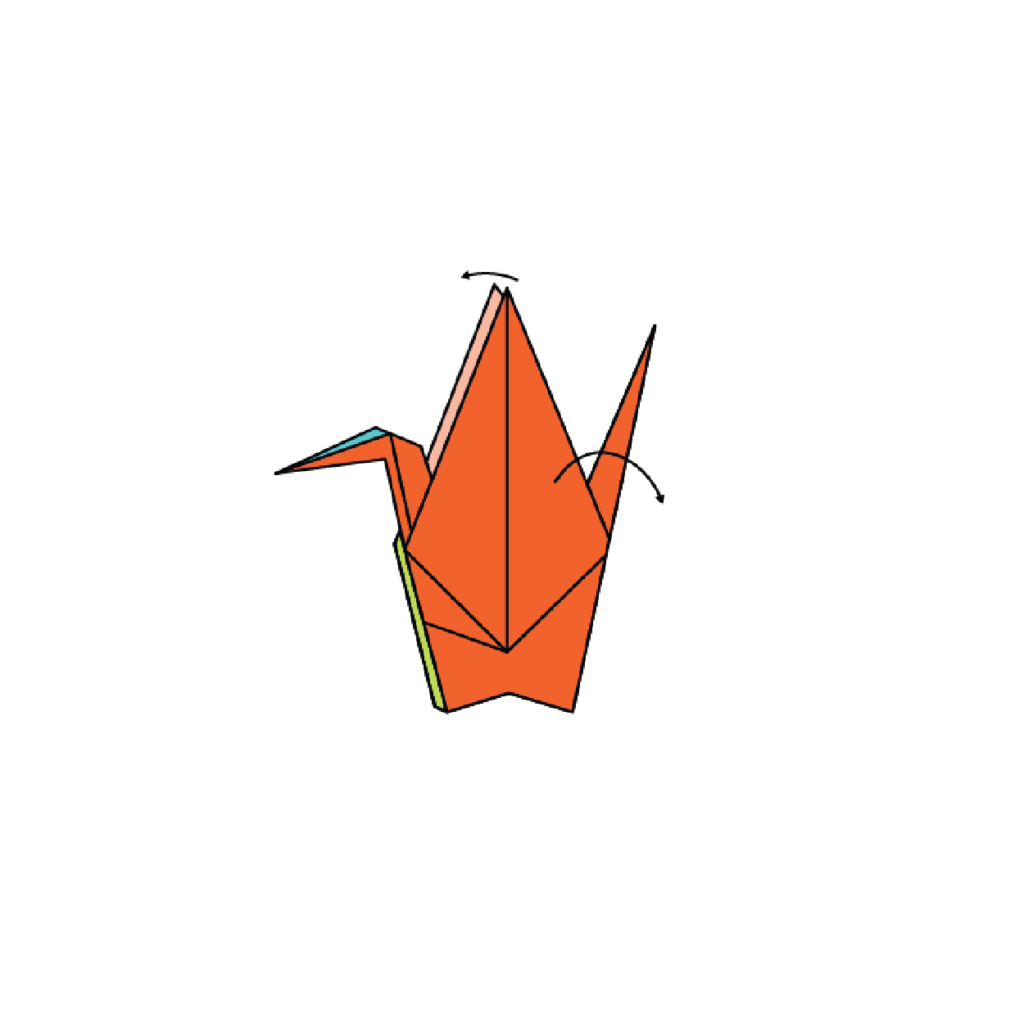
Pull the wings down and flatten the body into a square.
18. Completing the Origami Crane
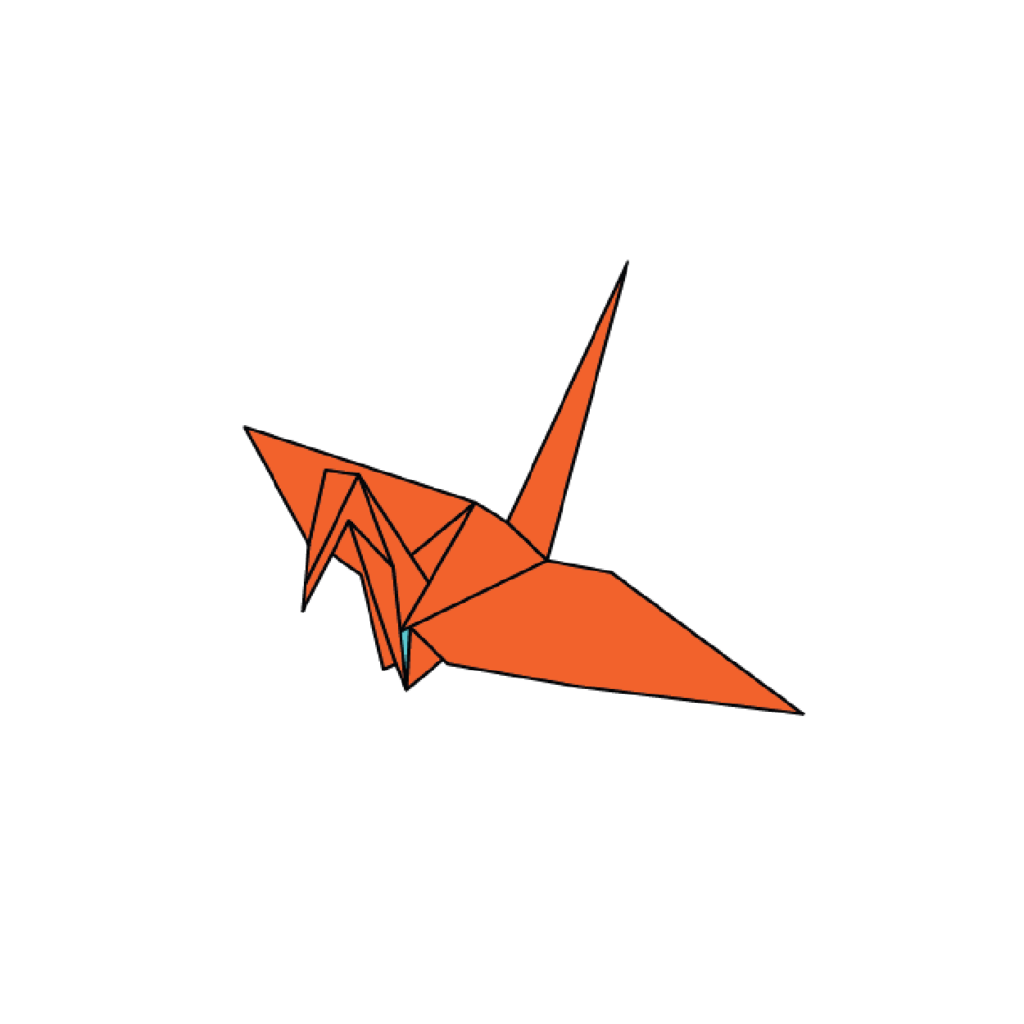
Now, you should have a beautiful origami crane in front of you. Congratulations on your final result!
There you have it! You should be nothing short of a pro with folding origami cranes now! Whether you enjoy learning through video or graphic instructions, I’ve tried to make it as simple as possible.
Finally, down below you’ll find a set of the above instructions which you can download and print!
How To Fold An Origami Crane Printable Instructions
You now know how to fold an origami crane! Let this just be the beginning of your paper folding journey! If you want to learn how to fold many more incredible things just take a look through all my creations and chose what you want to create next!
I hope you have enjoyed this how-to guide and that you’ll continue on this amazing journey of learning the art of paper folding!


