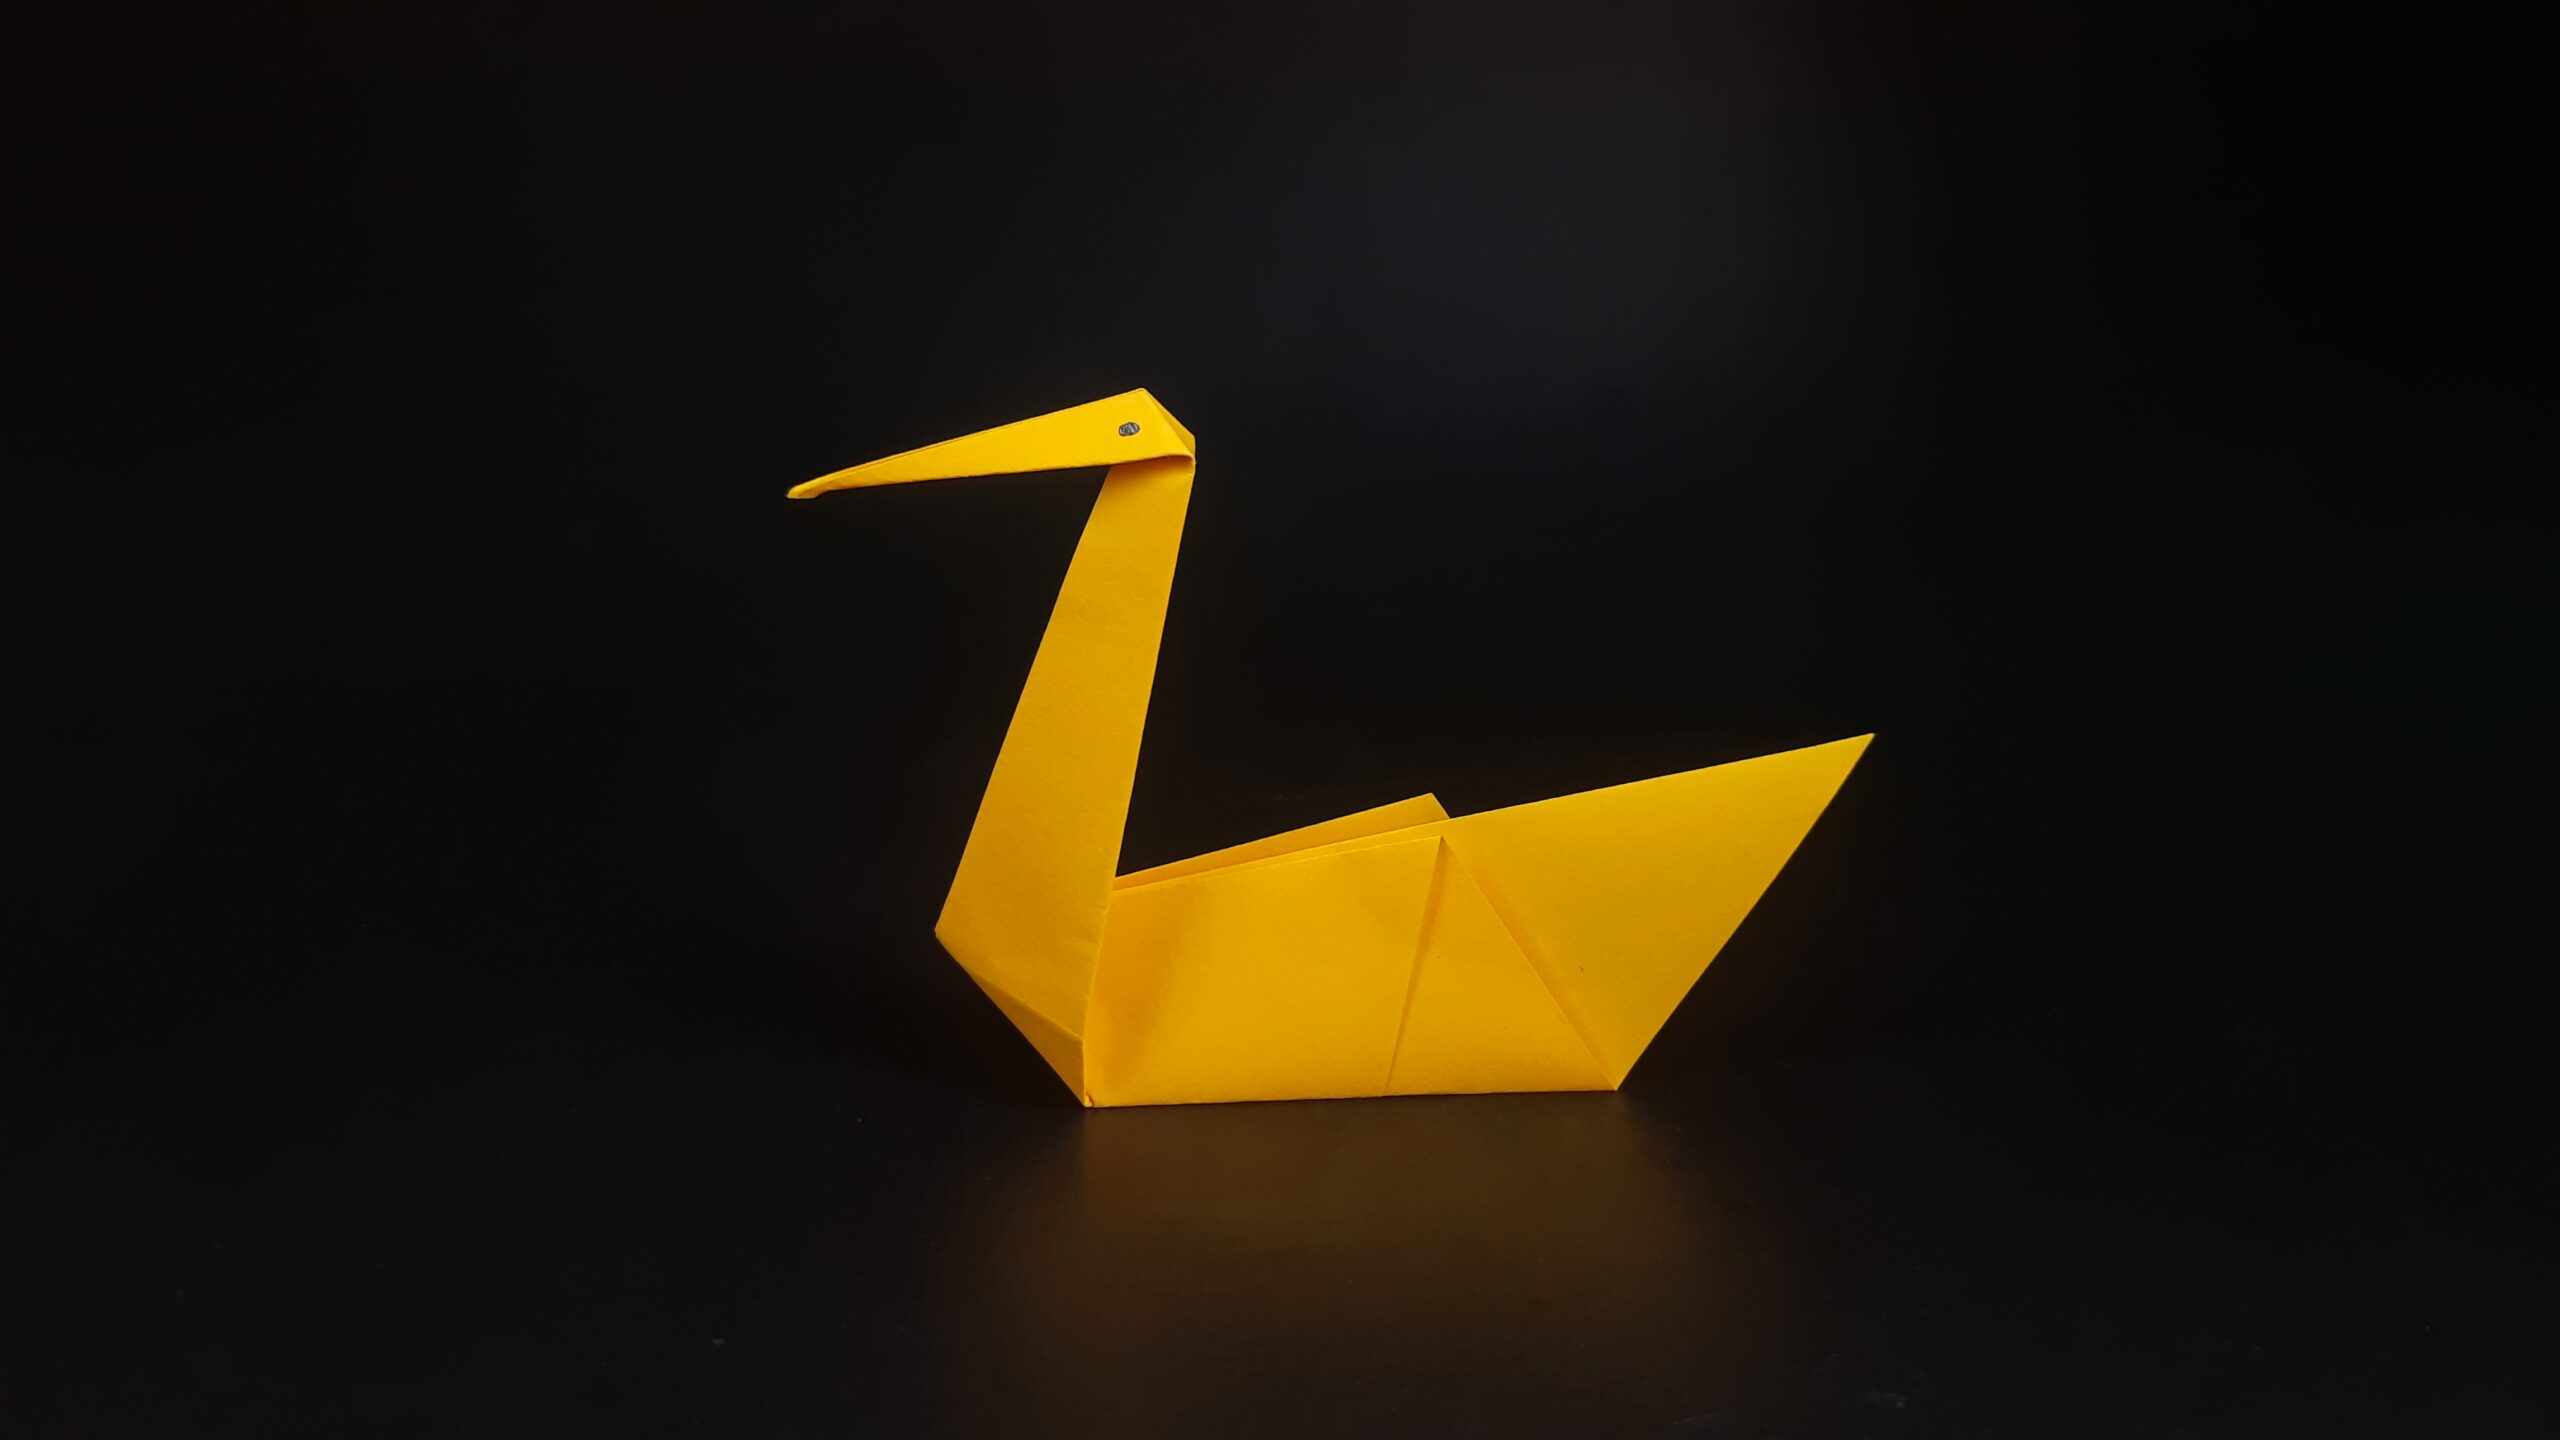
Origami can be used to create all sorts of things, from simple shapes to elaborate 3D sculptures. But, in this guide, I will teach you how to make an origami duck – a popular and relatively easy origami shape. I will provide step-by-step instructions, as well as some tips and tricks that will help you get started with this fascinating craft. So without further ado, let’s get started!
How To Make An Origami Duck Video Walkthrough
There you have it! You should now have your very first origami duck sitting in front of you if you followed along with the video I have provided you with! Make sure you get creative with it and choose a special color for your duck and even go ahead and draw on it to give it some character!
As you can see, this really isn’t really a difficult origami project to complete! Now, if you prefer learning in a different way other than through a video then I have prepared a set of step-by-step illustrated instructions on how to make an origami duck right below!
If you like this design you may want to check out my other Origami Animals!
How To Make An Origami Duck Step-By-Step Instructions
1. Create the Initial Diagonal Crease: The Foundation for Your Origami Duck

Begin with a square piece of paper, and fold the top right corner diagonally down to meet the bottom left corner. Ensure the edges align perfectly, and press down firmly on the fold. Unfold the paper to reveal a diagonal crease that will serve as the foundation for your origami duck.
2. Form Symmetrical Flaps: Establishing the Base Structure
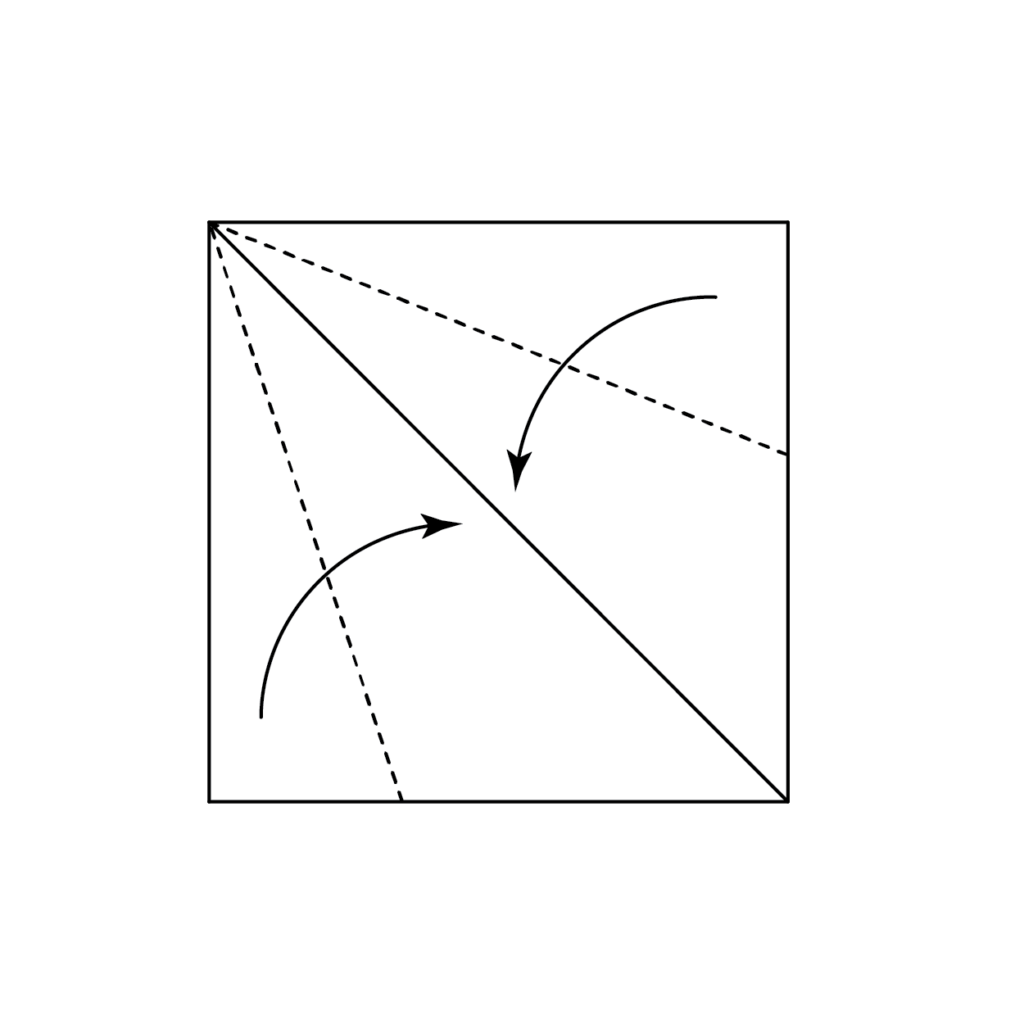
Take the top right and bottom left corners and fold them diagonally along the dotted lines, allowing them to meet at the central crease created in the previous step. This will create two symmetrical flaps on the paper.
3. Prepare for the Next Steps: Flipping the Paper

Once your paper resembles the provided image, carefully flip it over to the other side. This will ensure the folds and creases are properly oriented for the upcoming steps.
4. Shape the Central Triangle: Crafting the Duck’s Body
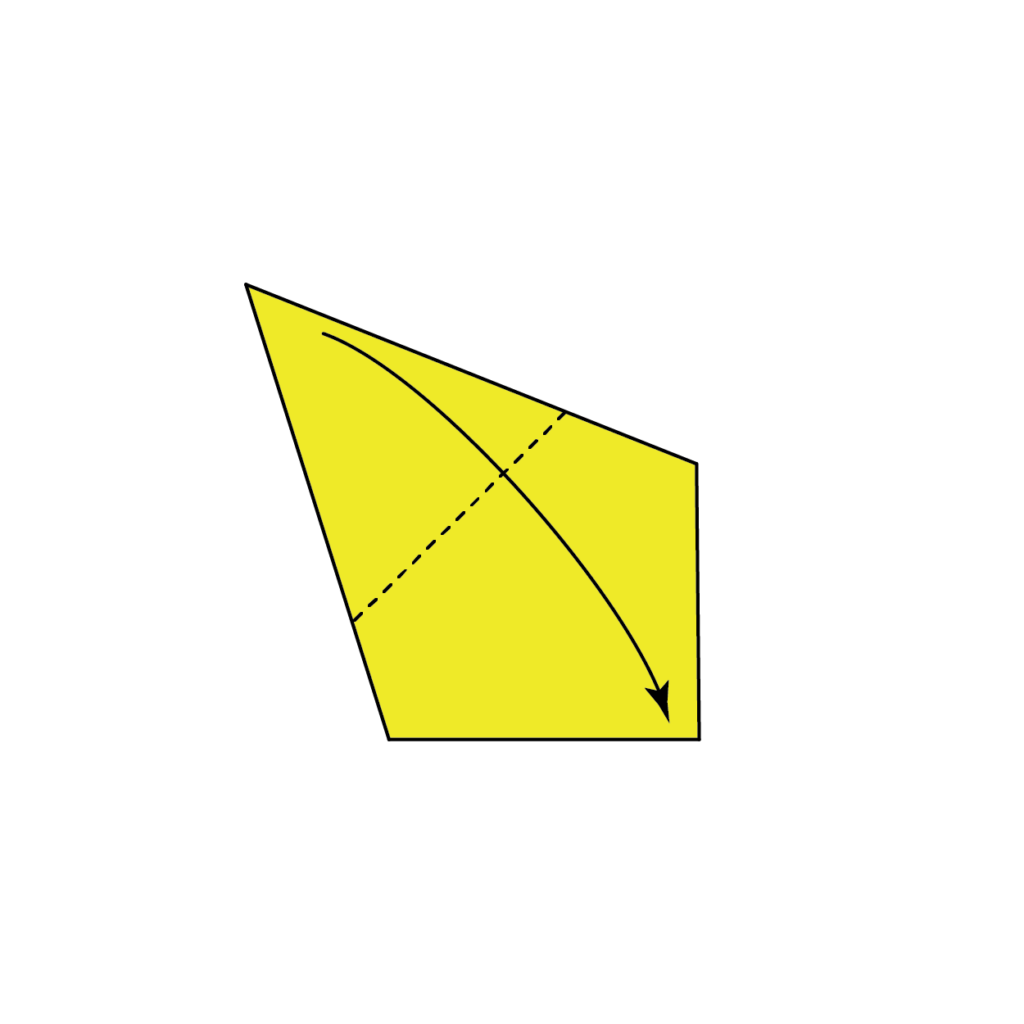
Grab the top corner of the paper and fold it downward along the dotted line, aligning it with the bottom corner. This action will form a central triangle that lays the foundation for the duck’s body.
5. Construct the Duck’s Head: Folding the Top Section
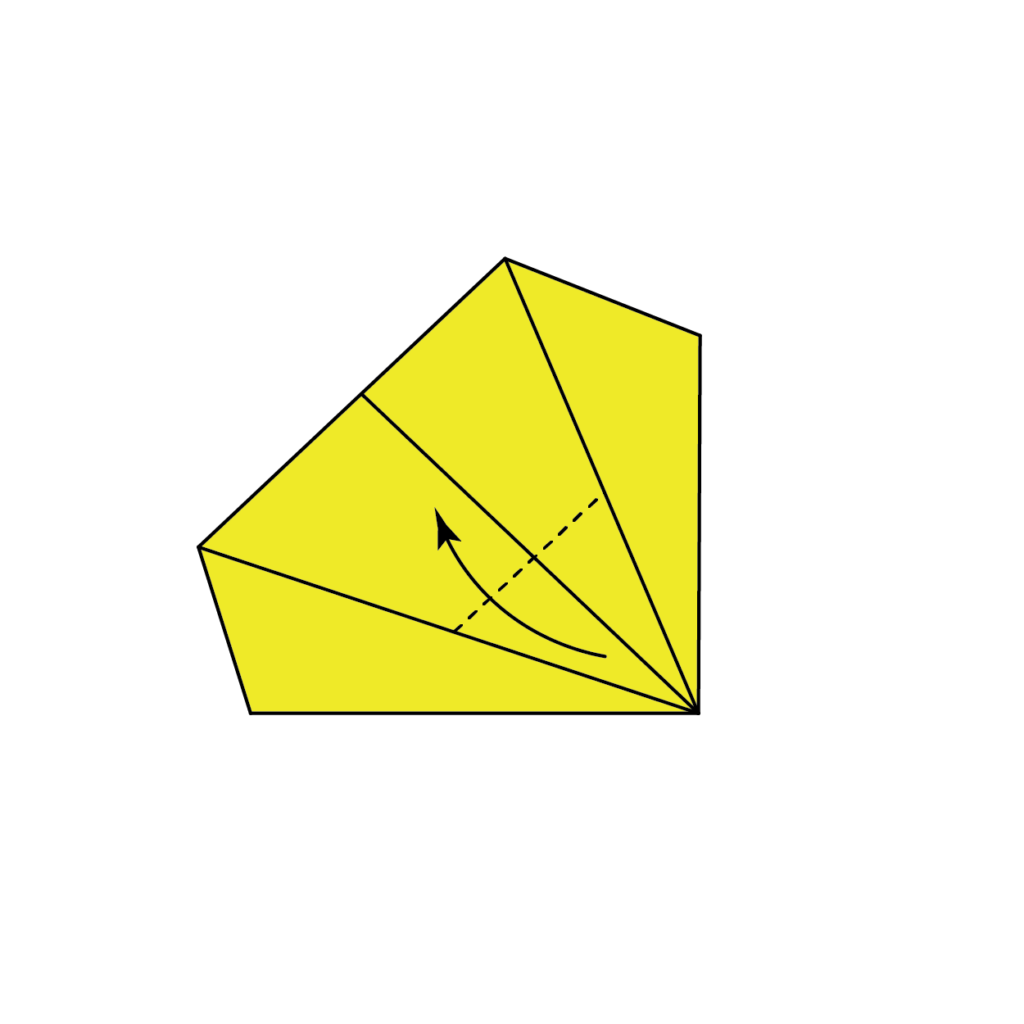
Take the corner you just folded down and fold it upward along the dotted line, aligning it with the top edge of the paper. This step will create the duck’s head and neck.
6. Enhance the Duck’s Appearance: Folding the Bottom Section

You should now have a triangular shape with a protruding top corner. Fold the bottom section of the triangle upward along the dotted line, roughly one-third of the way up the triangle.
7. Establish the Duck’s Base: Folding the Bottom Corner
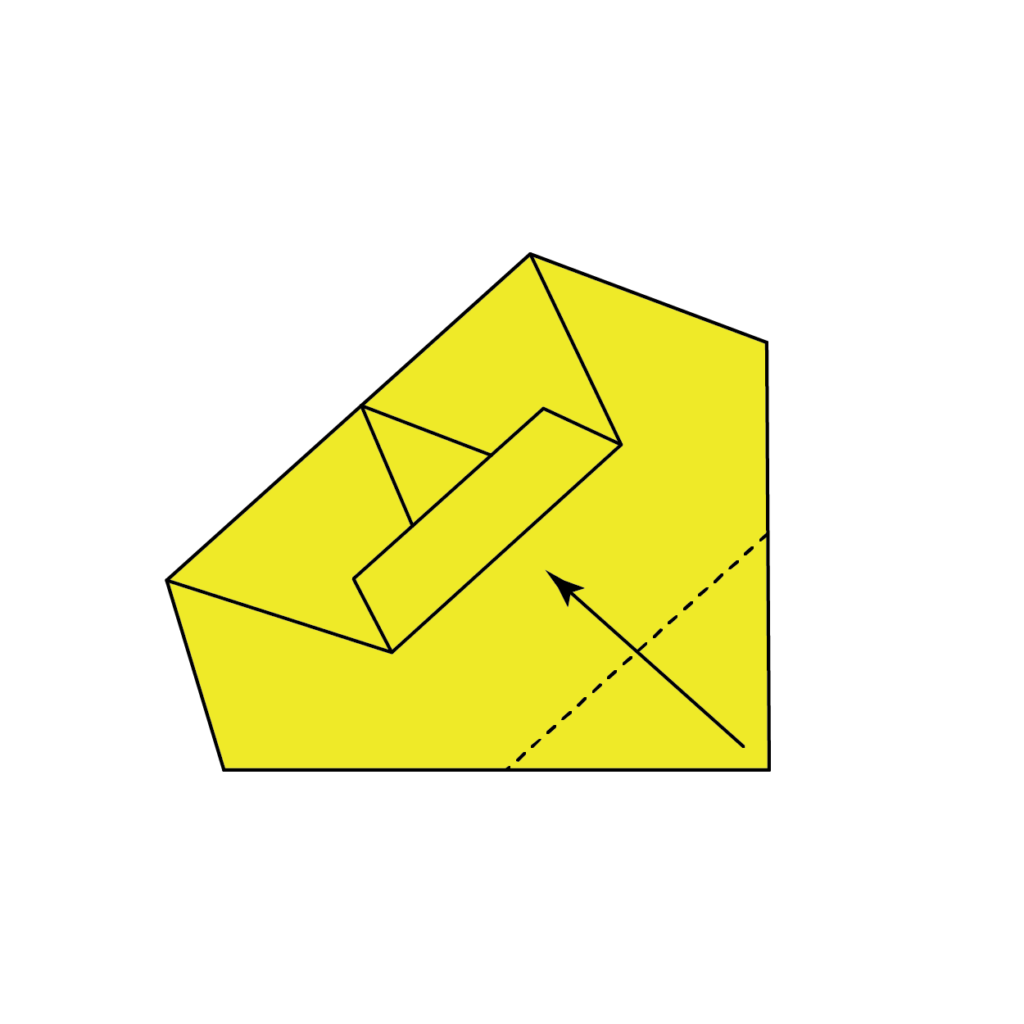
Carefully fold the bottom corner of the paper upward to meet the base of your previous folds, making sure not to tuck it under the flap. This step will help shape the duck’s body.
8. Secure the Duck’s Shape: Folding in Half
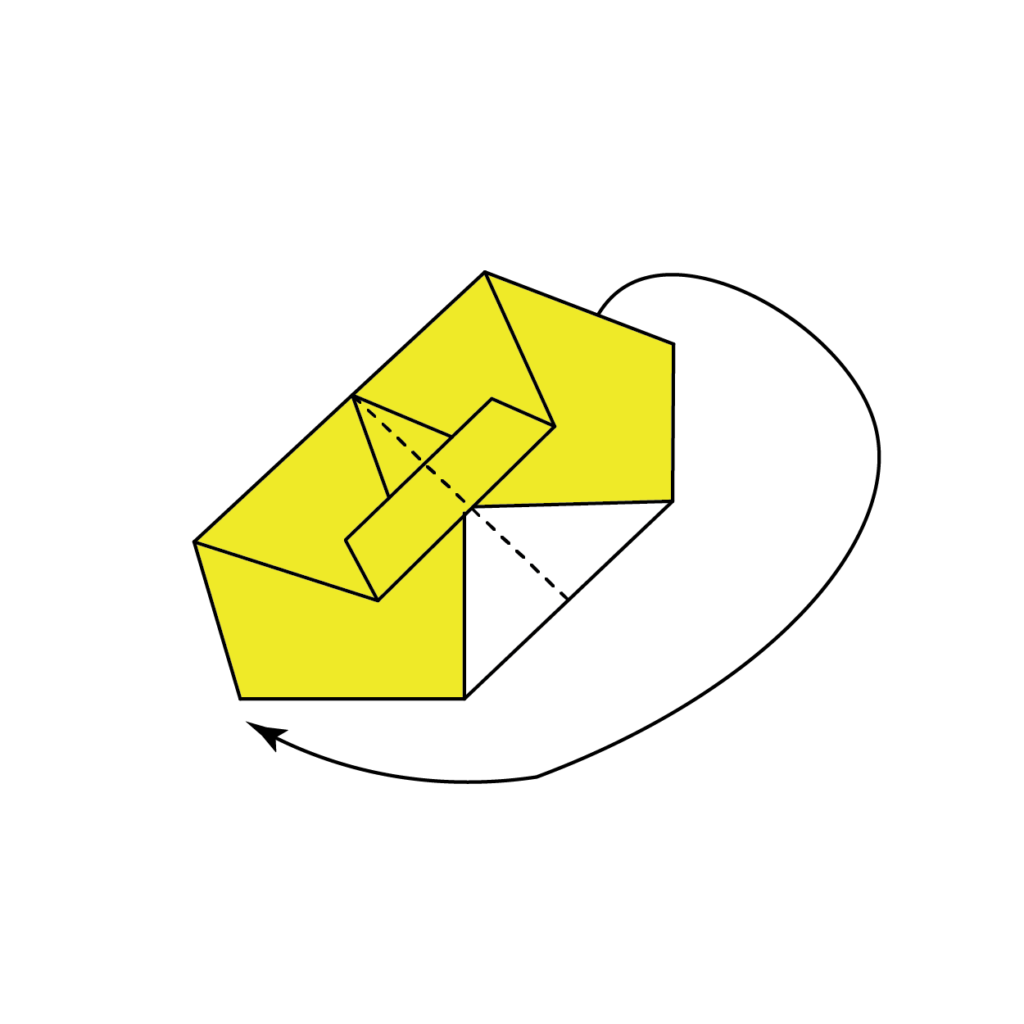
At this point, your paper should resemble the provided image. Fold the paper in half, ensuring that the previous folds are visible on the outside. This step helps reinforce the duck’s shape.
9. Adjust the Head and Tail: Swiveling into Position
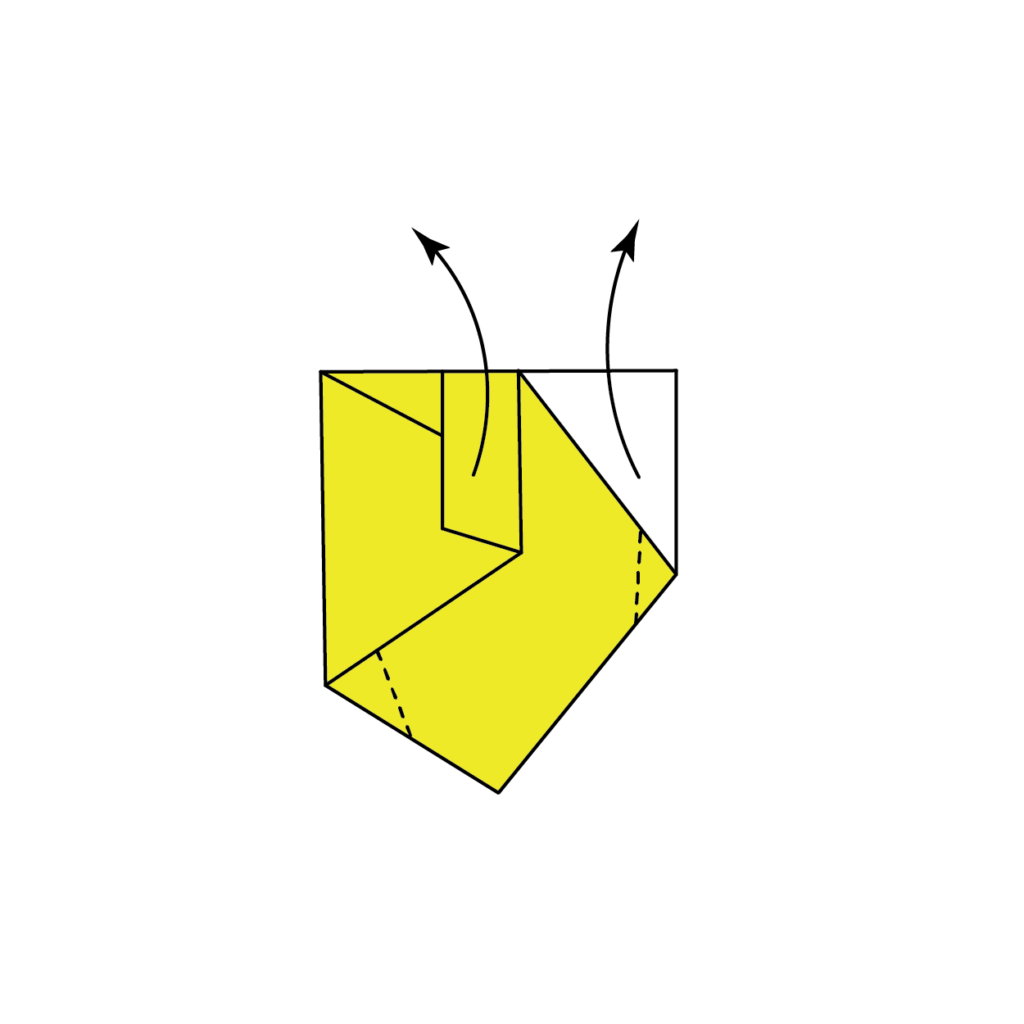
Grab the duck’s head and tail and gently swivel them upward, aligning them with the dotted lines shown in the image. This will actually give your duck the duck shape.
10. Refine the Duck’s Bill: Swiveling Downward

Add character to your duck by swiveling the bill slightly downward, creating a more lifelike appearance.
11. Create a Stable Base: Folding the Bottom Edges
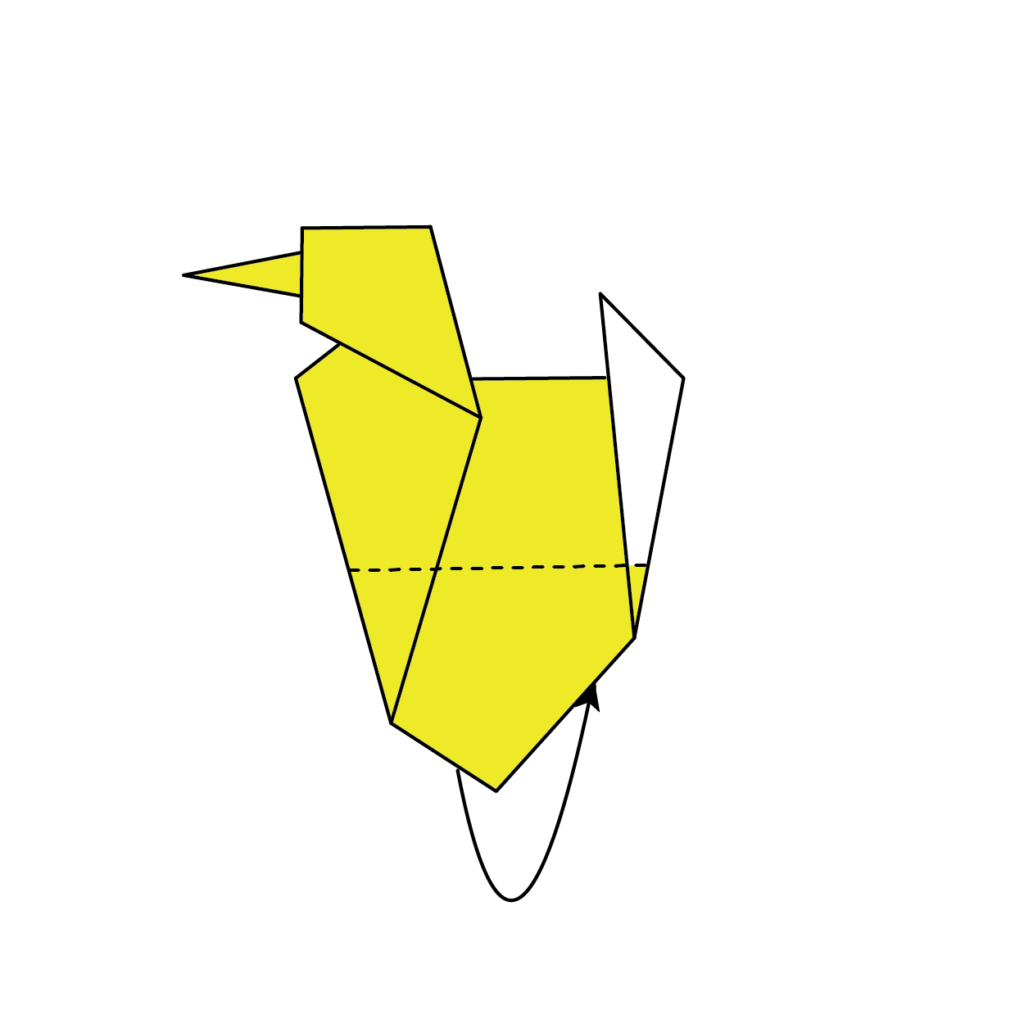
Fold the bottom edges of both sides of the paper inward along the dotted lines. This will help your duck stand on a flat surface.
12. Add the Finishing Touches: Shaping the Duck’s Tail

Take the back corners of the duck’s tail and fold them inward, giving your duck a complete and polished shape.
13. Admire Your Completed Origami Duck: The Final Result

Congratulations! After following these steps, you should now have a beautifully crafted origami duck that resembles the image provided. Enjoy your new paper creation and share it with friends and family.
Now that you have two sets of instructions for learning how to fold an origami duck, you should be getting pretty comfortable with this design! Again, this is a pretty easy and beginner-friendly origami model. However, even with that being the case, it’s always best to practice each origami model a few times till you really start to perfect it! The more practice you can get, the better! Now, you find the same instructions as above, down below but in a downloadable and printable format just in case you need them for future reference.
How To Make An Origami Duck Printable Instructions
Congratulations, you have made an origami duck! This easy-to-follow guide has taught you everything you need to know about how to make this classic origami figure. Whether you are a beginner or an experienced folder, you should now be able to make an origami duck with ease. Remember to take your time and be precise with your folds, and you will be rewarded with a beautiful and satisfying result.
Making origami is a wonderful way to relax, exercise your creative muscles, and connect with others who share your passion. So once you’re happy with your finished duck, make sure to check out all the other origami designs I have waiting for you! Thanks for following along and happy folding!
