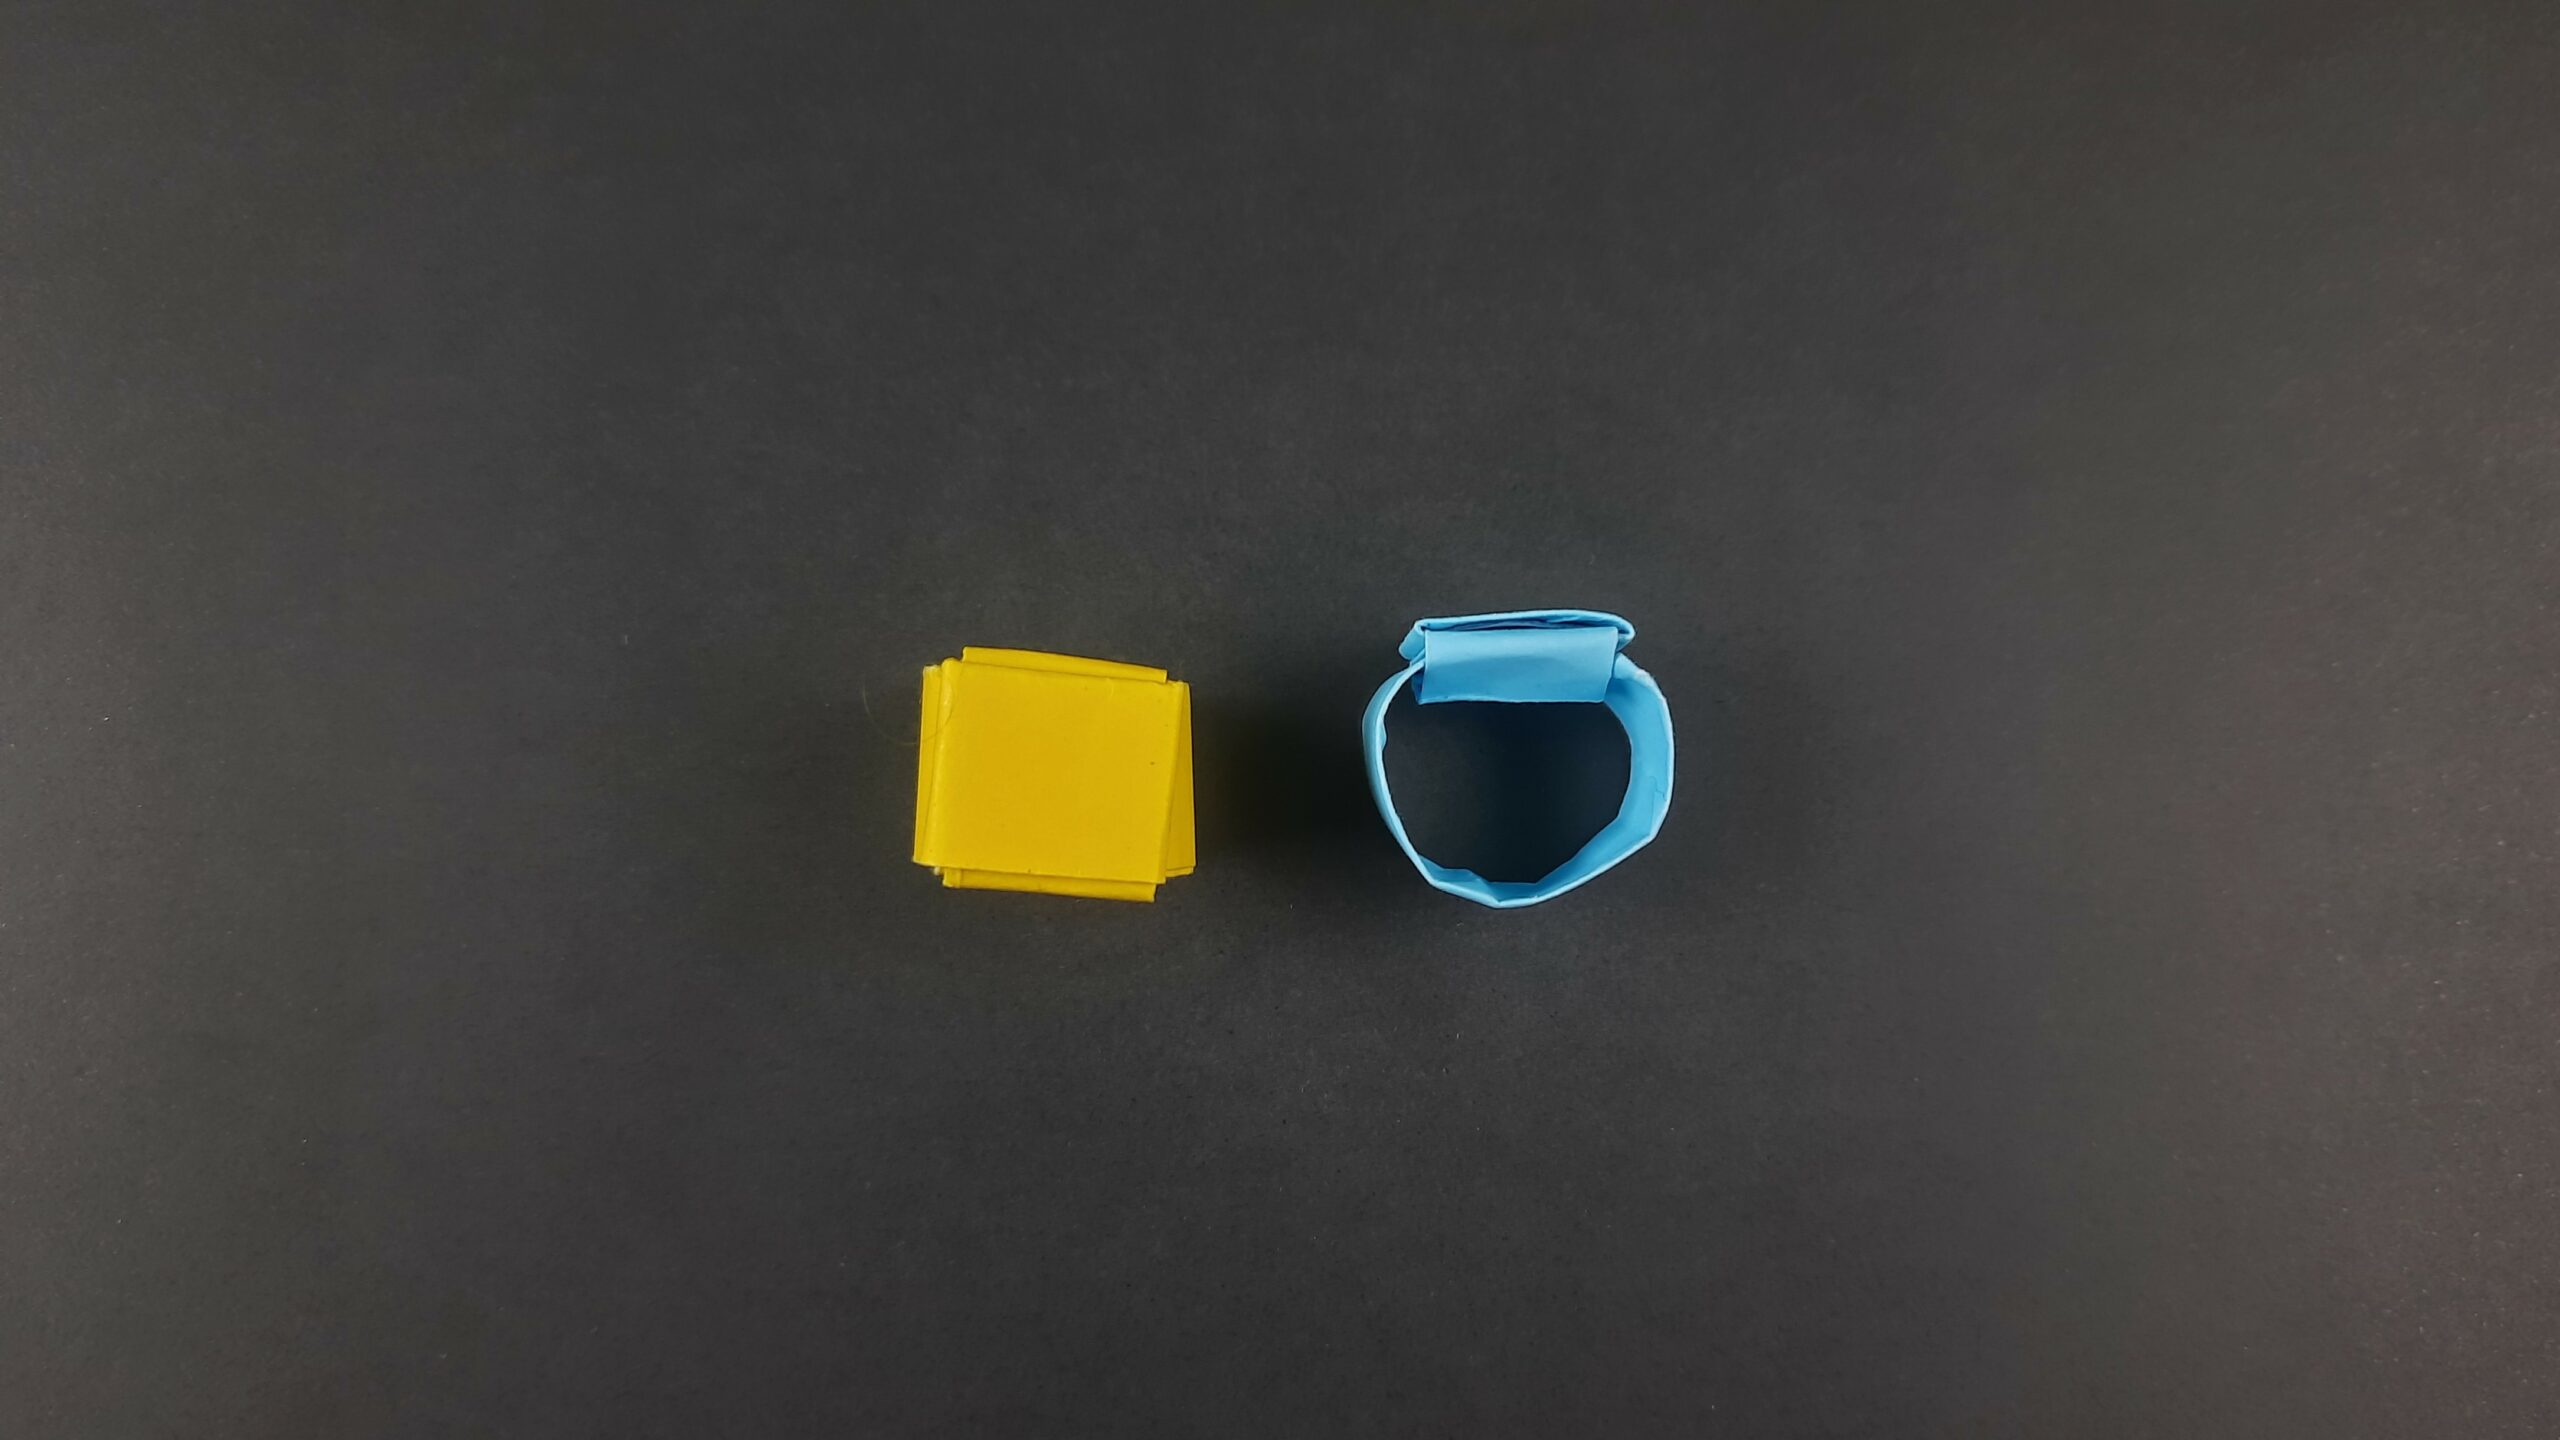
Wondering how to make an easy paper ring? Well, the good news is that making your own paper ring is a fun and easy project that you can do at home with just a strip of paper and a few minutes of time! With a little bit of patience and some careful folding, you can create a beautiful and unique ring that is perfect for any occasion. So grab a sheet of paper and let’s get started!
How To Make An Easy Paper Ring Video Walkthrough
There you go! You should now have your first paper ring wrapped around your finger if you followed along with the video I made for you! As you can see, it’s pretty easy and simple to make. You can probably make a ring for every finger within 10-20 minutes once you get a hang of the design! Go ahead and decorate your paper ring as well!
Draw any symbols on the top or even glue a jewel to the top of it as well. And obviously, you can use any colored paper you want! Now, if you want to learn how to make this origami ring in a different way other than through a video, keep scrolling and follow the step-by-step illustrated instructions I have made down below!
If you enjoyed making this design, check out all my other Origami Items!
How To Make An Easy Paper Ring Step-By-Step Instructions
1. Preparing the Paper: Begin with a 6×20 cm Paper Strip
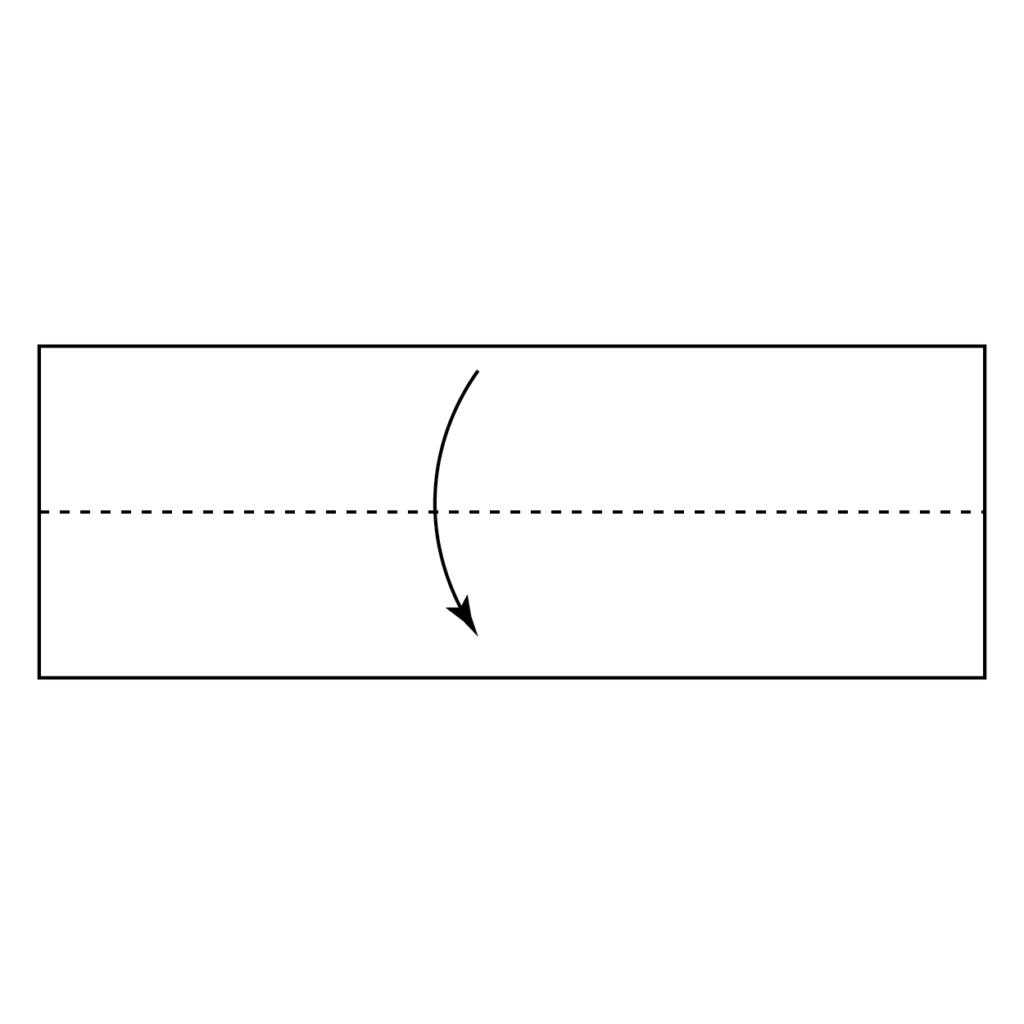
Start with a 6×20 cm piece of paper, laying it horizontally on your workspace. Fold the top half of the paper downwards along the dotted line as shown in the diagram.
2. Creating the Center Crease: Unfold and Refold the Paper Edges
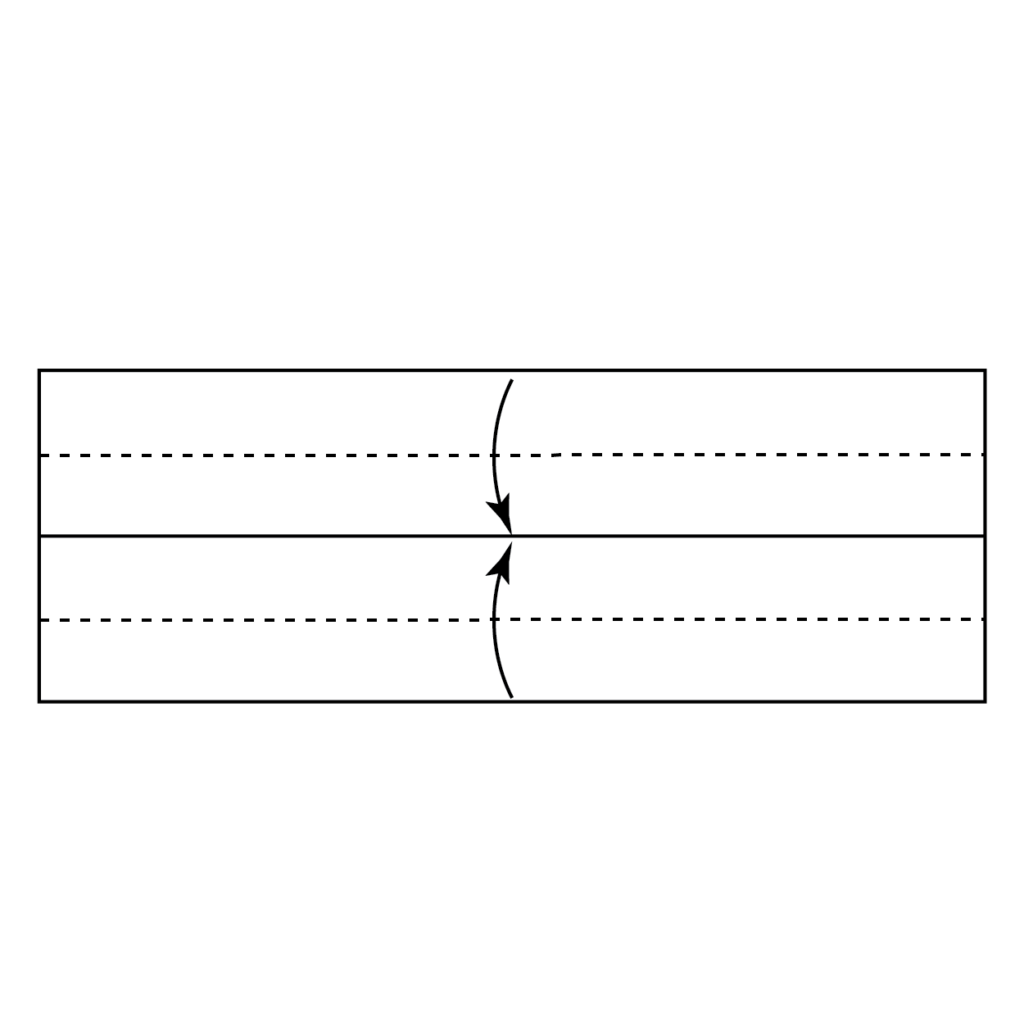
Unfold the paper, then fold the bottom and top edges along the dotted lines so they meet in the middle at the crease you just created.
3. Folding the Paper in Half: Create a Thinner Strip
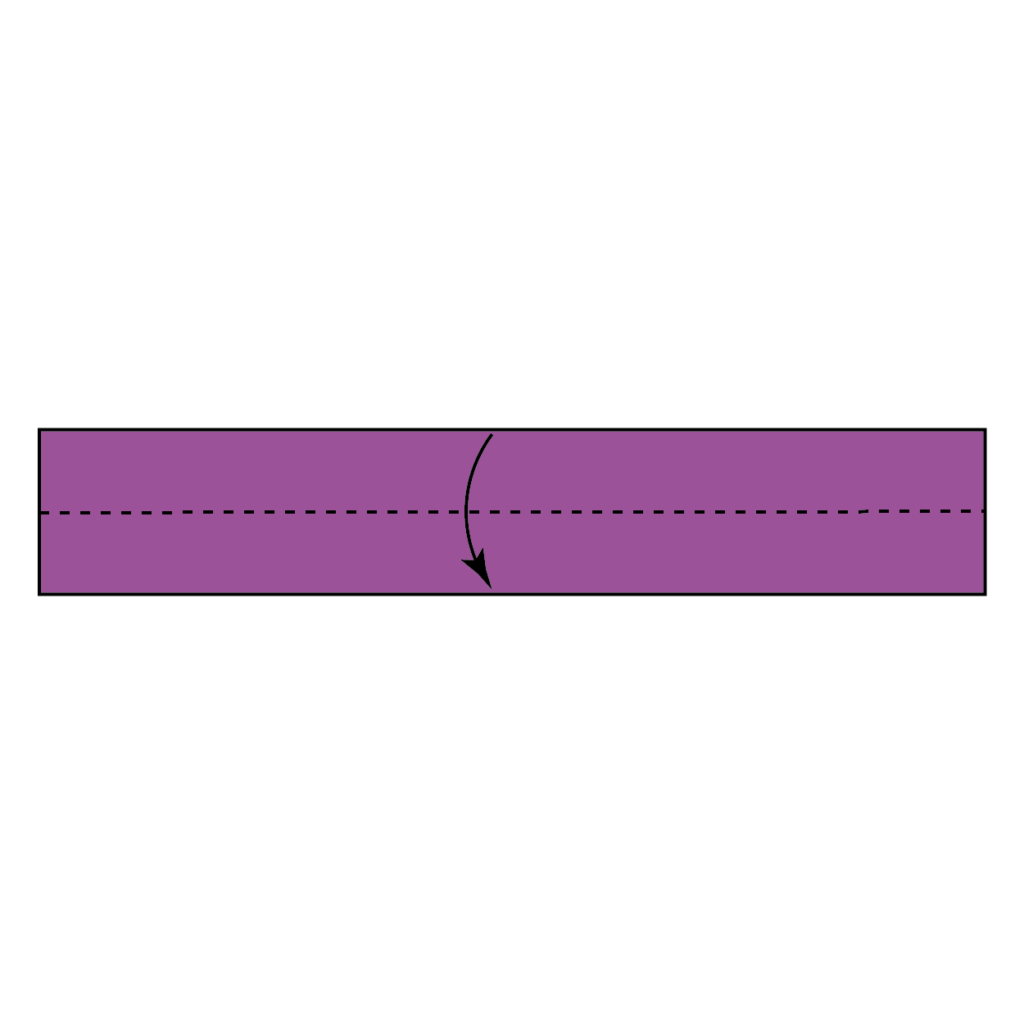
Fold the paper in half along the dotted line, forming a thinner strip.
4. Examine And Compare The Diagram To Your Ring

You should have a relatively thin strip of paper now like the one above.
5. Preparing the Locking End: Fold the Right End
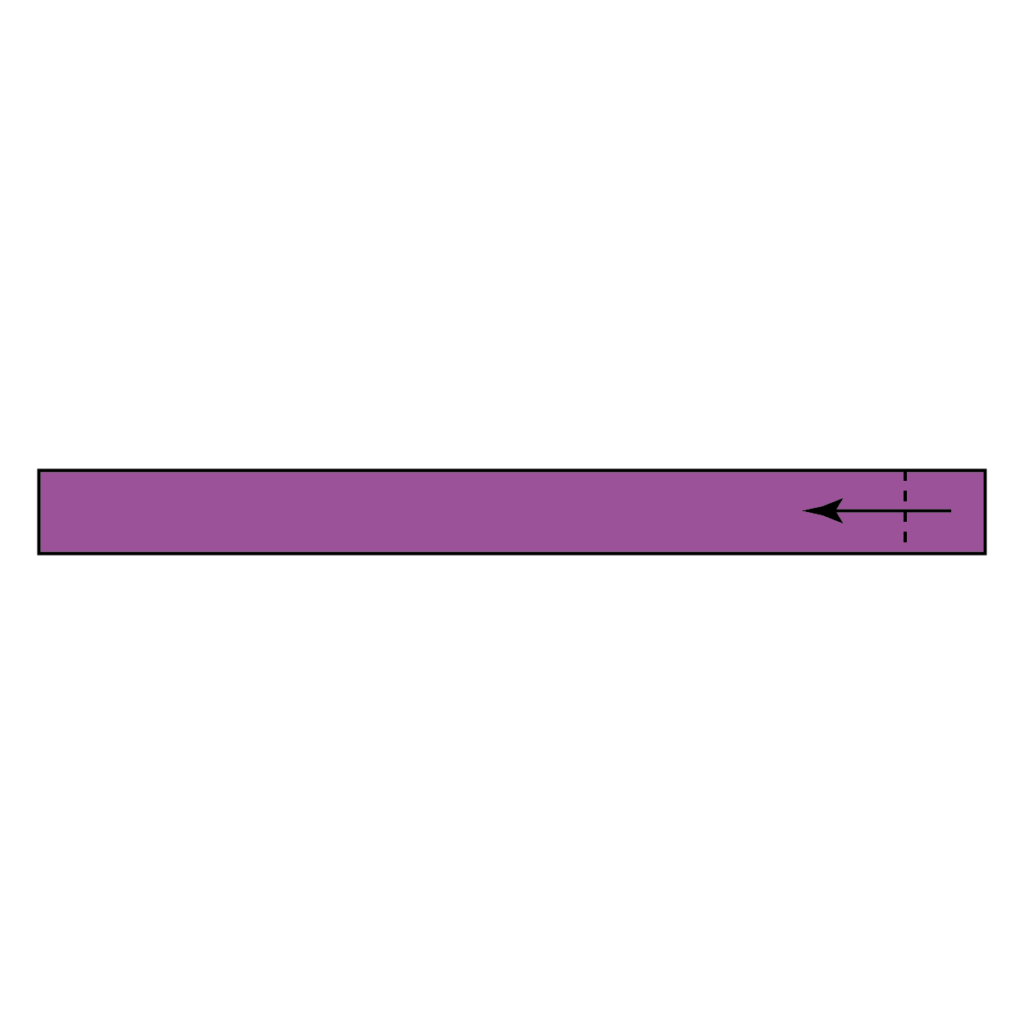
With the thin strip of paper, fold the right end about a centimeter over the dotted line.
6. Positioning the Locking End: Flip and Rotate the Paper

Flip the paper so that the folded end is at the back and to your left.
7. Forming the Ring Shape: Loop the Unfolded End Around
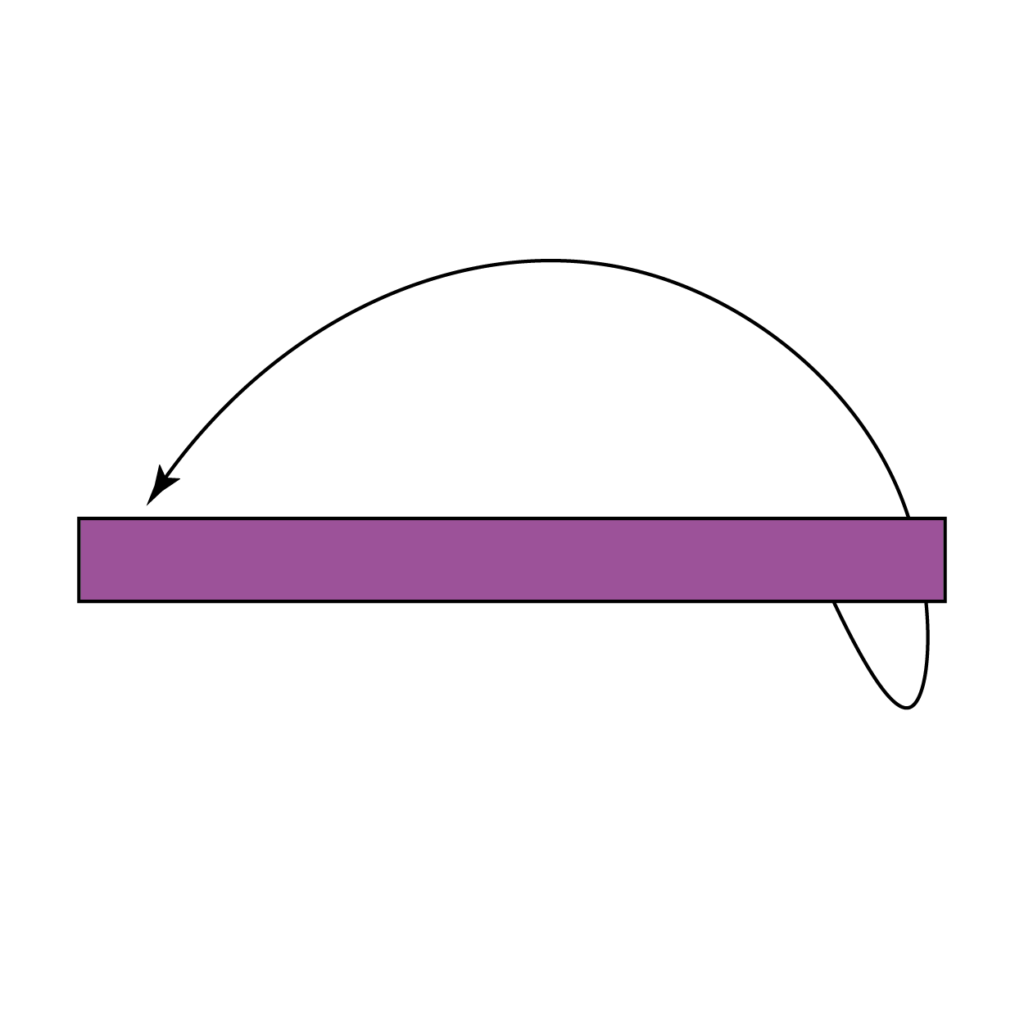
Take the unfolded end of the paper and loop it around to meet the back of the folded end, as shown in the diagram.
8. Creating the Lock: Pinch the Fold Inward
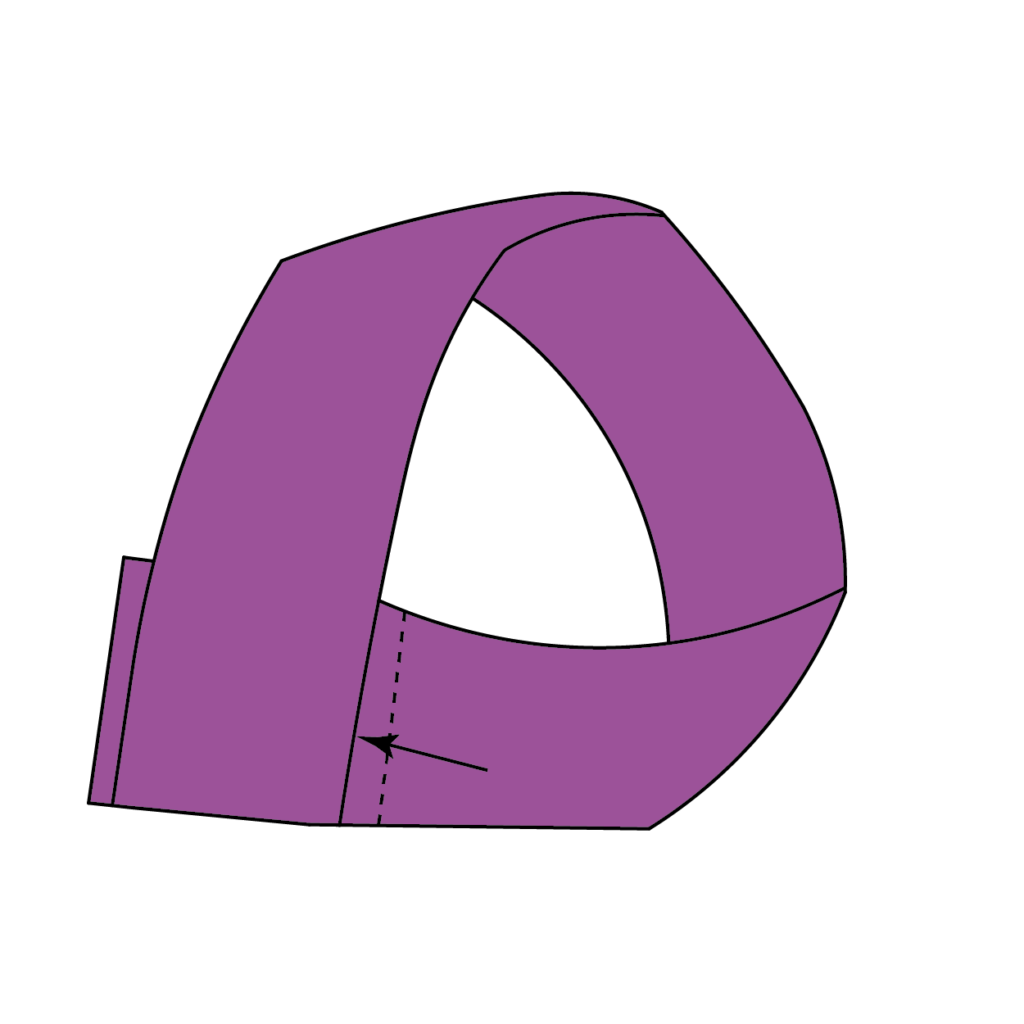
Hold the loop in place and fold/pinch along the dotted line inwards, as illustrated.
9. Examining the Shape: Open the Loop for a Side View

Open the loop to reveal the side view of the ring structure.
10. Fitting the Ring: Wrap the Paper Around Your Finger
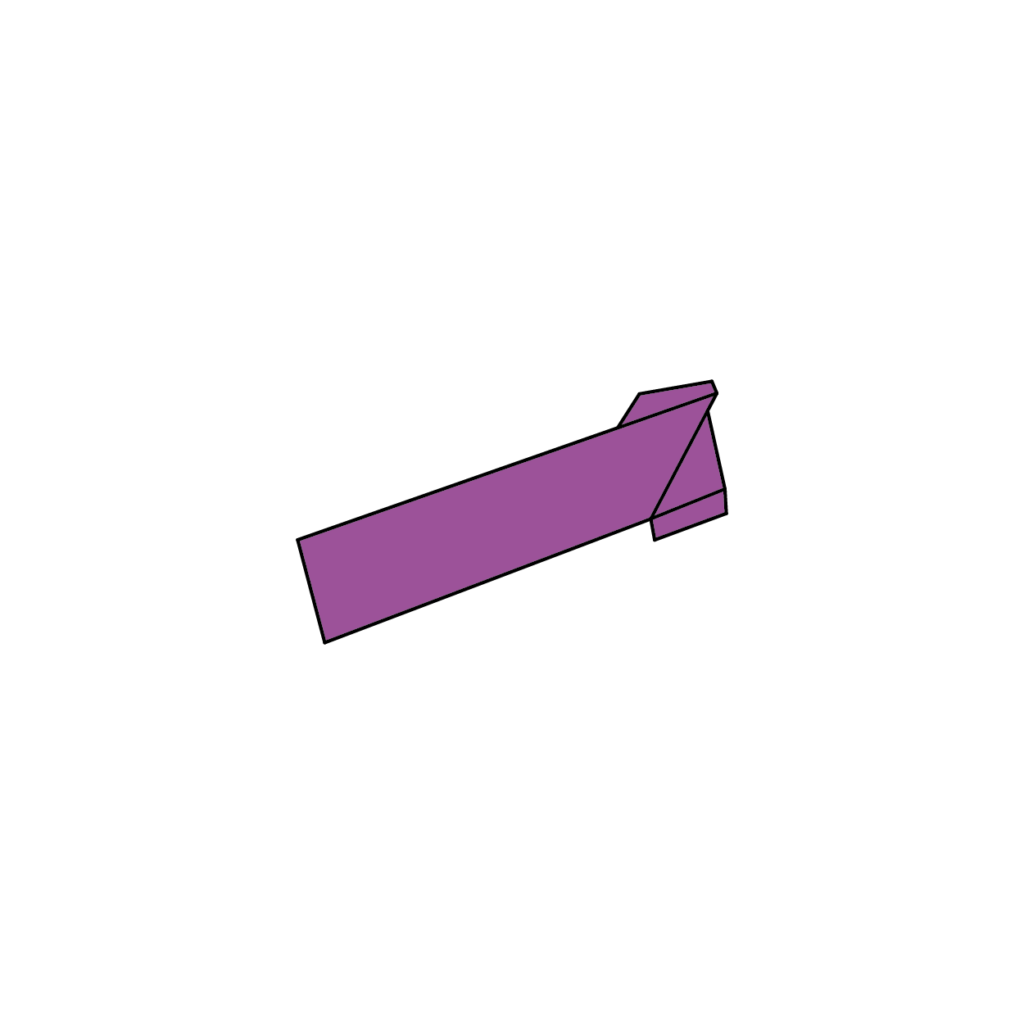
Place the paper on your desired finger with the small square piece on top. Wrap the paper around your finger once, stopping at the end of the square. Fold the remaining length diagonally back towards your arm, aligning the bottom corner of the fold with the bottom right corner of the square shape.
11. Checking the Shape: Remove the Ring from Your Finger

Carefully remove the ring from your finger. It should resemble the diagram provided.
12. Securing the Ring: Wrap the Long Strip Under the Square Flap
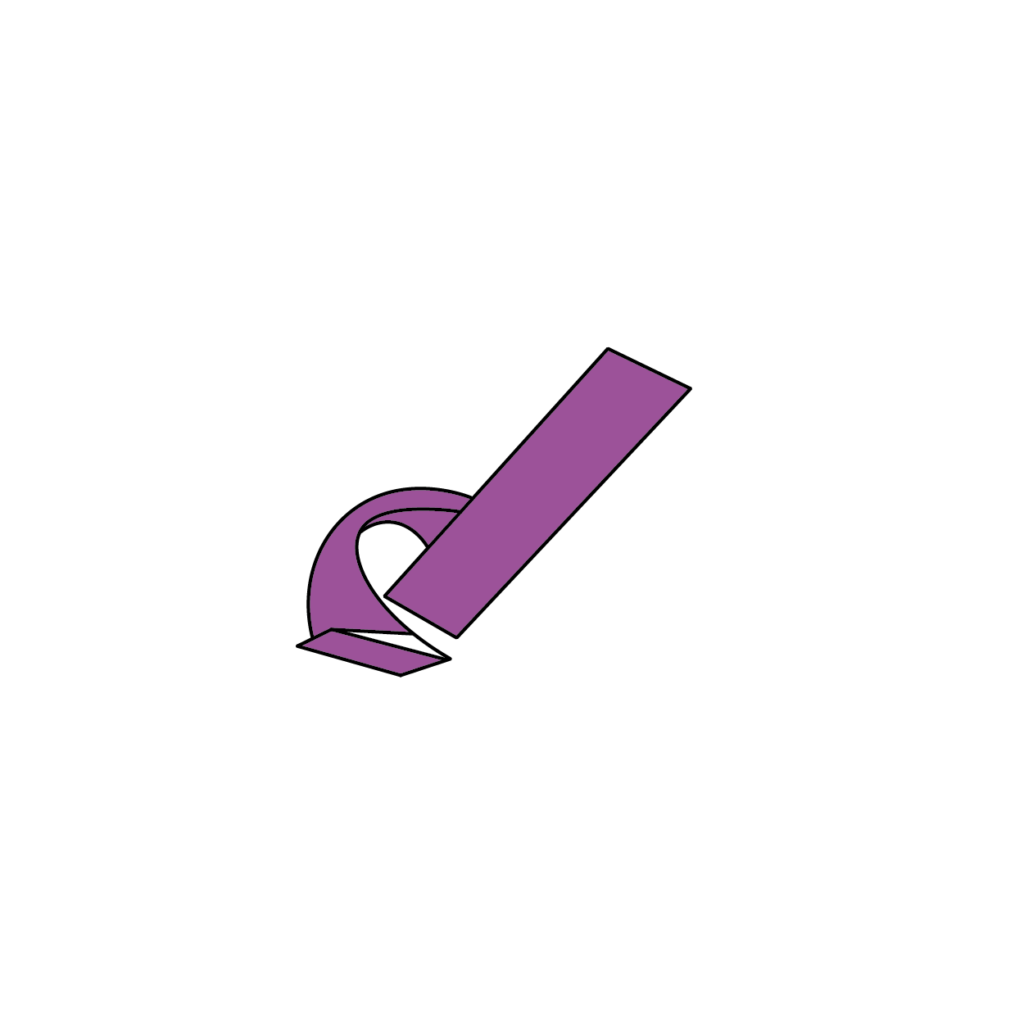
Close it up to how it was on your finger and you are going to take the long strip that is left and wrap it upwards under the square flap for the first wrap-around. The next two illustrations are to help you understand this.
13. Tucking the Square Piece: Fold the Long Strip Underneath
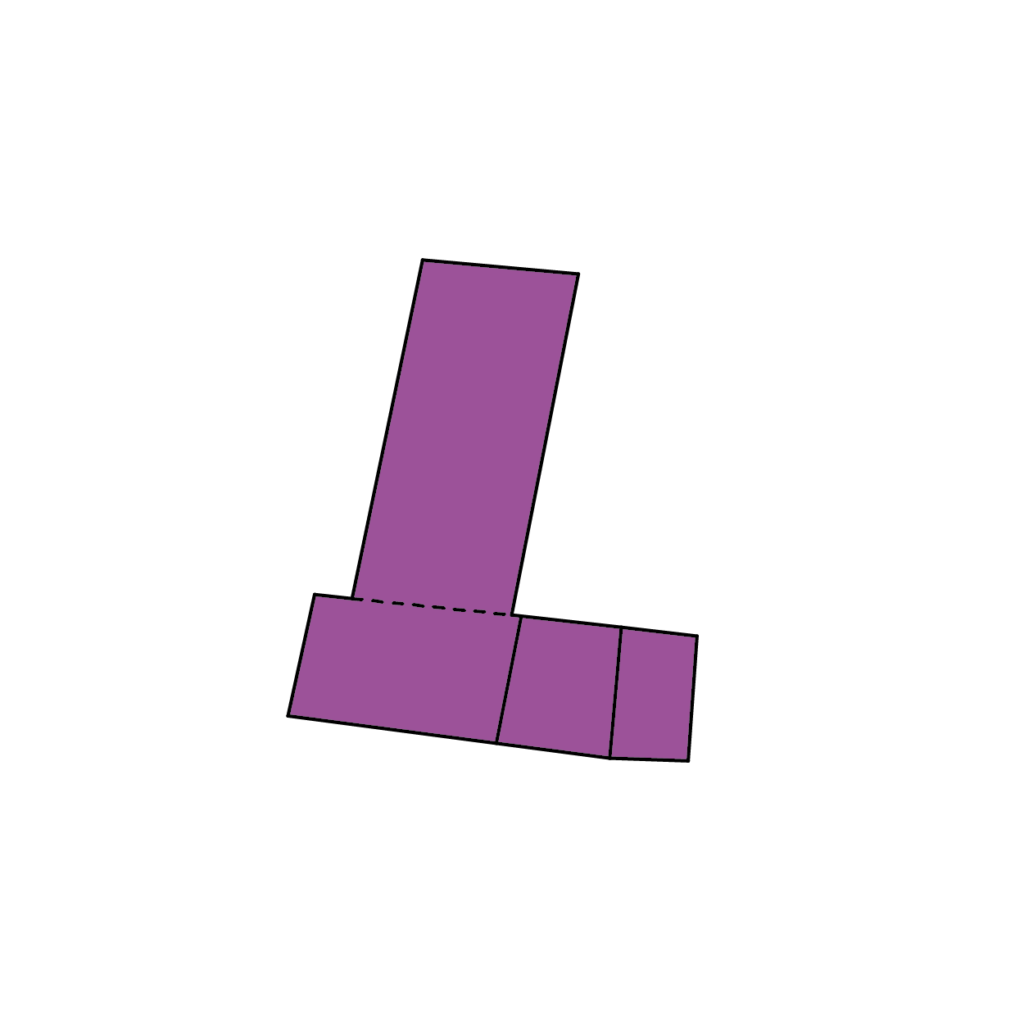
Lift the square piece and fold the long strip underneath it.
14. Locking the Ring: Tuck the Square Piece’s Bottom Flap

Once you have that done, you can close that square piece over the strip of paper and tuck the bottom flap of that square piece into the opening that is in the long strip of paper which will help hold this ring together.
15. Examining the Top View: Assess the Ring’s Structure
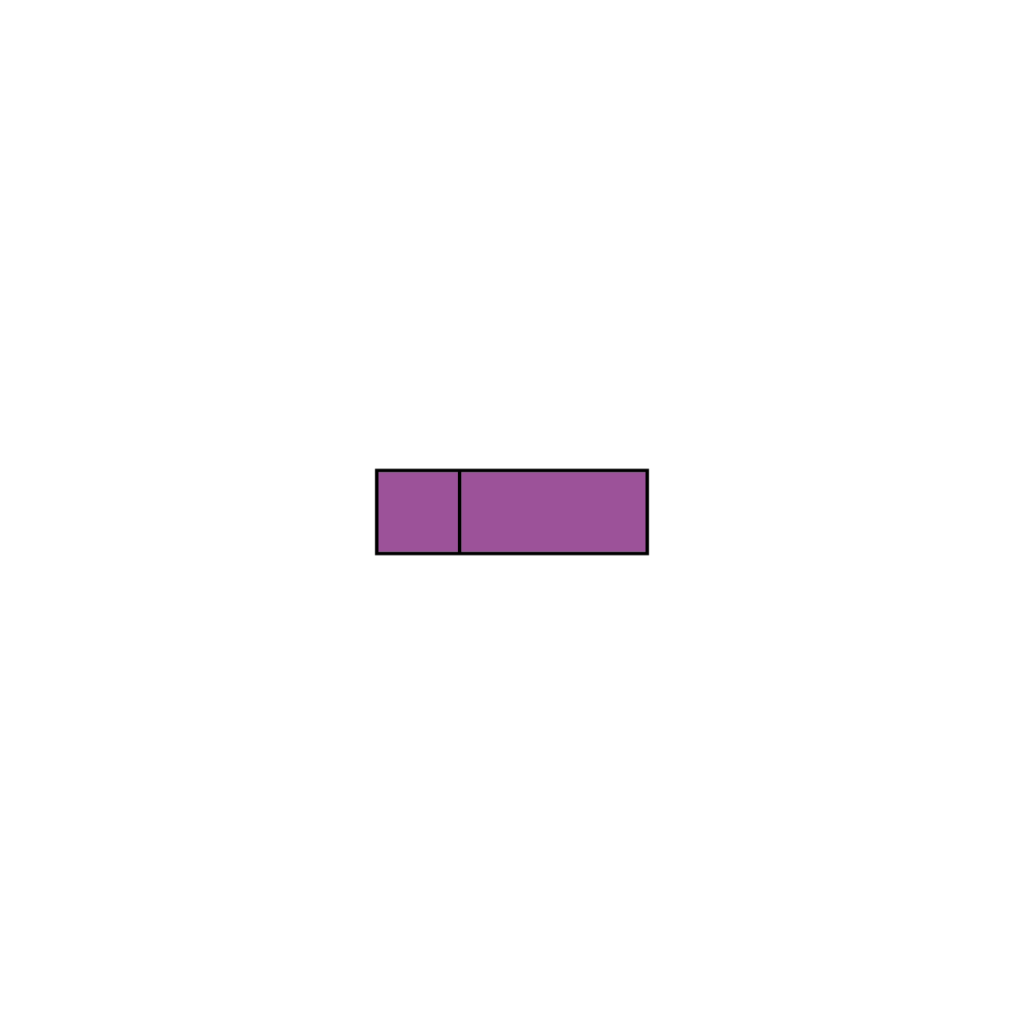
The top view of your ring should display the square piece and the remaining strip of paper, as shown in the diagram.
16. Completing the Ring: Wrap the Strip Through the Loop

Take the remaining strip and wrap it through the ring’s loop, bringing it around to the other side where you’ll tuck the final piece of the strip into the pocket you’ve created for it.
17. Admiring Your Finished Product: A Complete Paper Ring

After completing the above steps, you should have a beautiful, shiny paper ring! Enjoy your new handmade accessory.
There you go! You should be getting quite comfortable with this paper ring design! I would hope you have at least 2 origami rings made. It’s always good to practice the same design a few times just to get the practice in and continue to advance your skills in the art of origami! I will say for this particular design, learning through the video would definitely be easier.
It’s a bit difficult to grasp each step through illustration but I tried my best to help you understand and it should be more than possible for you to get it down, it’ll just be a little harder than the video. Now, down below you’ll find the same instructions as above but in a downloadable and printable format just in case you need them for future reference.
How To Make An Easy Paper Ring Printable Instructions
That’s it! You’ve now made a paper ring! Whether you want to wear it as a fashion statement or give it to a loved one, this ring is sure to be a hit.
Thanks for following along, and I hope you had as much fun making it as I did. Make sure you check out all the other cool origami designs I have on this site to continue to grow your origami skills! Happy folding!

