Do you want to impress your friends and family with an origami crown that you made yourself? If so, then you have come to the right place! In this guide, we will teach you how to make an origami crown using just a few easy and simple steps. I will also provide some tips on how to customize your crown for a unique look. So what are you waiting for? Let’s get started!
How To Make An Origami Crown Video Walkthrough
There you go! This video I have made should make it more than easy enough for you to create your first origami crown! You can use whatever colored paper you’d like and get as creative as possible with the origami design! You can even add jewels to your crown. Really go for it and make this creation unique to you! Now, if you prefer learning a different way other than video instructions, I have put together a step-by-step illustrated guide for this origami crown. Just look below and follow along!
How To Make An Origami Crown Step-By-Step Instructions
1. Folding the Top Corner Downwards
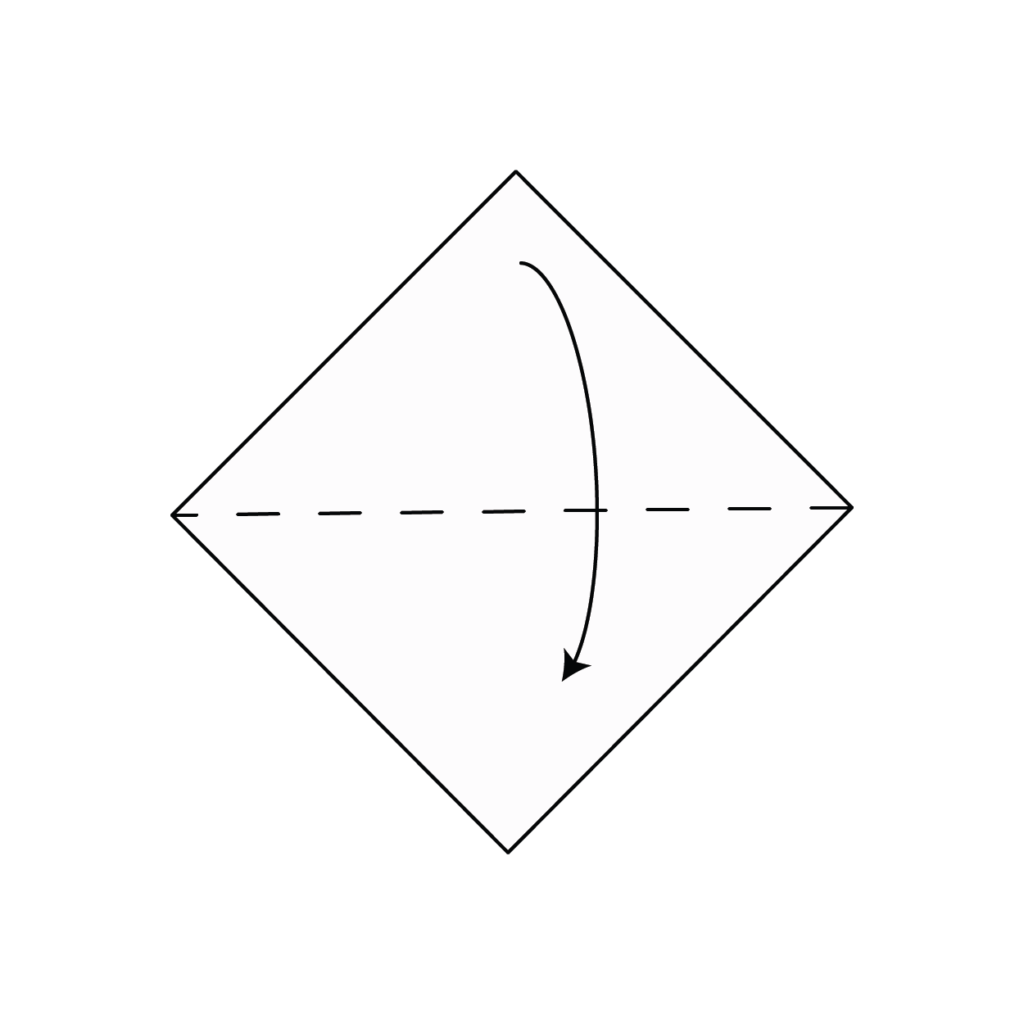
Begin with a square piece of paper and take the top corner, folding it down to meet the bottom corner. This will create a triangle shape. Press the fold firmly to create a sharp crease.
2. Folding the Triangle in Half
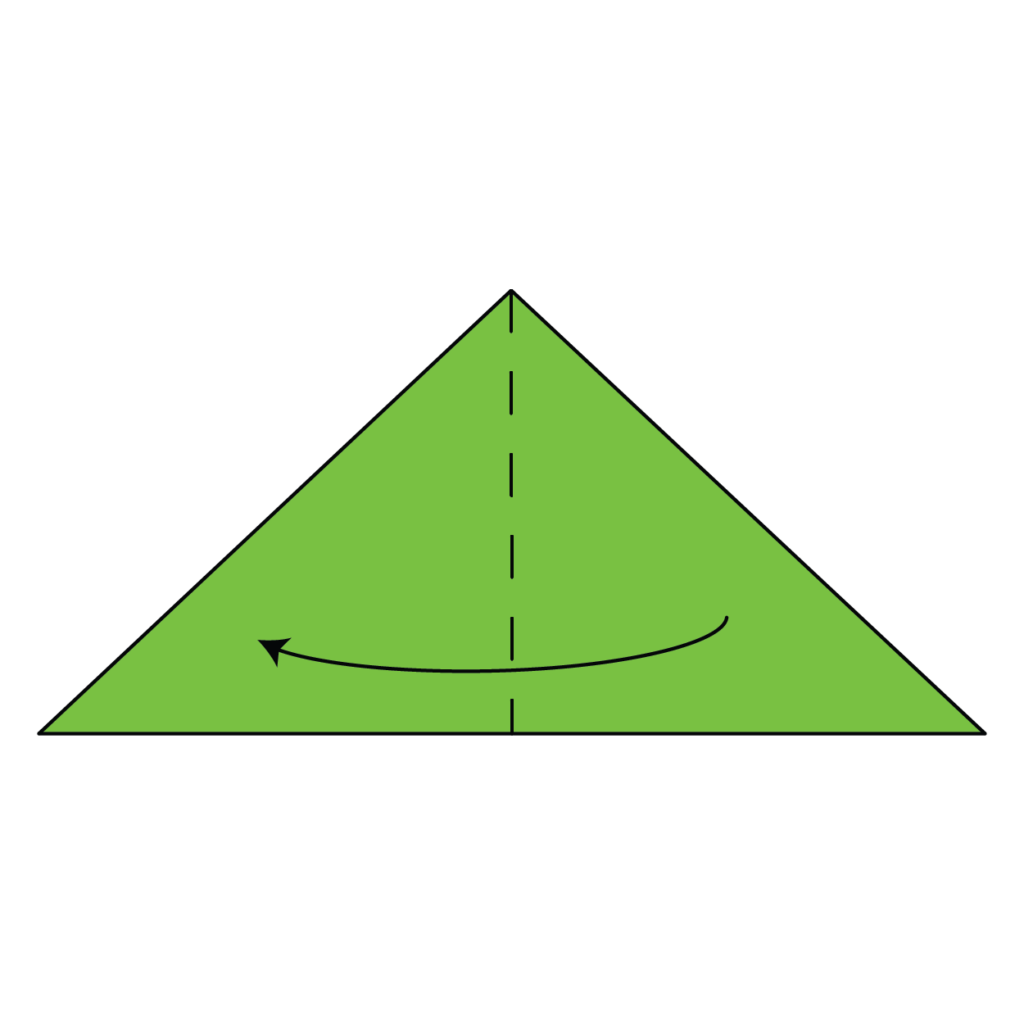
Take your newly formed triangle and fold it in half along the dotted line, making sure the corners are aligned. Press the fold firmly for a sharp crease.
3. Unfolding the Paper
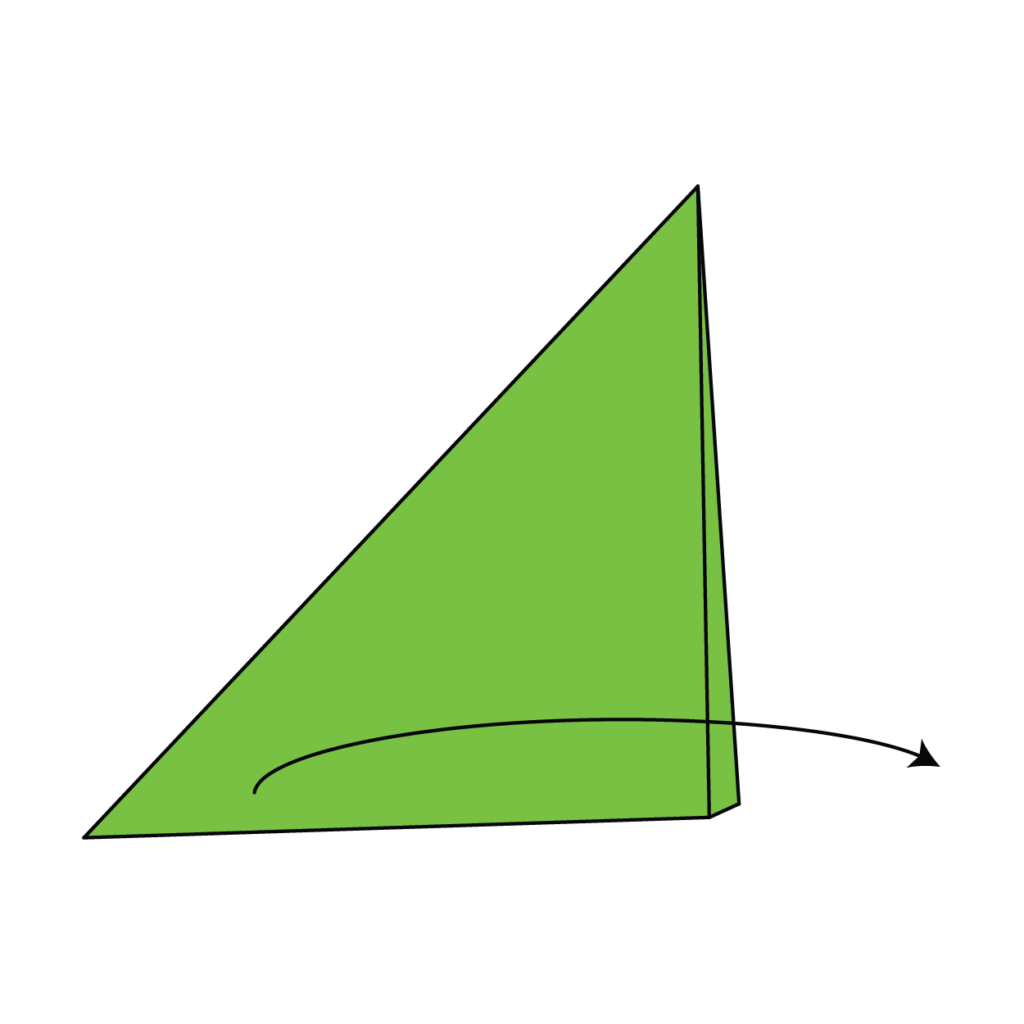
Carefully unfold the paper back to the larger triangle shape, revealing the creases from the previous folds.
4. Checking the Shape

Ensure that your paper now resembles a triangle with a central vertical crease, as shown in the reference image.
5. Creating a Slight Opening
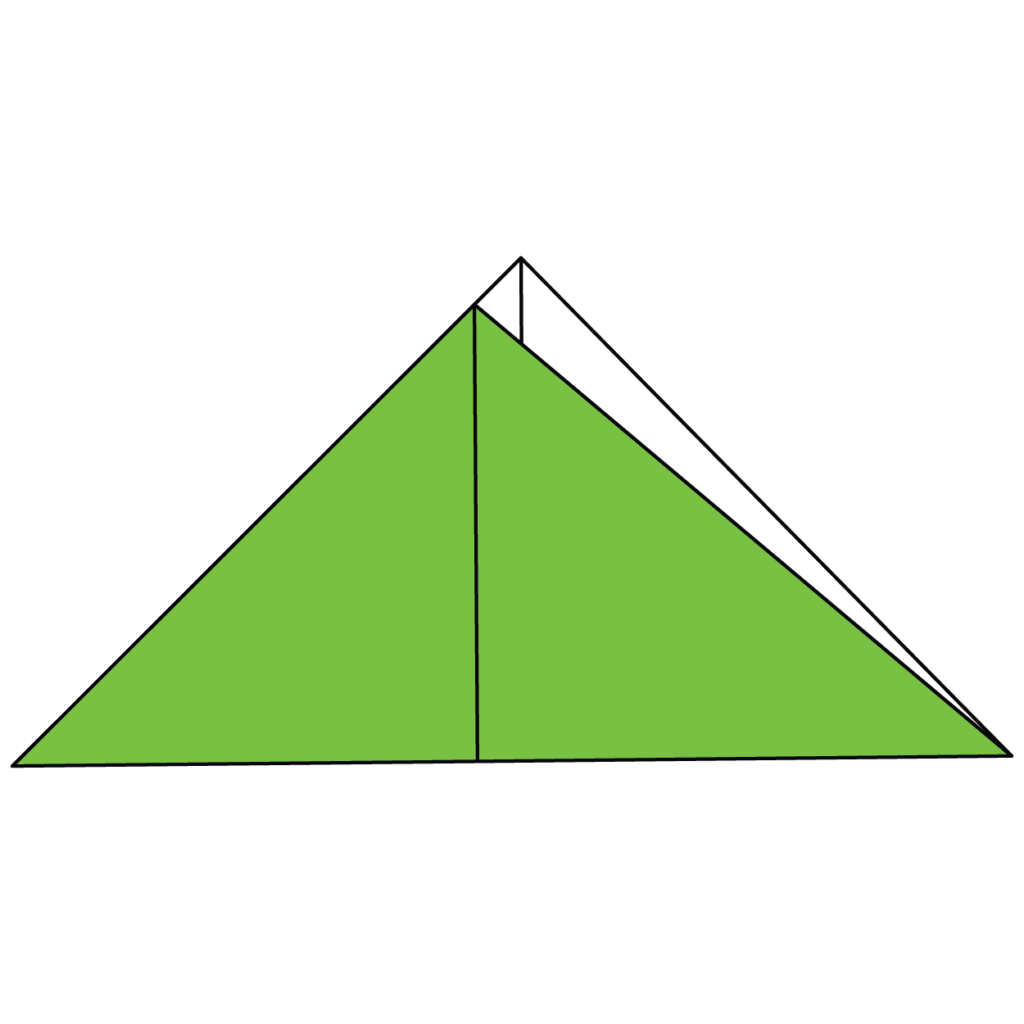
Gently open up your triangle just a little bit, without unfolding it completely. This will prepare the piece for connecting with another triangle.
6. Folding a Second Triangle
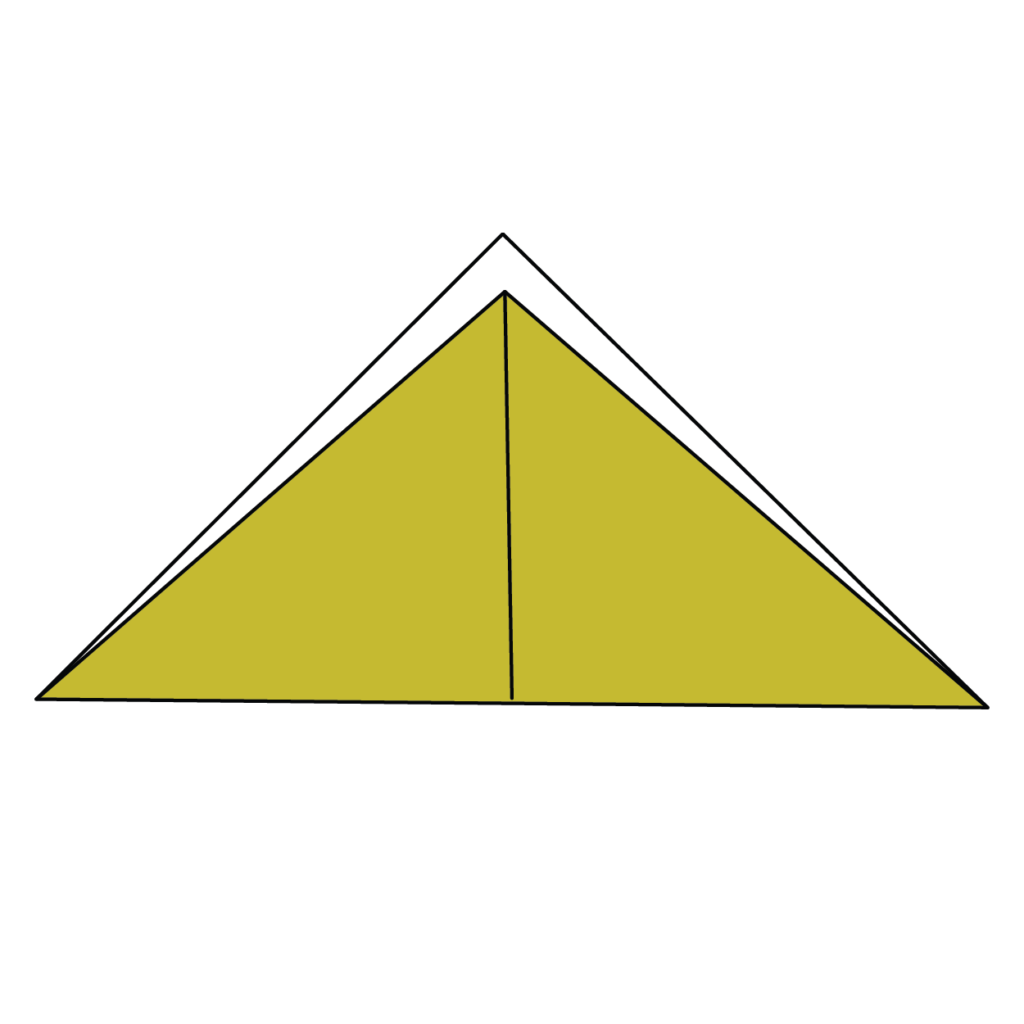
Using a different piece of paper, repeat steps 1 to 5 to create another triangle with a slight opening.
7. Gluing the Triangles Together
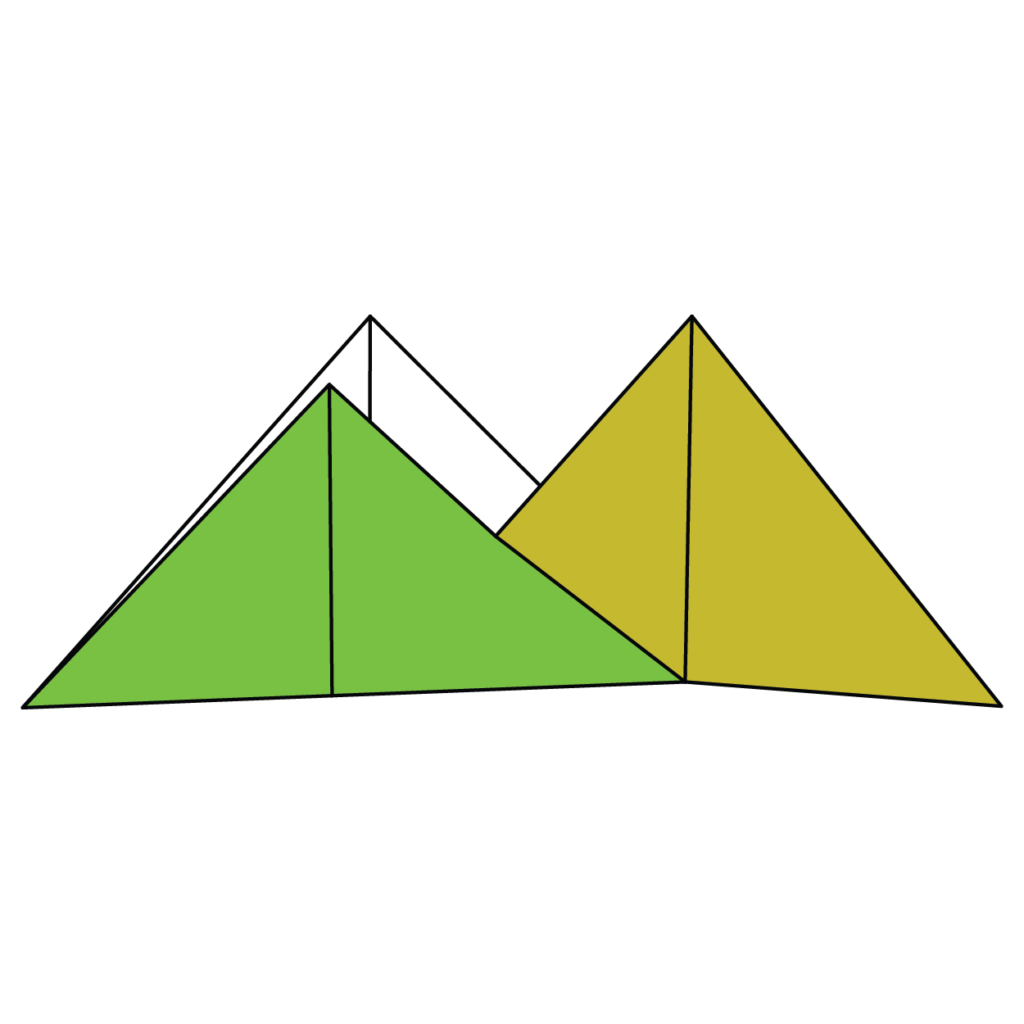
Apply glue to the corners of each triangle, as shown in the reference image, and press the corners together to form a connected structure.
8. Expanding the Origami Crown

Continue to fold more triangles and glue them together, repeating the process until you have reached your desired size for the origami crown. Once completed, you can join the ends to form a circle, creating the finished crown!
Now that you have both a video guide and an illustrated guide, you should be close to a pro at making this origami crown! You should make a few of them just to really get an understanding of this design. Practice really does make perfect in the world of origami! Down below you’ll find the same instructions but in a downloadable and printable format.
How To Make An Origami Crown Printable Instructions
Now that you know how to make an origami crown, check out my other origami creations and keep learning the art of origami! With a little practice, you’ll be able to fold all sorts of different shapes and creatures. Who knows? You might even start designing your own origami models. Thanks for following along with this guide – I hope you had as much fun making your crown as I did!


