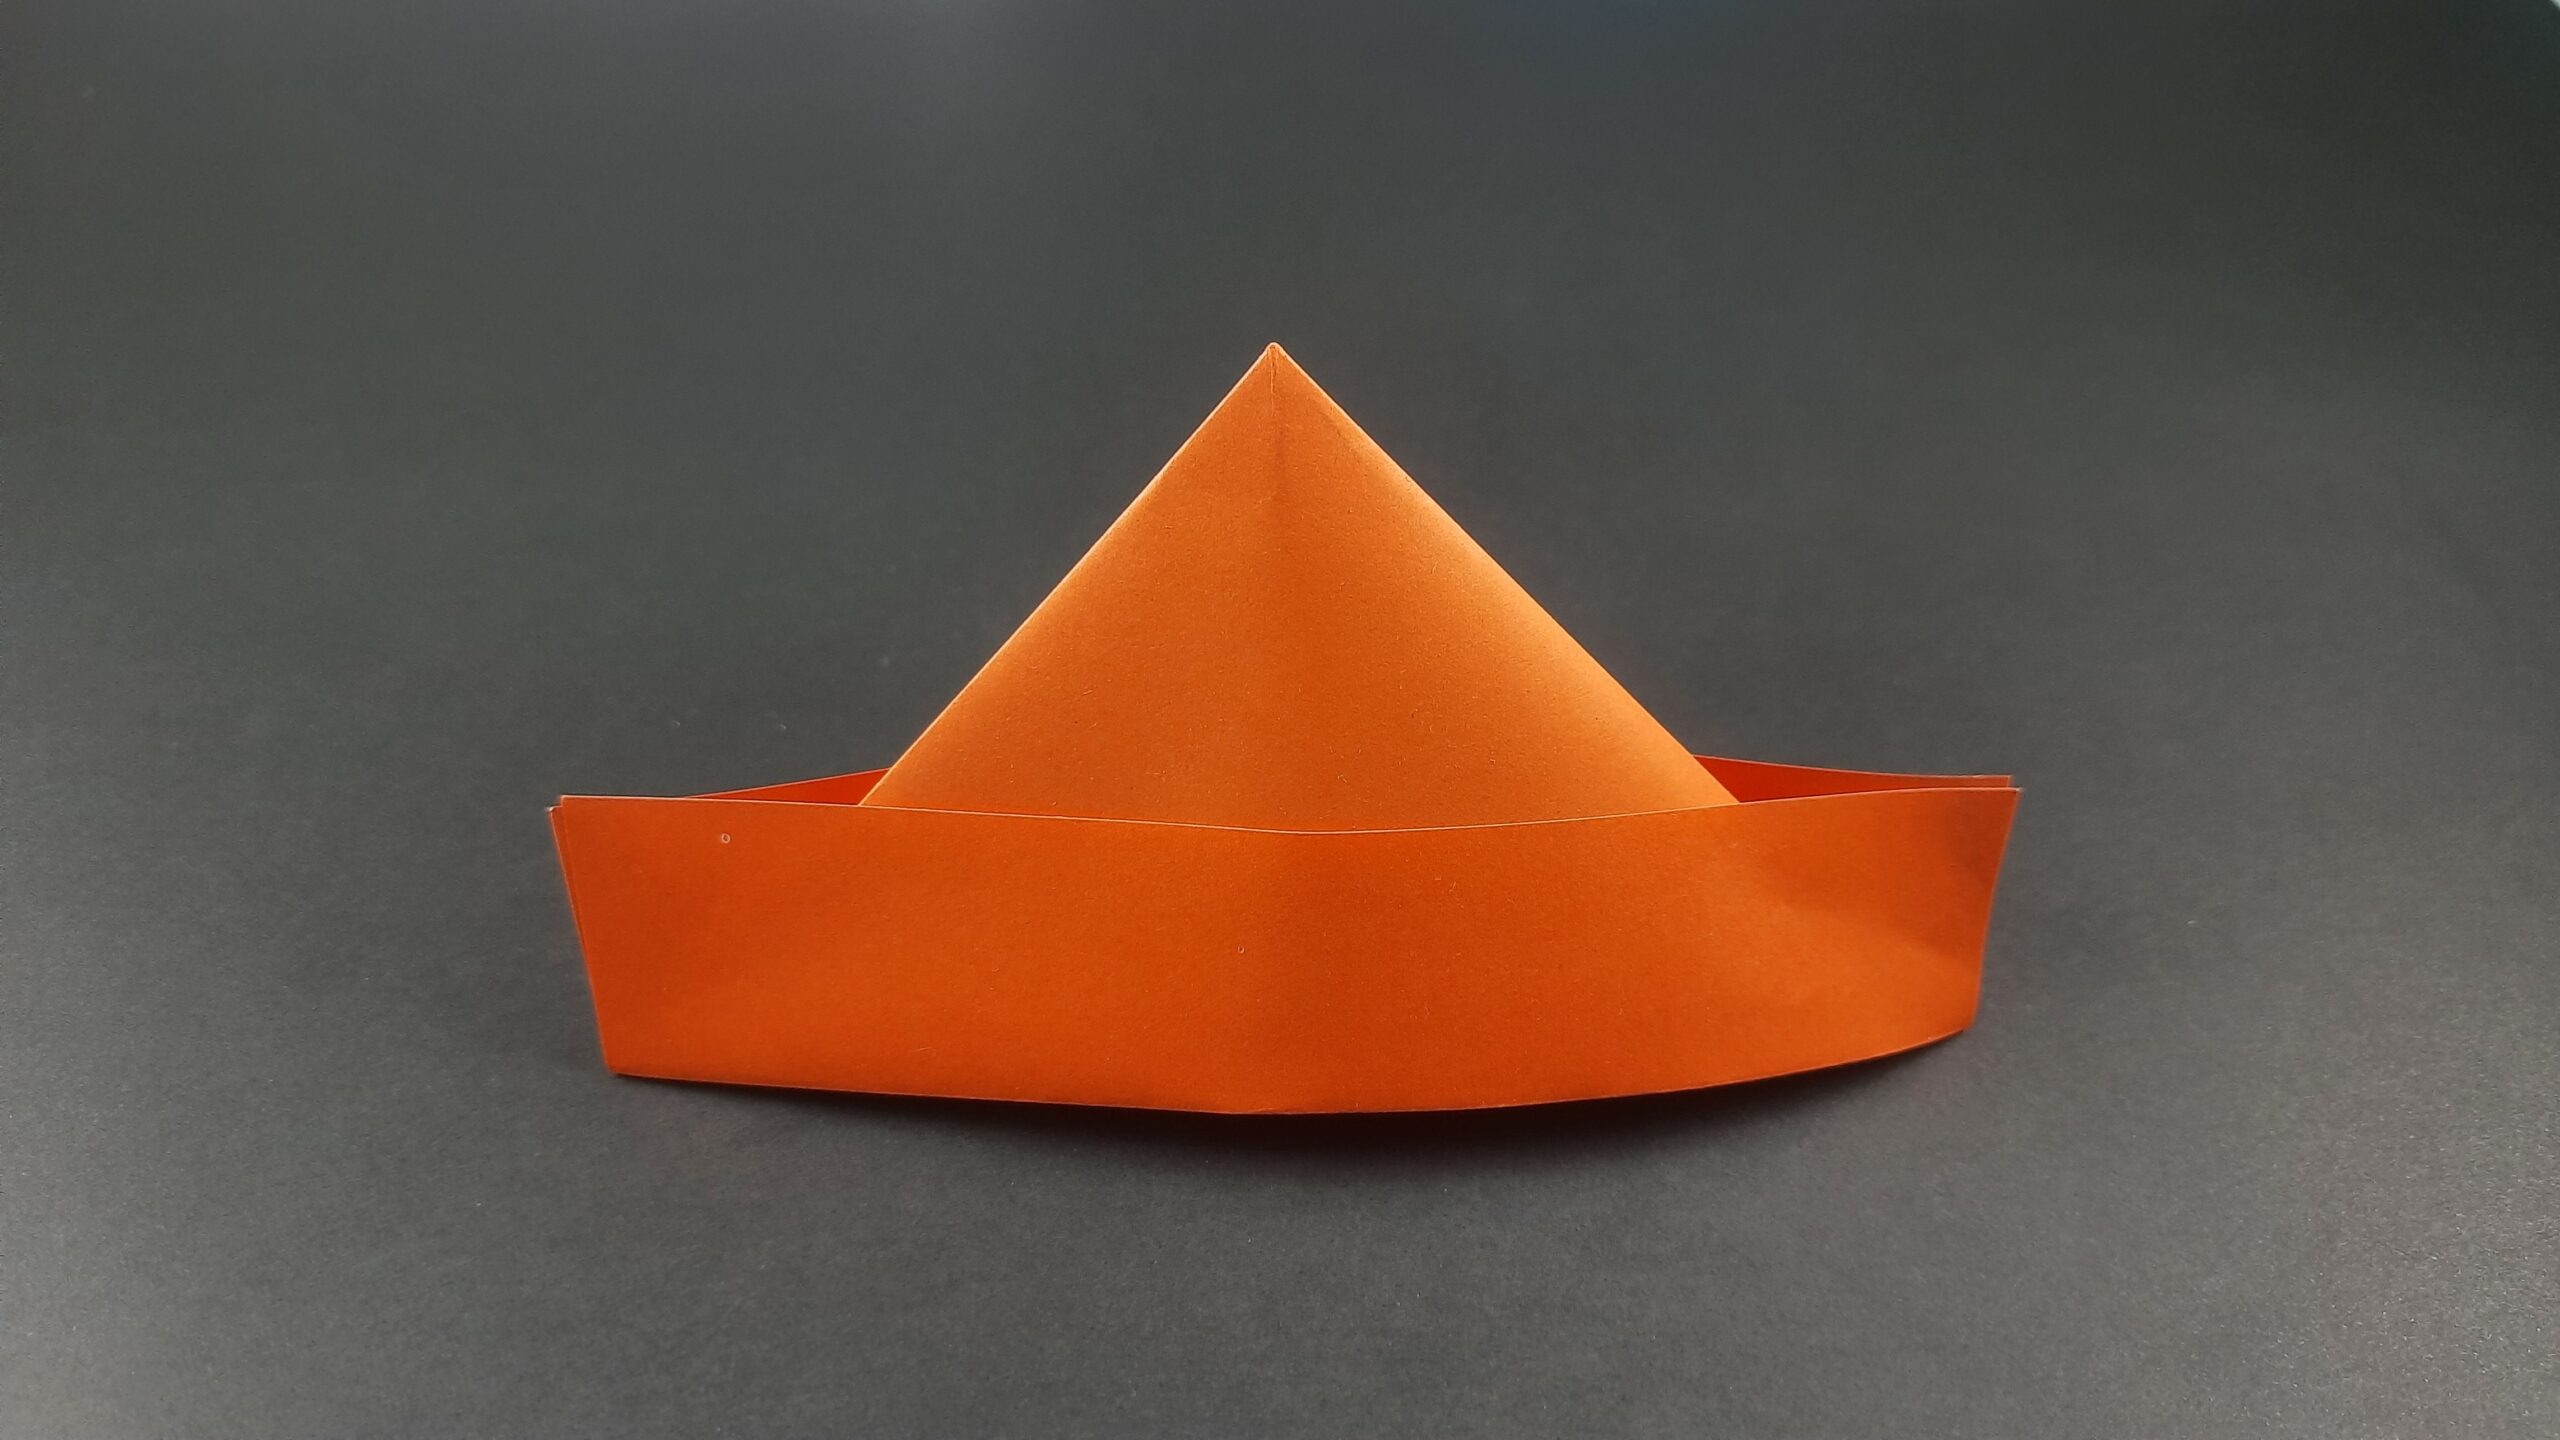
Do you want to learn how to make an origami hat? If so, you’re in luck! This helpful illustrated guide will show you how to create a delightful origami hat in no time.
With just a few simple steps, you’ll be able to impress your friends and family with this fun and easy paper craft. So get ready to fold some hats!
How To Make An Origami Hat Video Walkthrough
There you have it! You should be a pro now at making this simple yet stylish origami hat if you used the video above. You can go ahead and use any colored paper you want and you can also decorate your origami hat to your heart’s content.
If you prefer to learn a different way other than by video I have also prepared a step-by-step illustrated guide down below that is very easy to follow!
- If you enjoyed this design make sure to check out all my other Origami Items!
How To Make An Origami Hat: Step-By-Step Instructions
1. Folding the Printer Paper Vertically
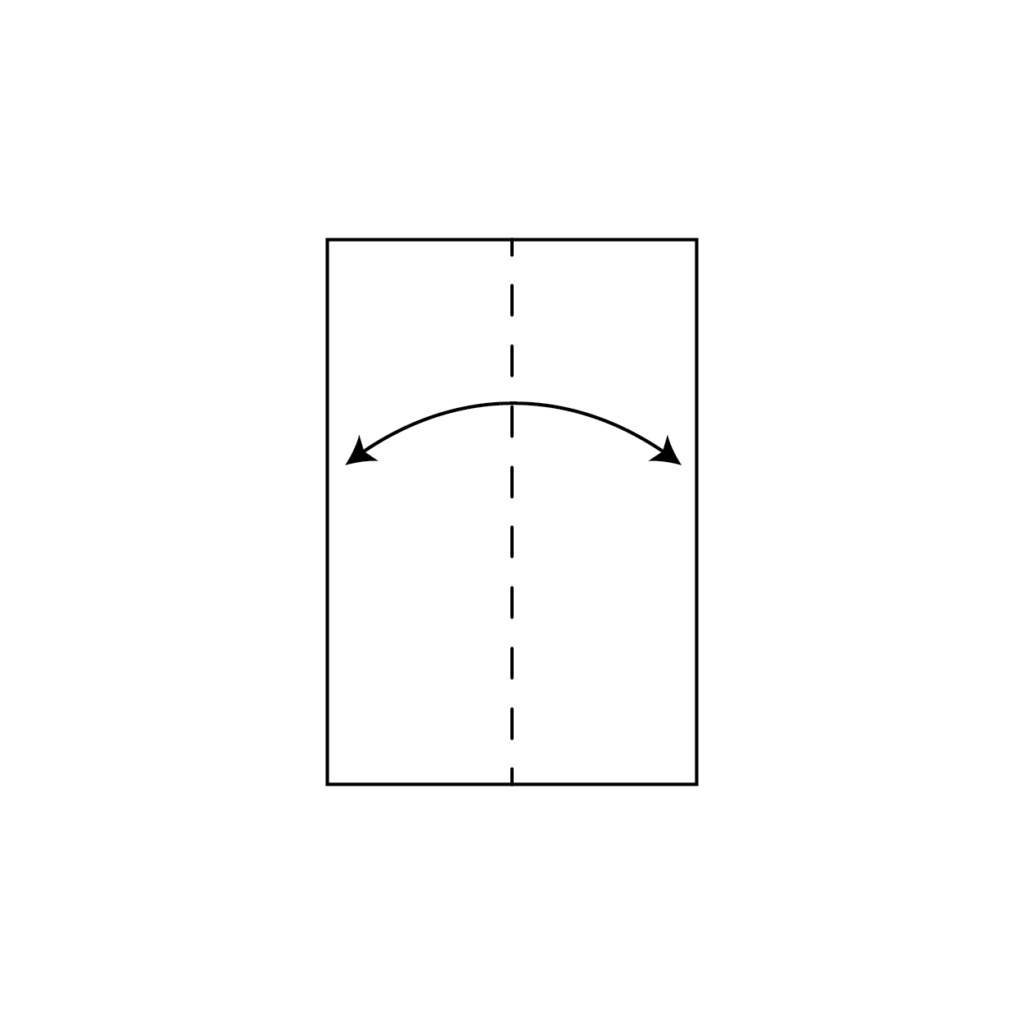
Place a full sheet of printer paper in front of you. Fold the paper in half vertically, then open it back up. Use the dotted line in the reference image as a guide.
2. Folding the Paper Horizontally
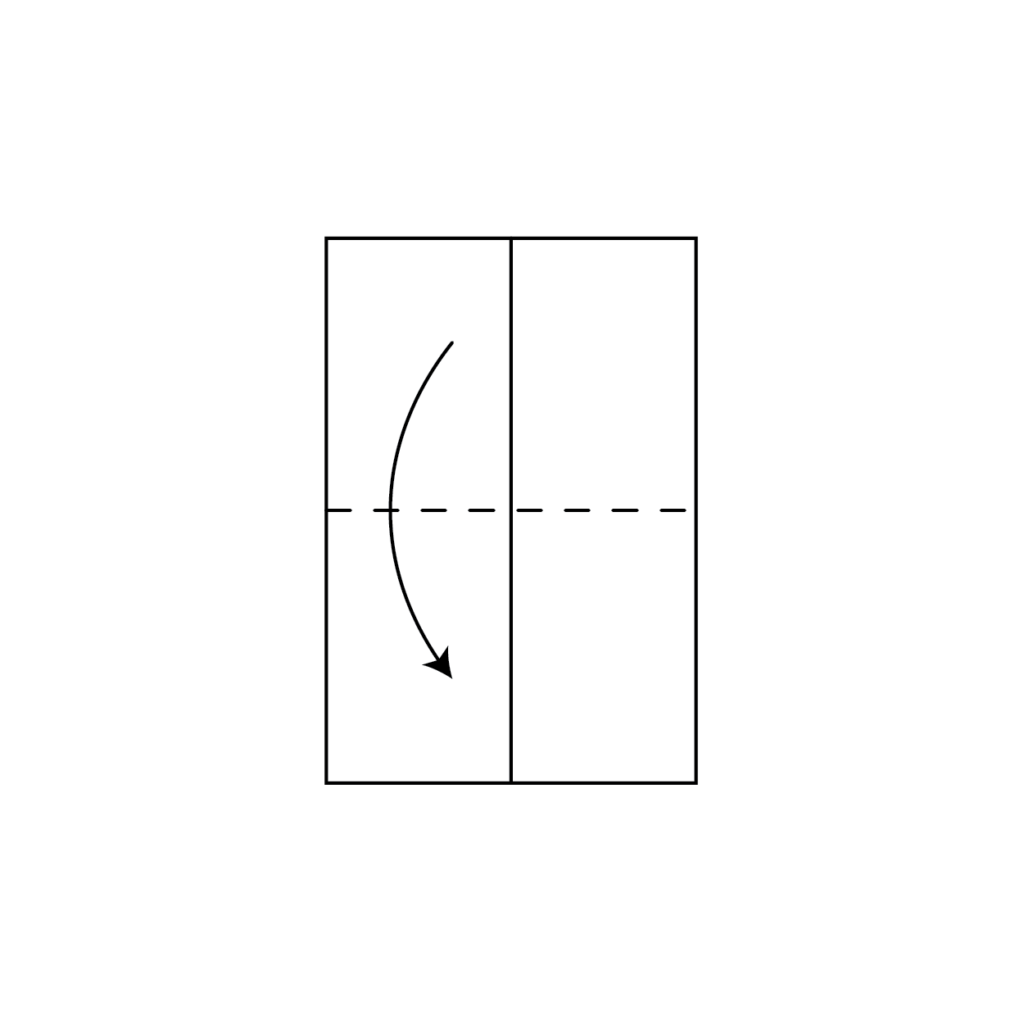
Take the top of the paper and fold it in half horizontally to meet the bottom edge, as shown in the reference image.
3. Folding the Top Corners
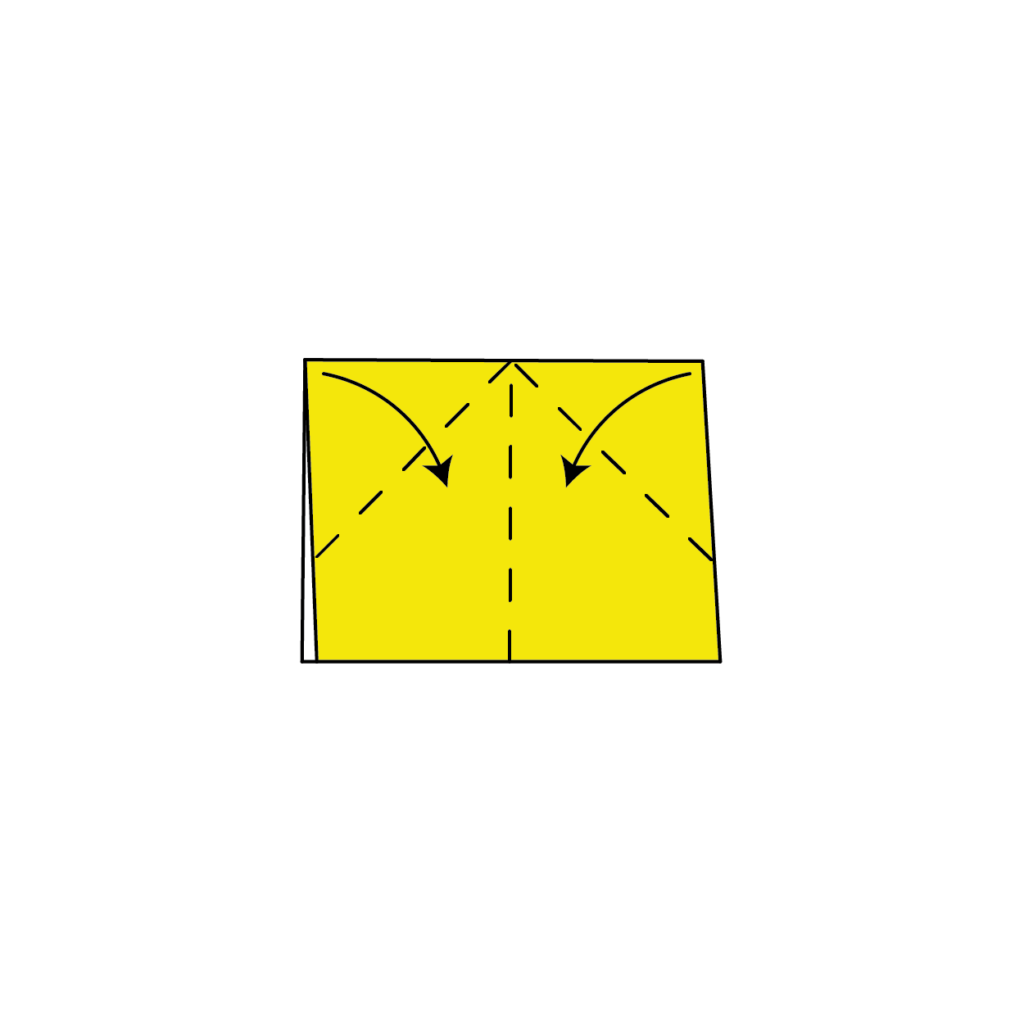
With your paper still folded, take both the top left and right corners and fold them down over the dotted lines as shown above. Almost like you are making the front of a paper airplane. Once you are done you should be left with something that almost resembles a house.
4. Folding the Front Flap Upward
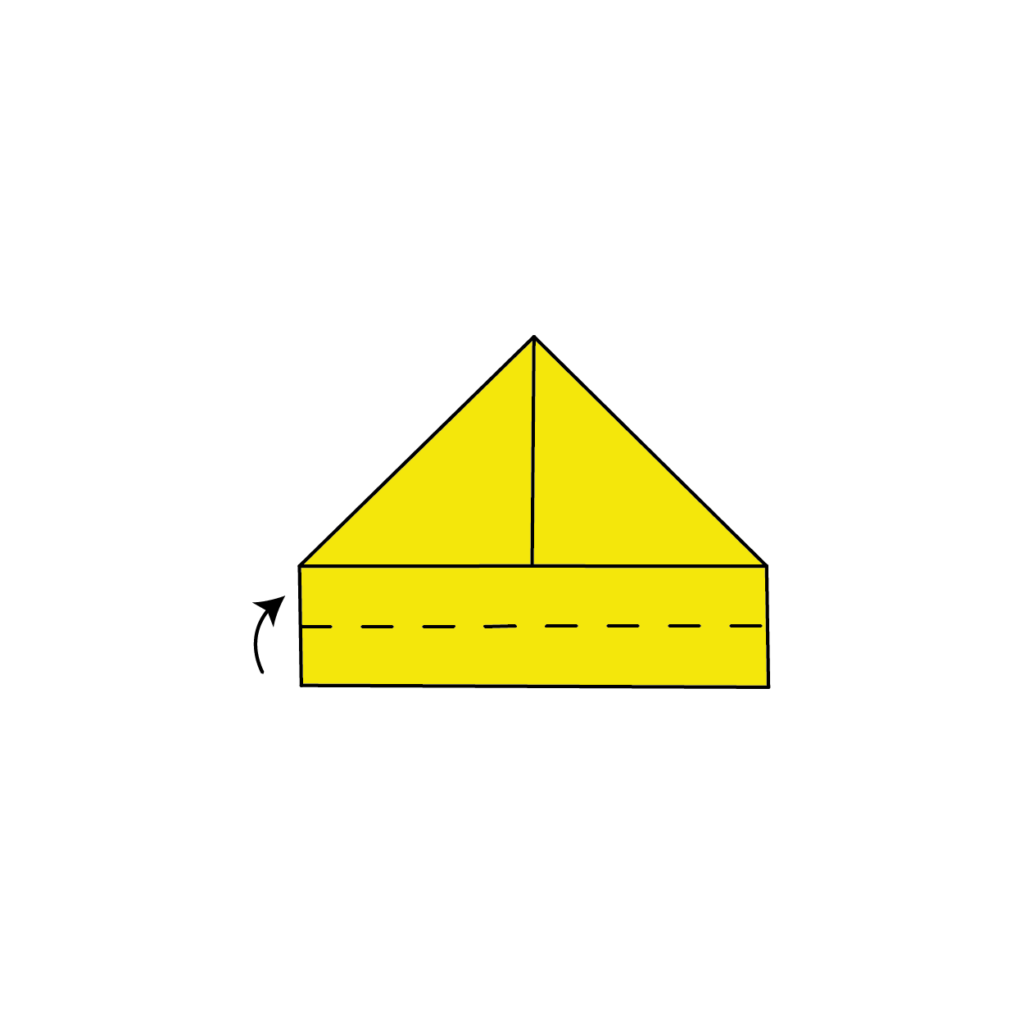
Take the front flap of the two flaps at the bottom and fold it up over the dotted line as shown above. You are not folding it over the two folds you just made yet. This new fold should align with the bottom of the previous fold.
5. Examining the Folded Shape
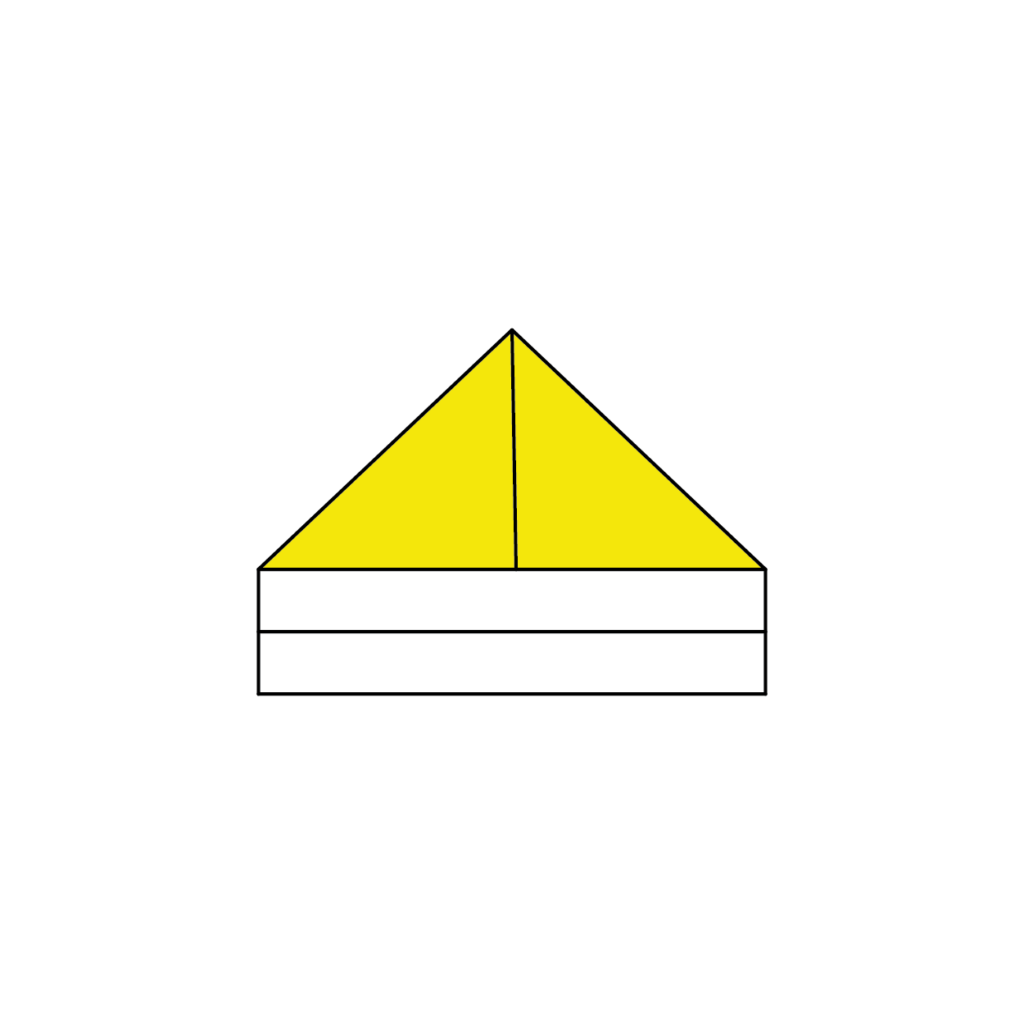
At this point, your folded paper should resemble the shape shown in the reference image.
6. Folding the Front Flap Over the Previous Folds
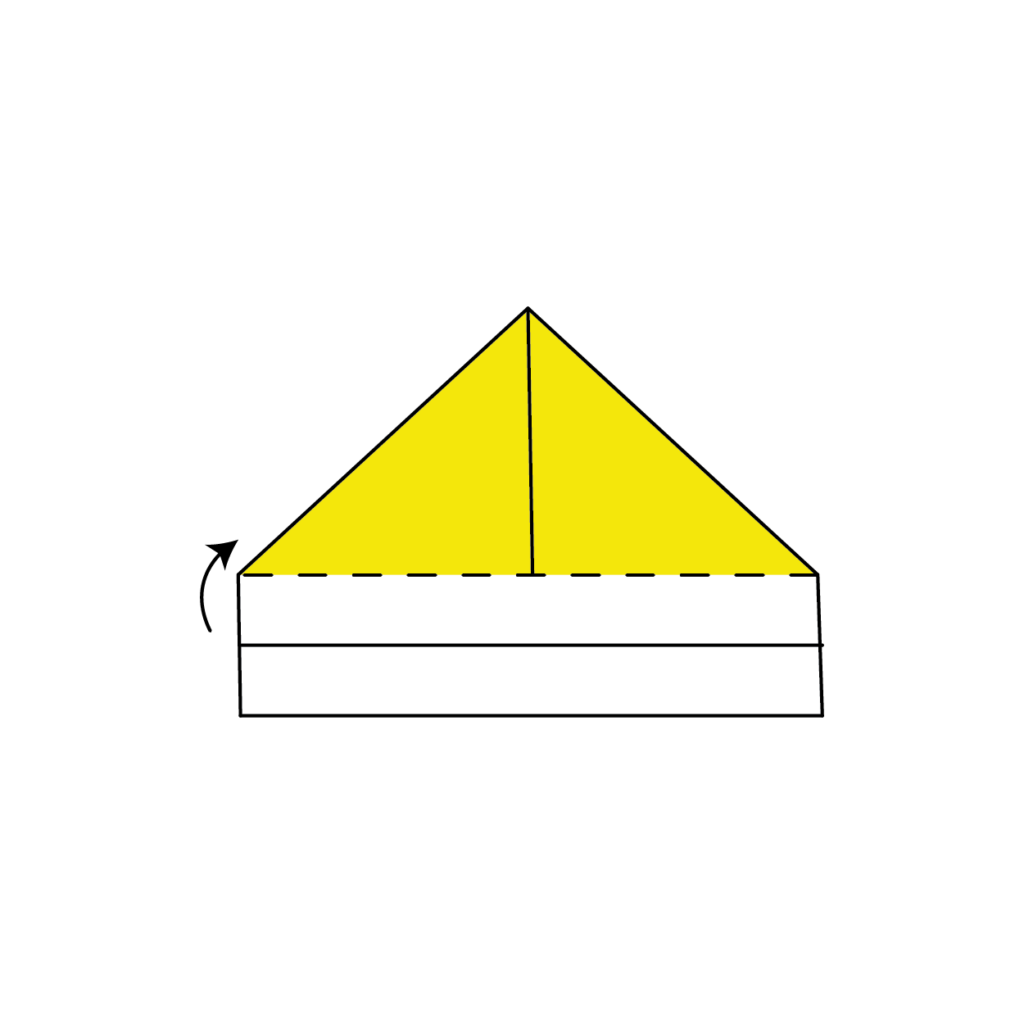
Once again take that same flap but this time fold it up and over the folds, you made in step 3 as shown above. So the two flaps you made in step 3 should now be under this fold you just made.
7. Repeating Steps on the Opposite Side
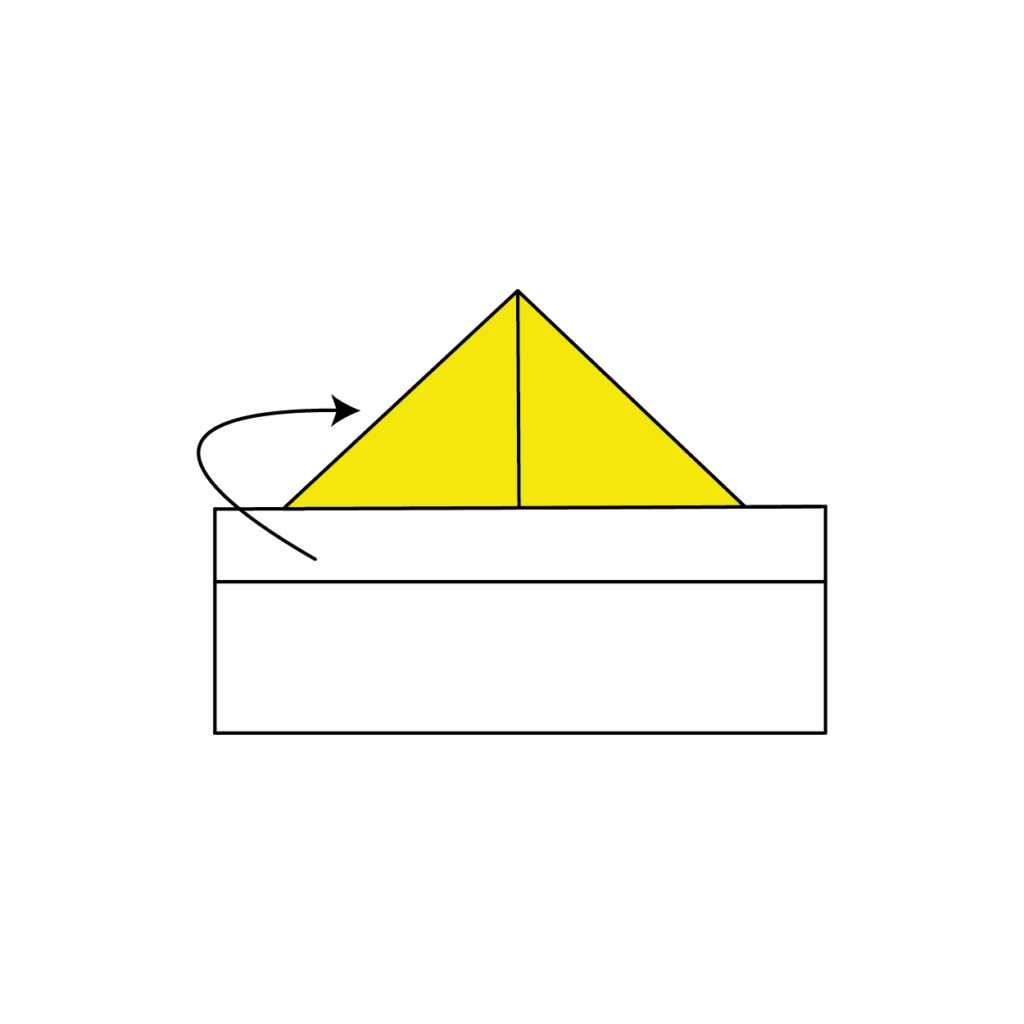
Turn the paper over and repeat steps 4 to 6 on the other side. The folds should align with each other once completed.
8. Opening the Origami Hat
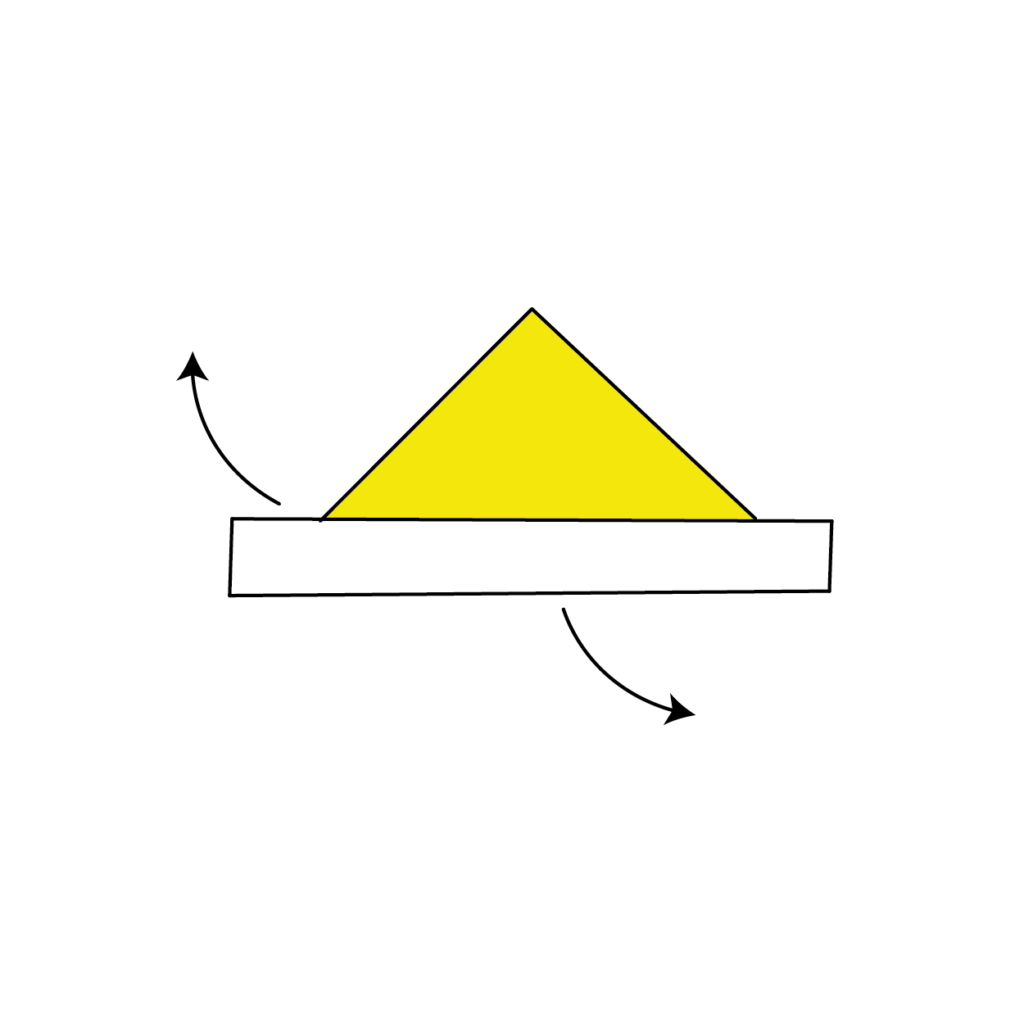
Gently open the hat by pulling outward on the pocket you’ve created. Optionally, fold the corners of the white strip in the reference image inwards to give the hat a smoother shape. This step is not necessary but adds a polished appearance.
9. Admiring the Final Origami Hat

Congratulations! You have successfully completed your origami hat. Take a moment to admire your handiwork and consider making more hats to share with friends and family.
There you go! If you enjoy instructions more than videos I hope that these were simple and easy to follow! You now have a video and an illustrated set of instructions for how to make an origami hat!
You should practice this origami creation a few times till you master it and leave no room for error! But most importantly, have fun with it! Below you’ll find the same instructions but in one large printable graphic!
How To Make An Origami Hat Printable Instructions
As you can see, it’s not too difficult to make a basic origami hat once you know the steps. If you want to keep learning the art of origami, be sure to check out my other origami creations and tutorials.
And who knows – maybe your next project will be an origami tiara or crown! Have fun folding and best wishes with your new paper hat.
