Origami can be a fun and rewarding activity for anyone, regardless of experience. In this blog post, I will show you how to make an easy origami cat face using a few simple steps. This project is perfect for beginners, and it is sure to bring a smile to your face! Let’s get started!
How To Make An Easy Origami Cat Face Video Walkthrough
There you have it! An easy-to-follow video guide on how to make your very first origami cat face! This is a super simple project that anyone can follow along too. Use any colored paper you want and the fun thing about this creation is you can draw your cat face to look however you please!
Get as creative as you can with this project! Next up, if you prefer learning with something other than videos I have prepared a step-by-step illustrated guide to help you out right below!
Like this design? Check out all my other Origami Animals!
How To Make An Easy Origami Cat Face: Step-By-Step Instructions
1. Forming a Triangle Base
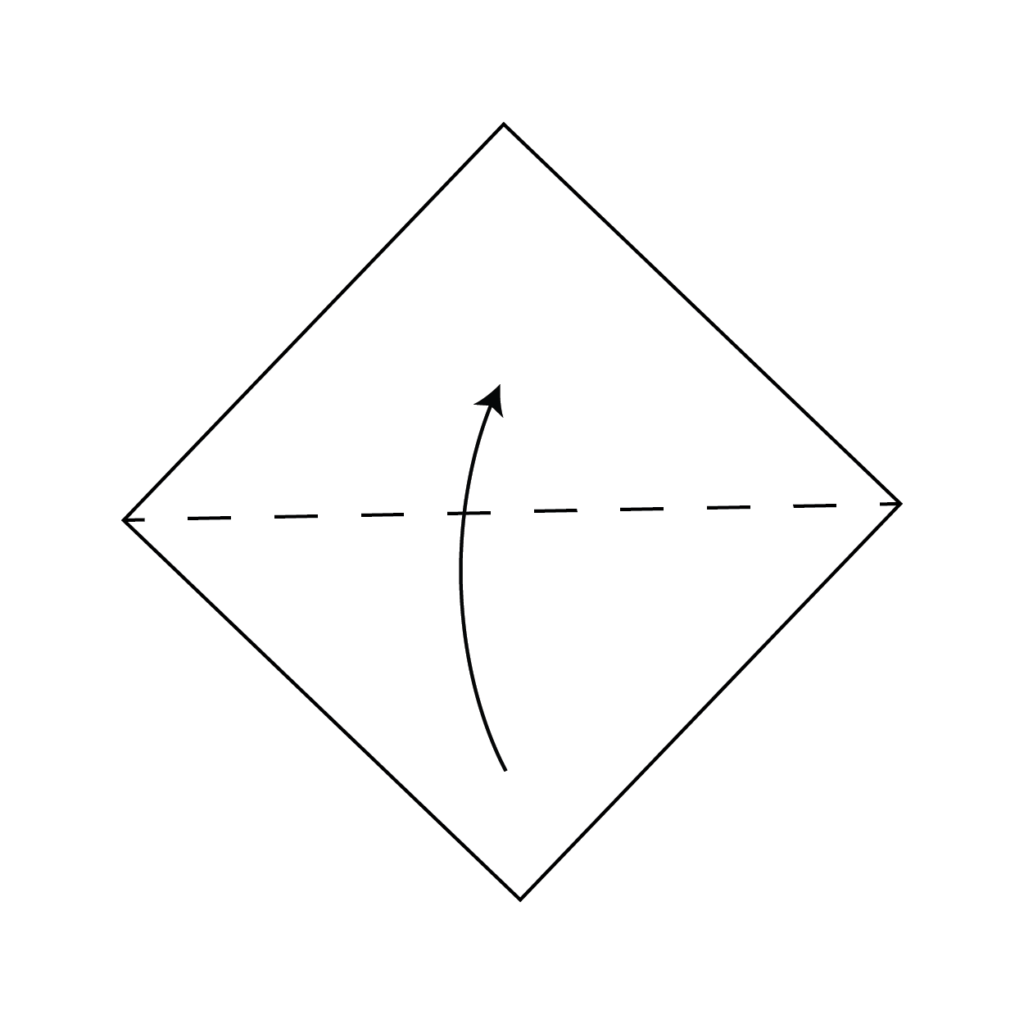
Take the bottom corner of the square paper and fold it up to the top corner of the paper forming a triangle.
2. Pinching the Small Crease
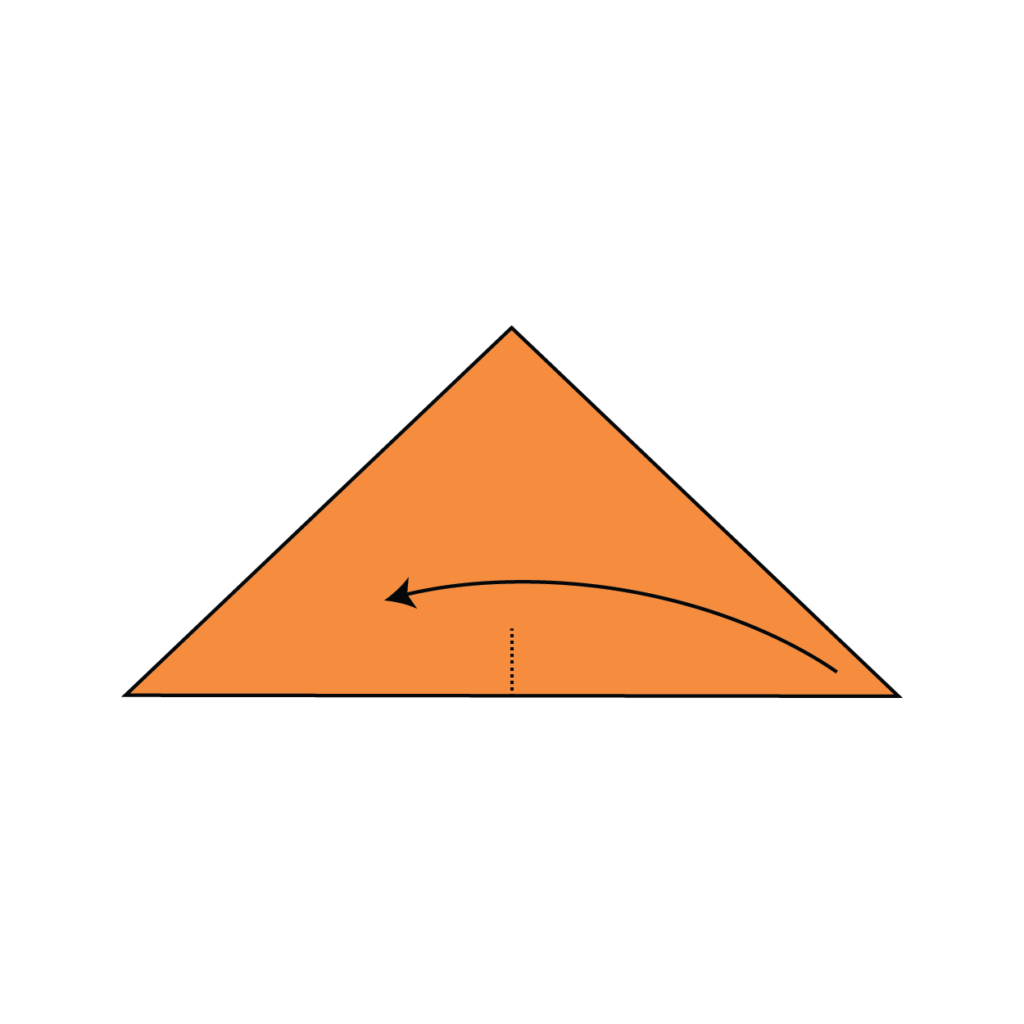
Take the right side of the paper and meet it to the left side and pinch the bottom of the paper to create a small 1-2 inch crease and open the paper back up after.
3. Creating the Right Cat Ear
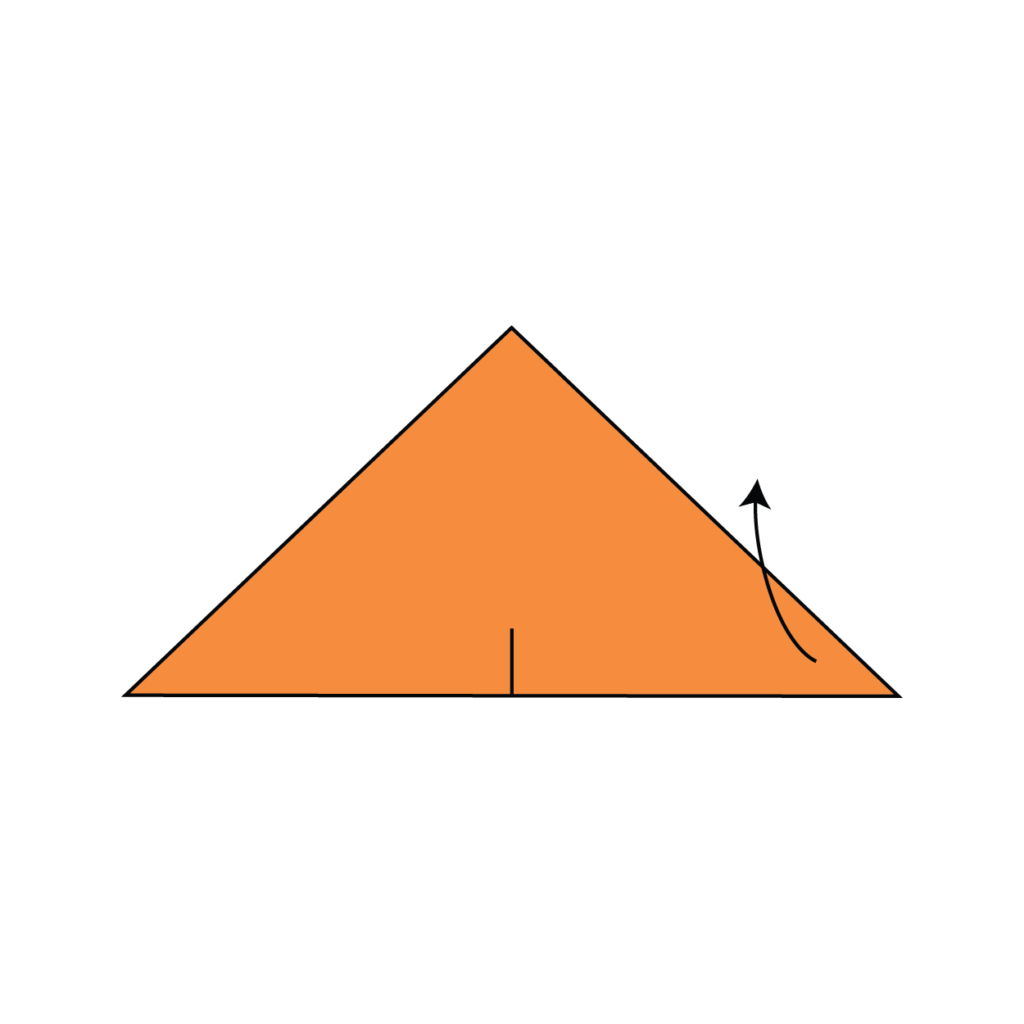
Fold the right side of the paper up at an angle with the bottom of the fold lining up to meet the small crease you just made in the previous step. This will create one of the cat’s ears. Refer to the next image to see what you should end up with.
4. Crafting the Left Cat Ear
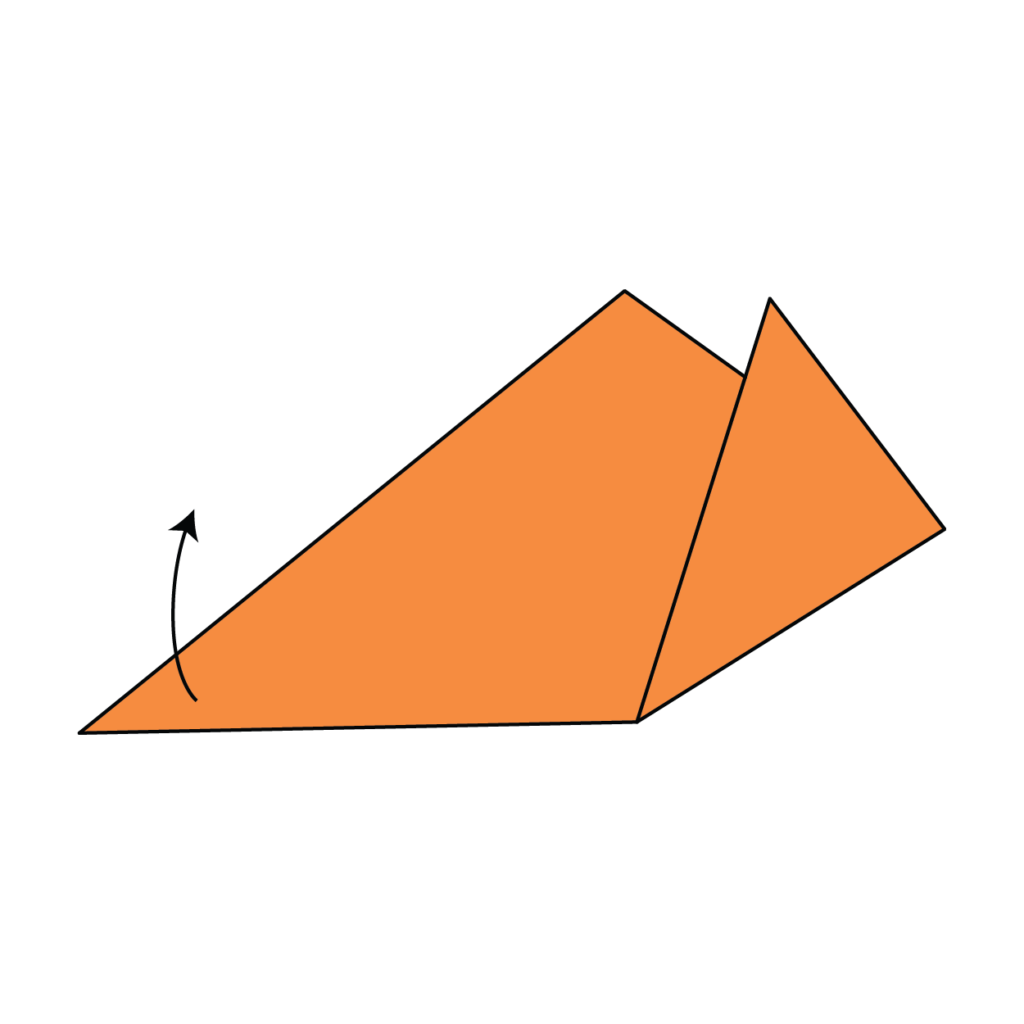
Now that you have the right cat ear done, you are going to repeat the exact same thing you did in step three but on the left side to create the cat’s left ear.
5. Folding the Bottom Corner and Flipping Over
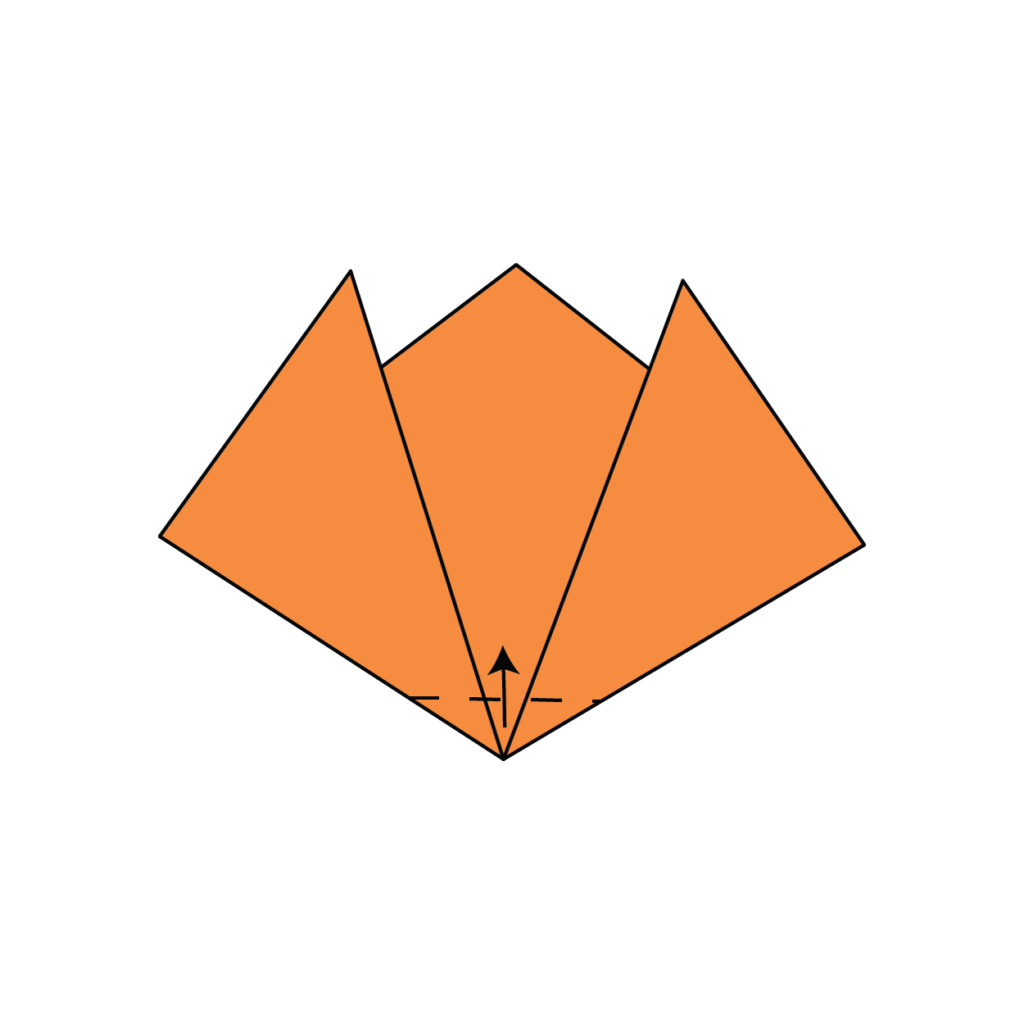
Your origami cat should be looking like this. Now take the bottom corner and fold it up over the dotted line as the image above depicts. Then flip the paper over once you’ve made the fold.
6. Shaping the Cat’s Face
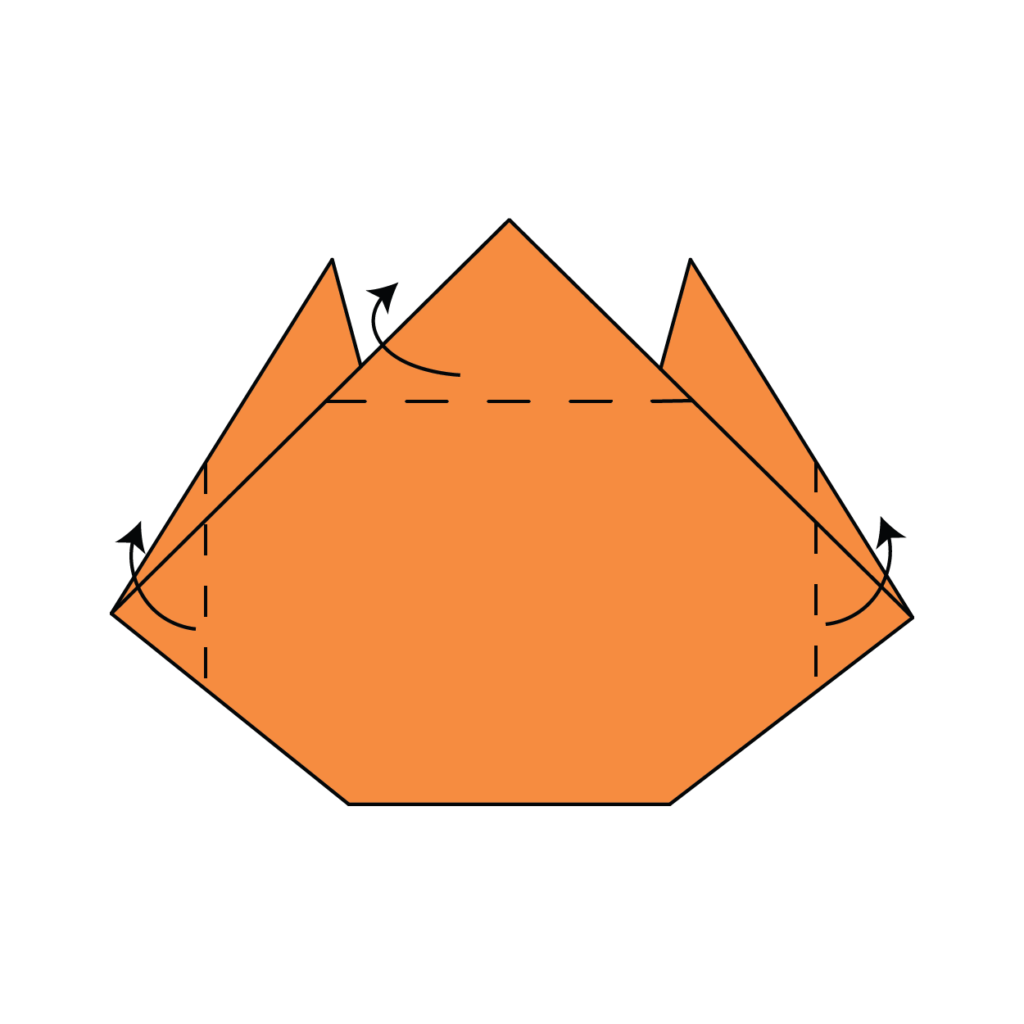
Now for the top, left, and right side of the cat face you are going to fold those points backward. Use the dotted lines in the image above as a reference. These folds are going to give the cat’s face its proper shape.
7. Checking the Back of the Origami Cat Face
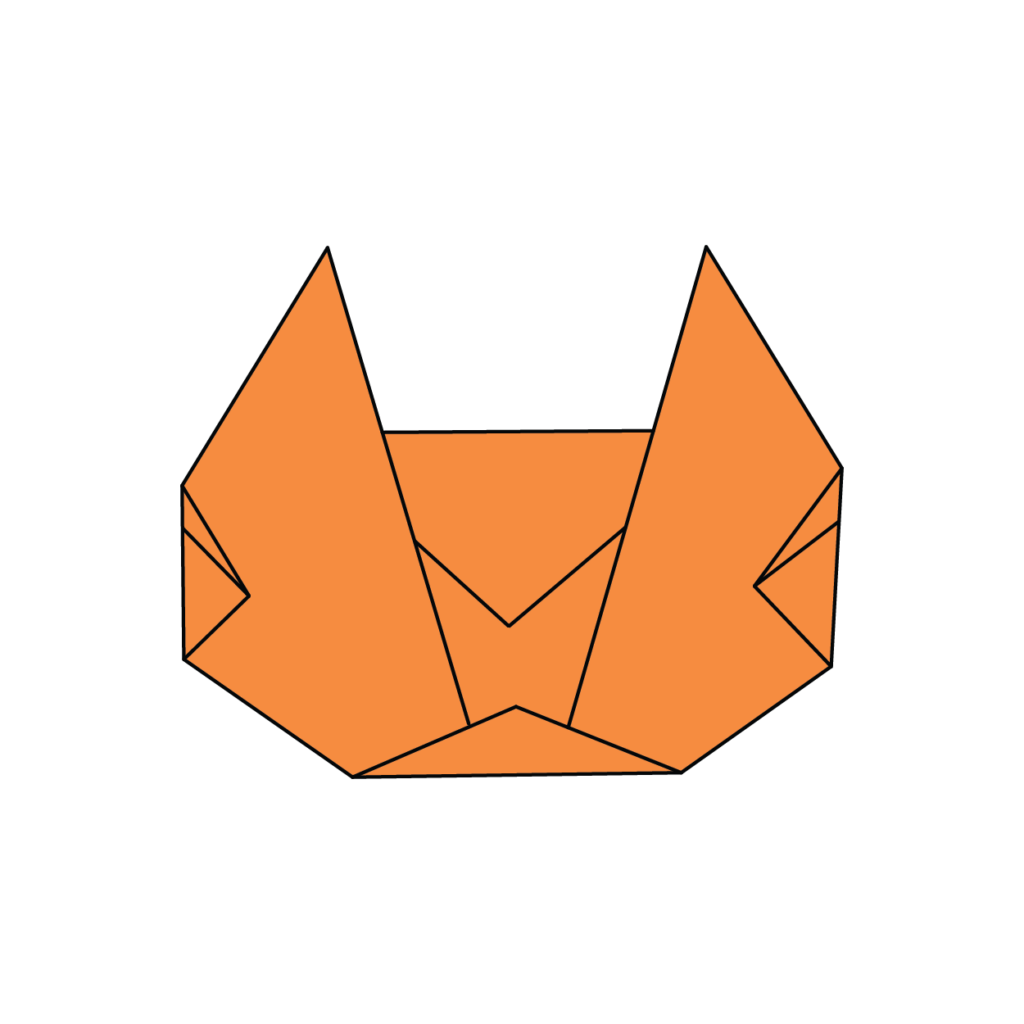
If you flip your origami cat face over to the back then this is what it should look like after all the folds you just made. If it looks like this then you can flip it back over and head to the next/last step.
8. Personalizing the Origami Cat Face
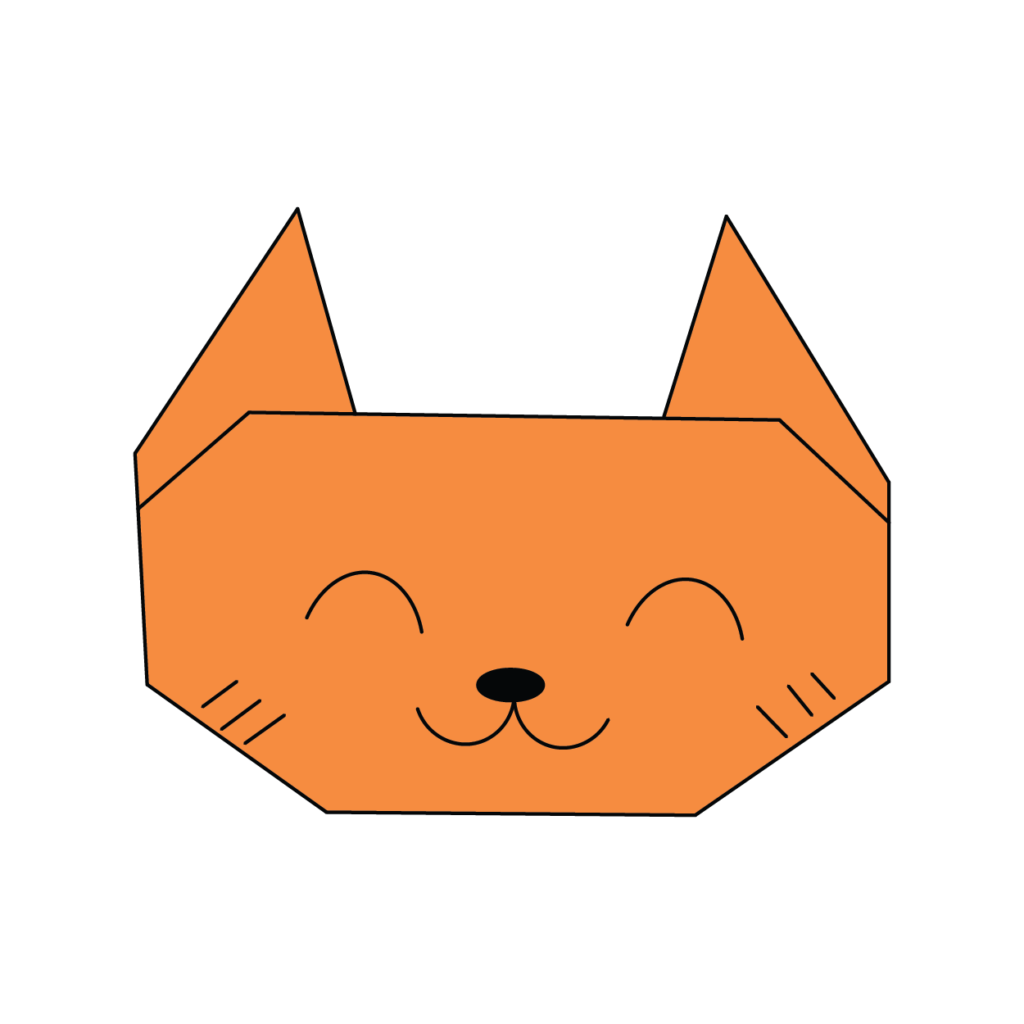
Your origami cat face is complete! Now, use your creativity to draw on the cat’s features and make it uniquely yours.
There you go! If you enjoy instructions more than videos I hope that these were simple and easy to follow! You should be coming close to becoming a pro at making origami cat faces!
Make sure to repeat this project a few times to really perfect and get a hang of it! Below you’ll find the same instructions but in one large printable graphic!
How To Make An Origami Cat Face Printable Instructions
Now that you know how to make an easy origami cat face, check out my other origami creations and keep learning the art of origami.
It’s really not as difficult as it seems and once you get the hang of it, you can create some amazing things. Who knows, maybe your next Origami masterpiece will be a life-sized tiger! Thanks for reading and happy folding!
