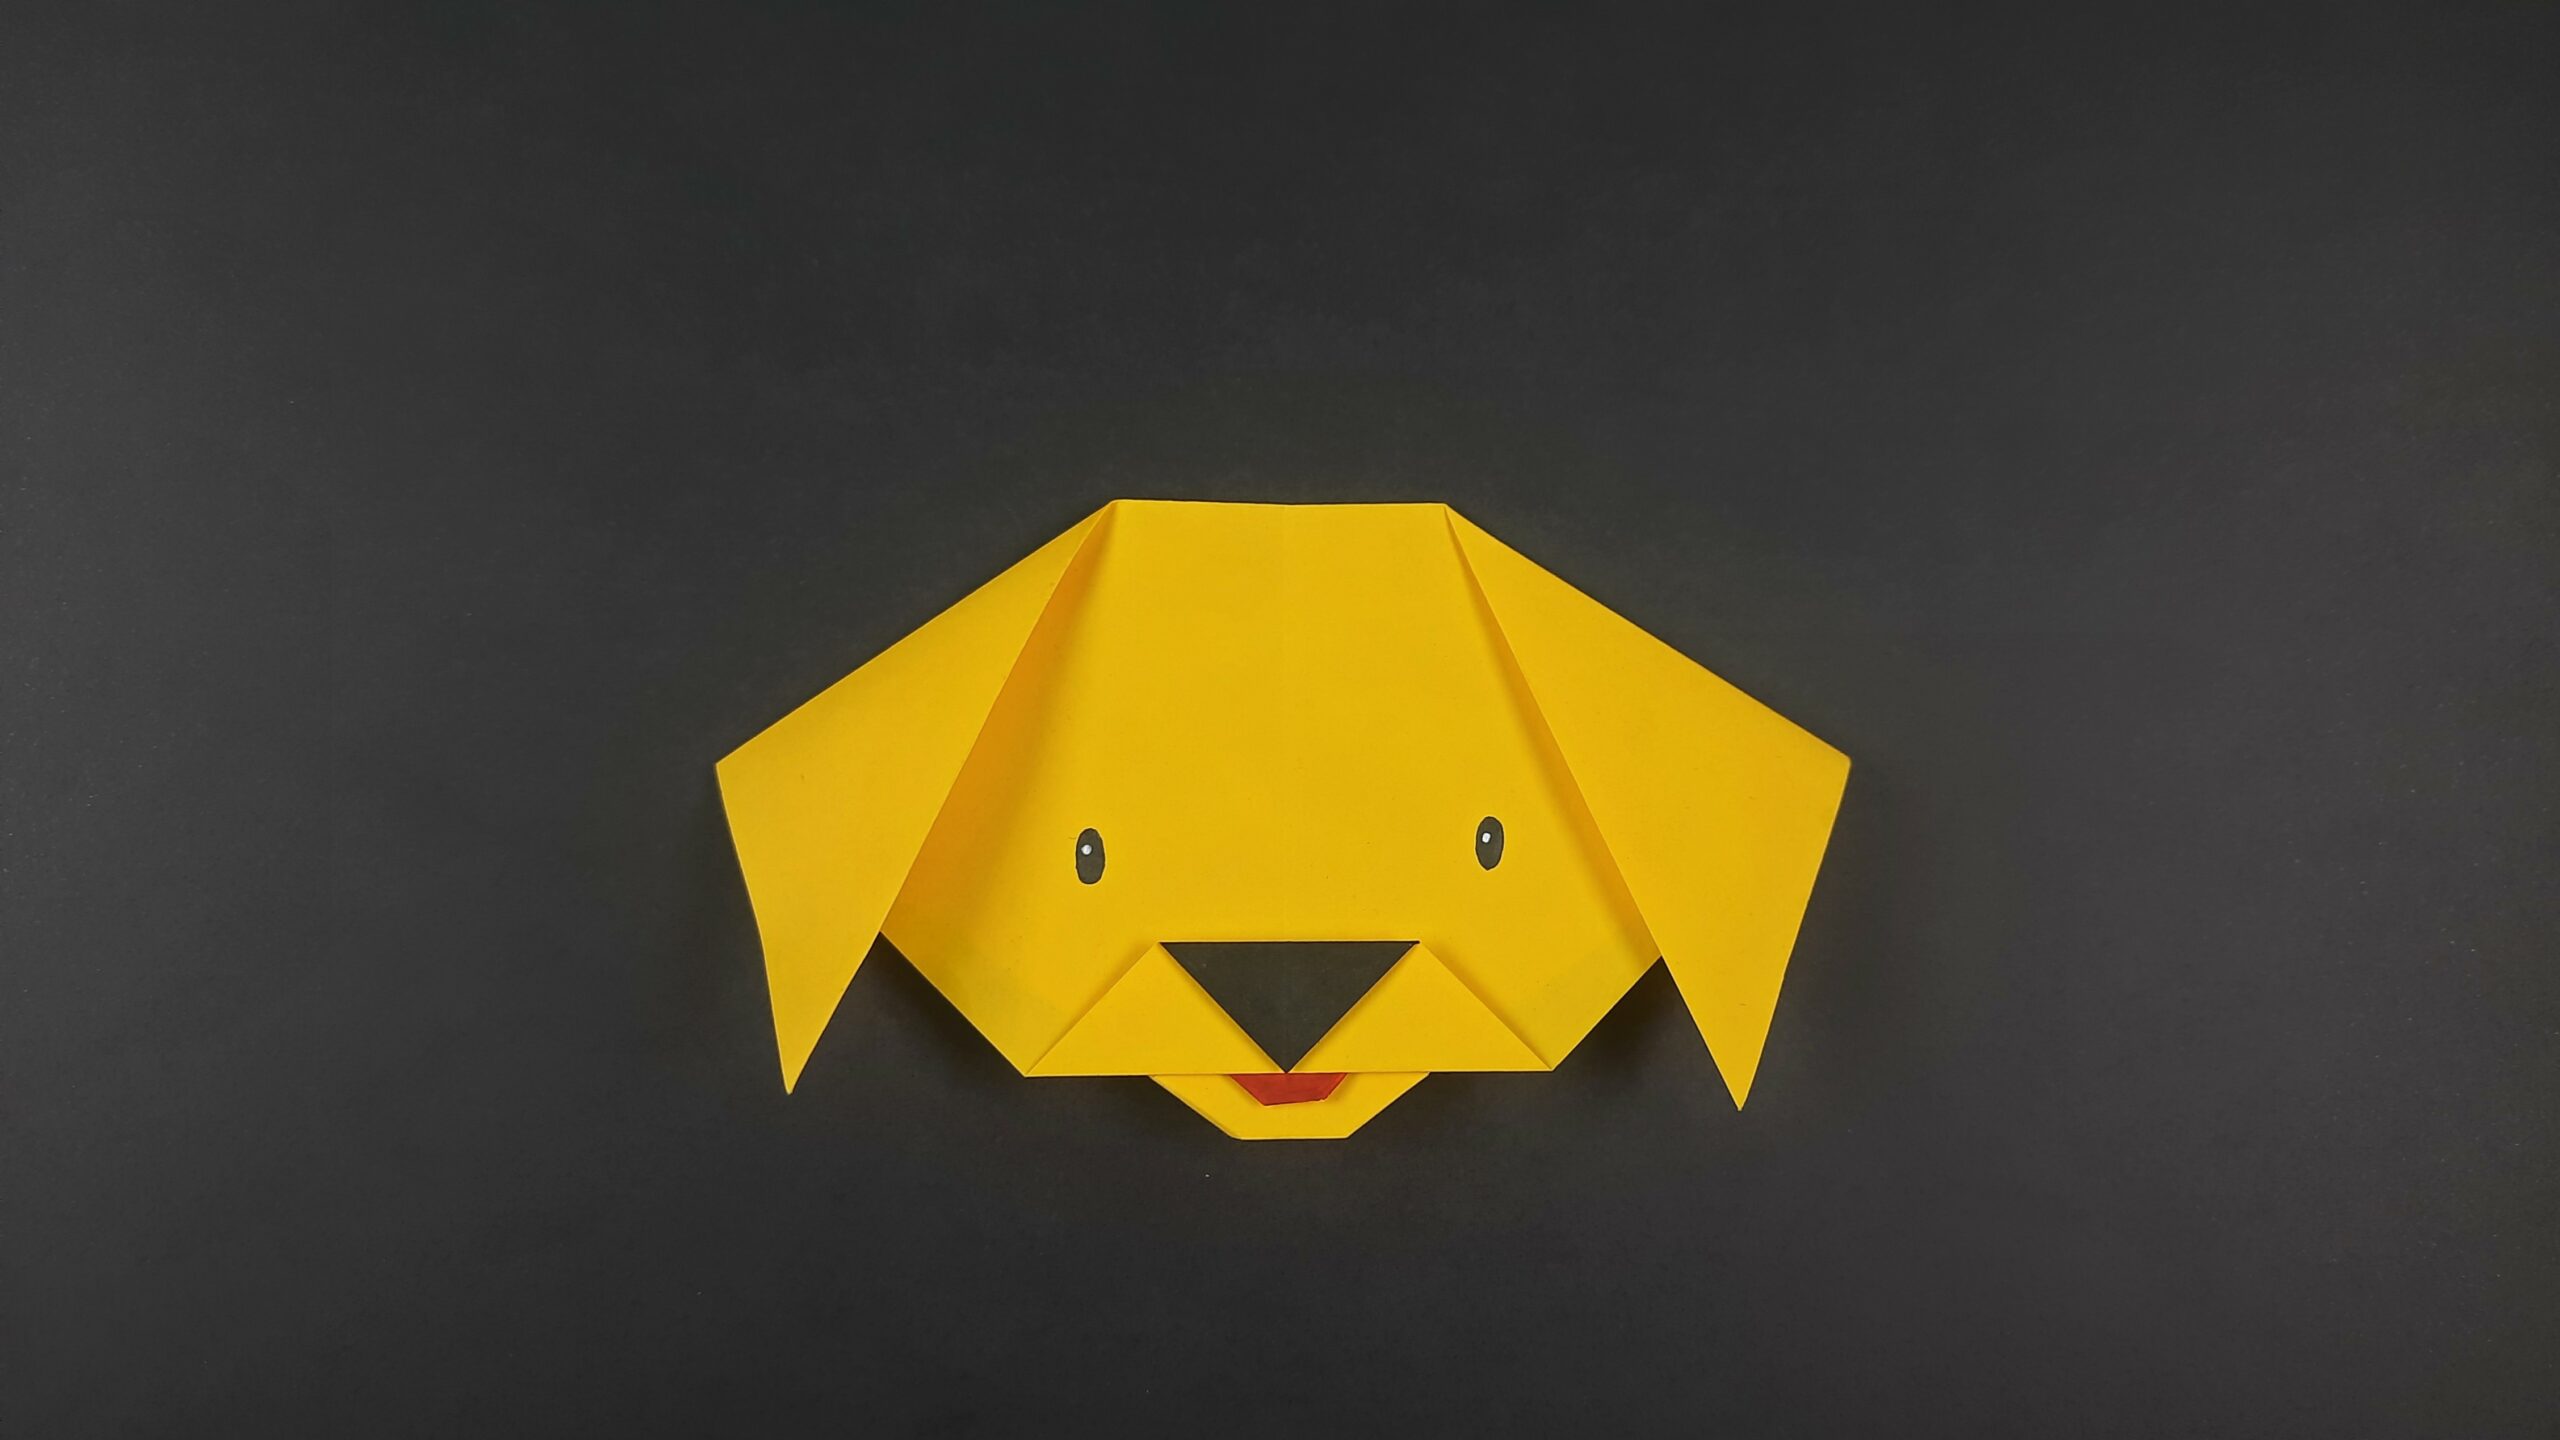
Origami is a great way to show off your crafting skills and it can also be a lot of fun. In this guide, I will show you how to make an easy origami dog face. This project is perfect for beginners, so don’t worry if you’re new to origami. With just a few simple steps, you’ll be able to create an adorable origami dog! Let’s get started.
How to Make An How To Make An Easy Origami Dog Face Video Walkthrough
There you go! If you watched this video you should have your very first origami dog face done and ready to decorate! This video should have made it more than easy enough to create this cute little pup. As always feel free to use any colored paper you want and create the doggy of your dreams!
Now, if you don’t want to learn through a video I have also made a set of simple step-by-step illustrated instructions you can follow to create your first origami dog face!
If you enjoy making this origami model, check out all my other Origami Animals!
How To Make An Easy Origami Dog Face: Step-By-Step Instructions
1. Folding the Initial Triangle
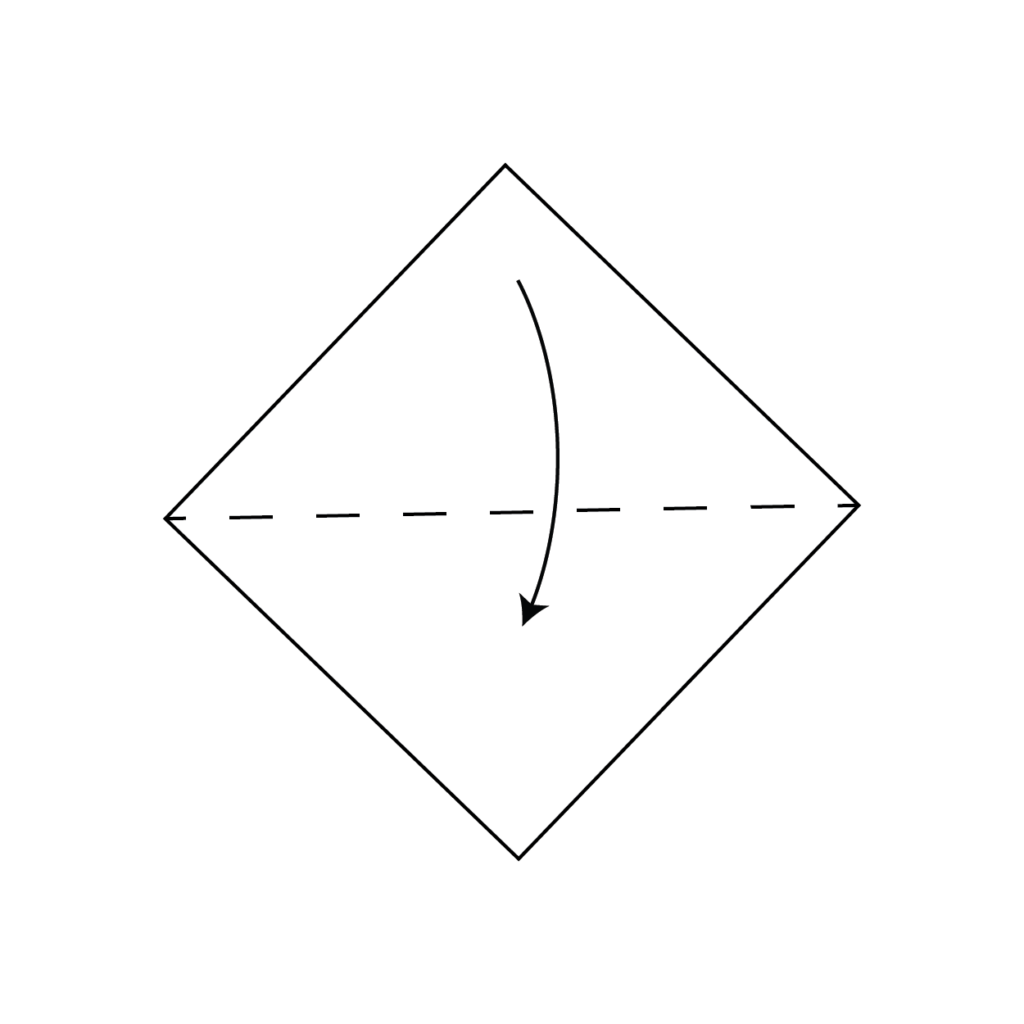
Start with a square piece of paper and turn it to face you as if it were the shape of a diamond. Fold the square piece of paper in half by taking the top corner and meeting it with the bottom corner of the page.
2. Making the Right Dog Ear
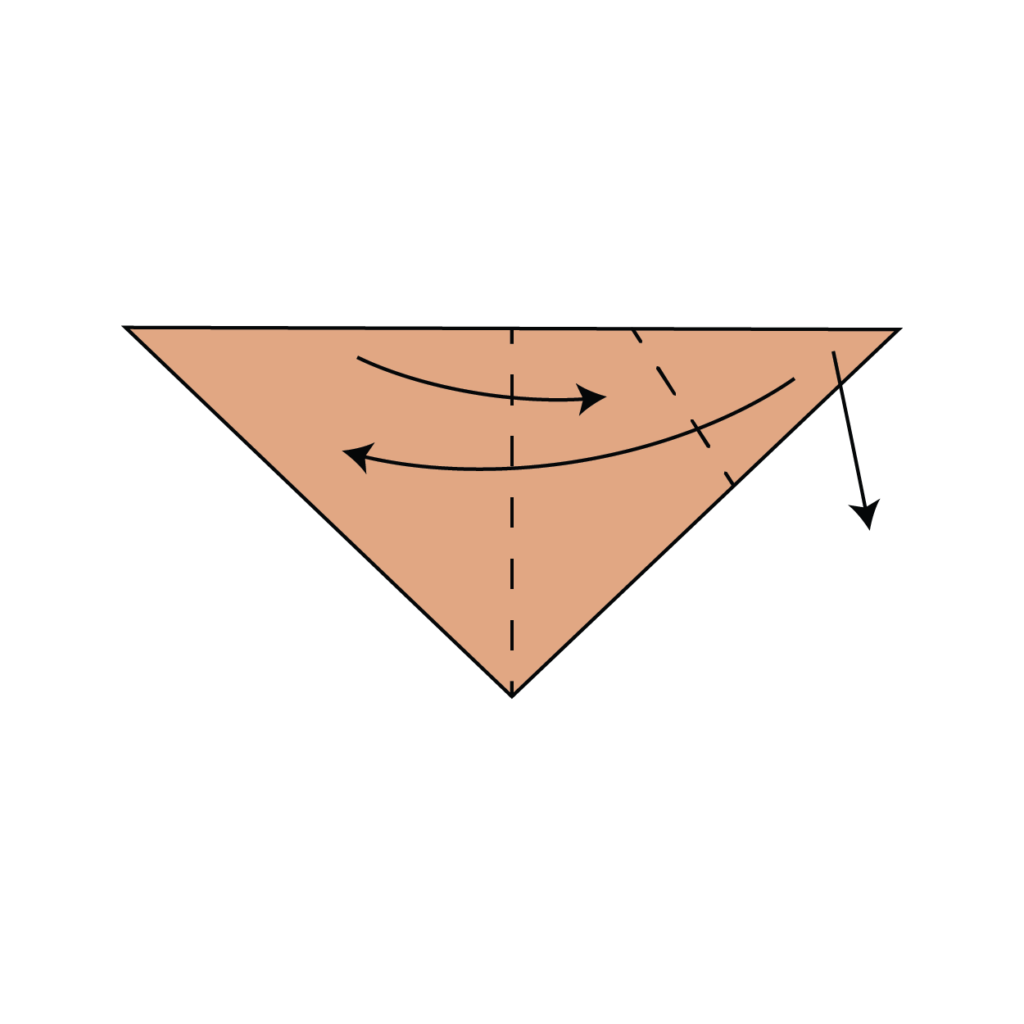
Now you should have a triangular shape. Fold it in half taking the left corner to meet the right corner and then unfold it to create a crease. Then fold the right corner down at an angle along the dotted line to create the right ear. As shown above.
3. Creating the Left Dog Ear
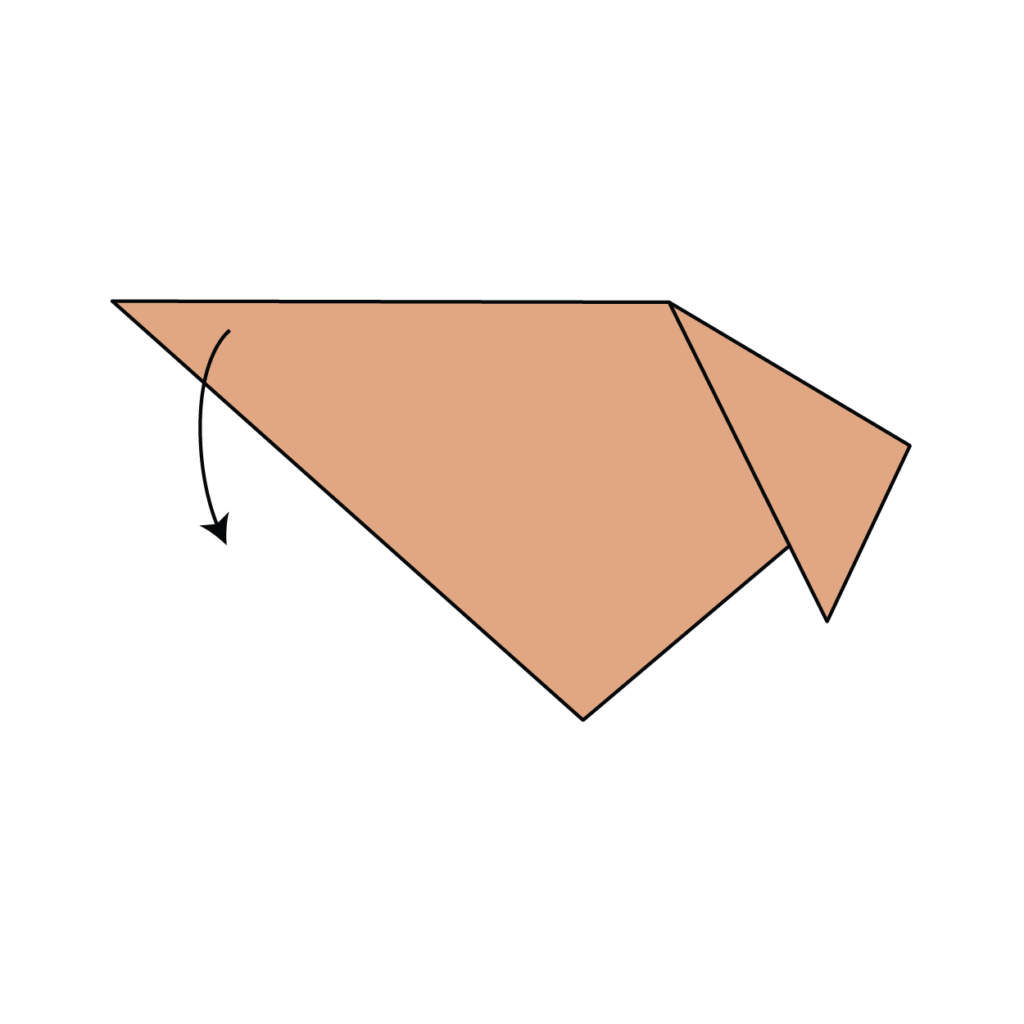
Your dog’s ear should look like this now. Next, you are going to repeat the ear fold on the left side of the paper to create the other dog ear.
4. Folding the Bottom Corner Flaps
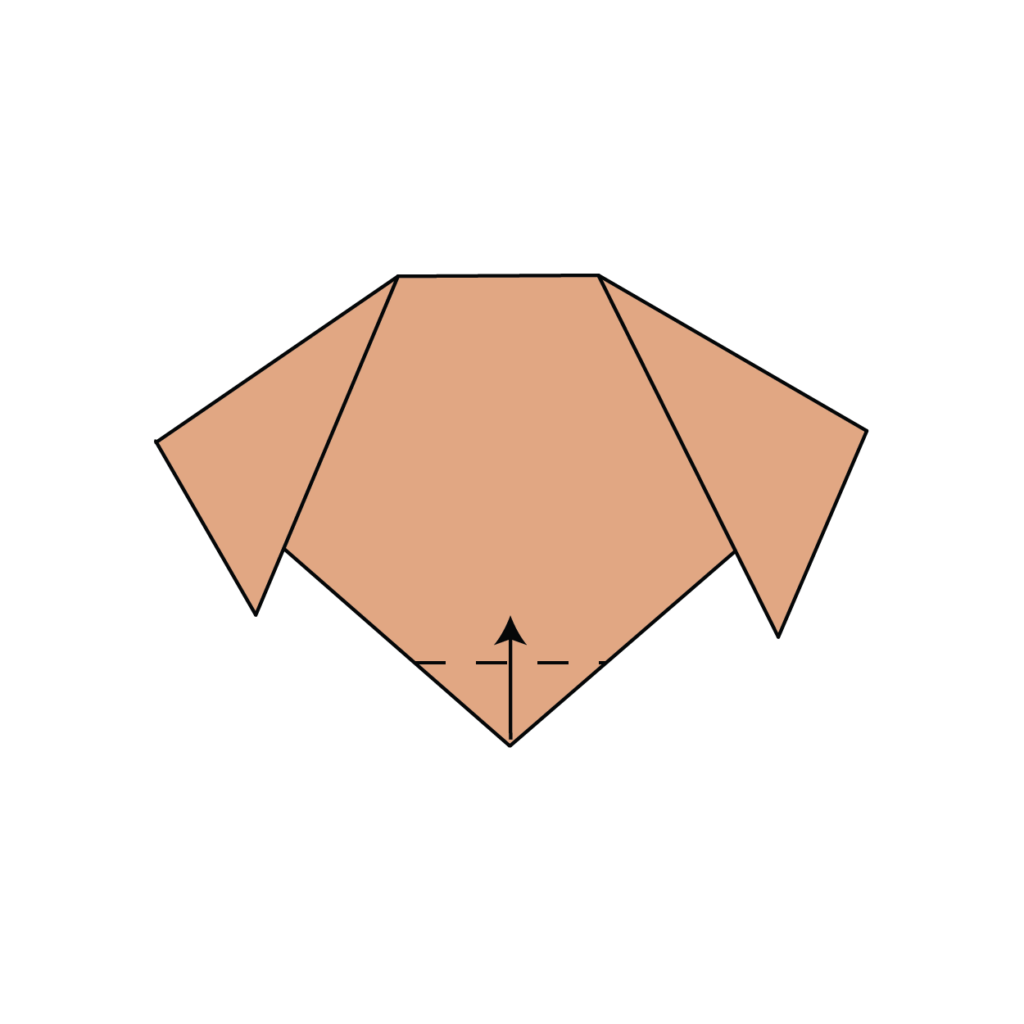
If your model looks like this, you are on the right track. Take what currently seems like the dog’s chin and fold both the bottom corner flaps up along the dotted line as shown above.
5. Tucking the Front Flap Underneath
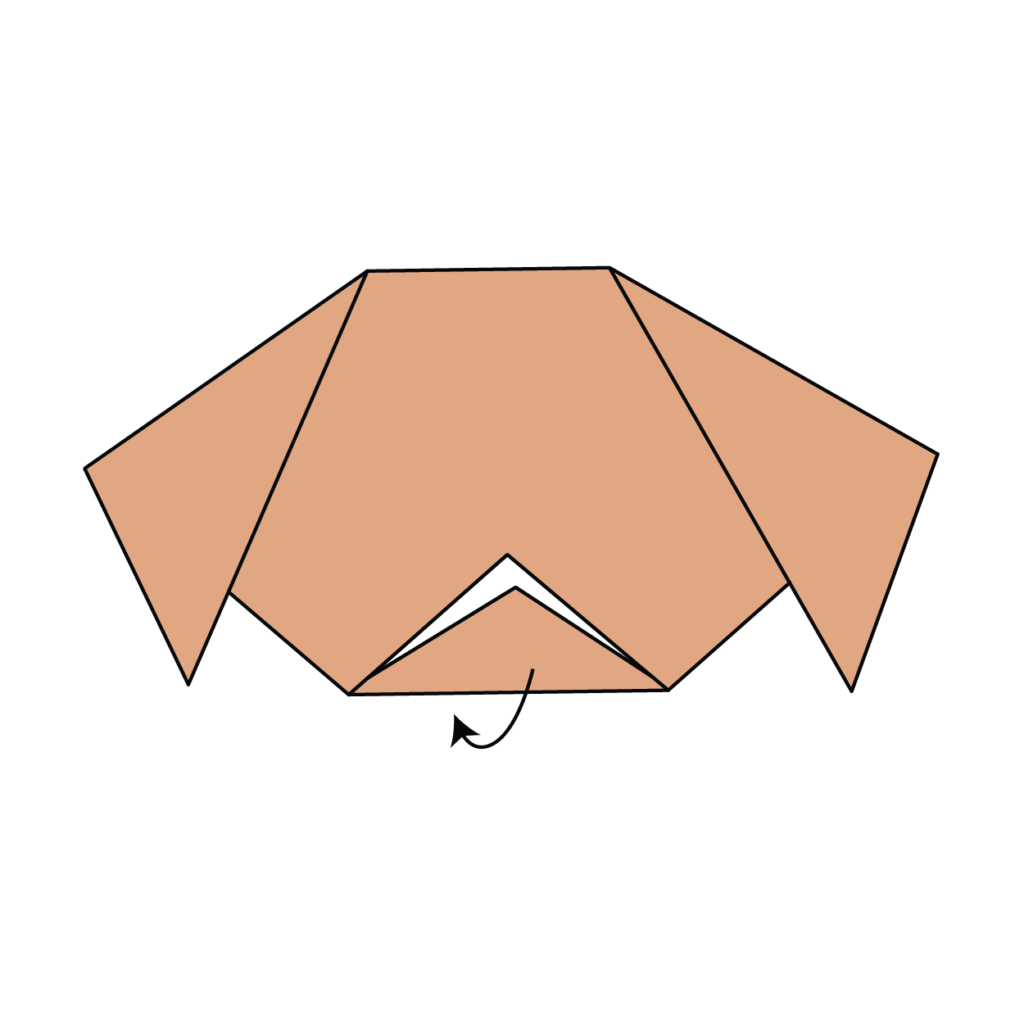
Now, you are going to take the front flap (The colored flap in the image) and tuck it underneath the bottom flap. The next step will should you the result of this.
6. Folding the Top Point of the Front Flap
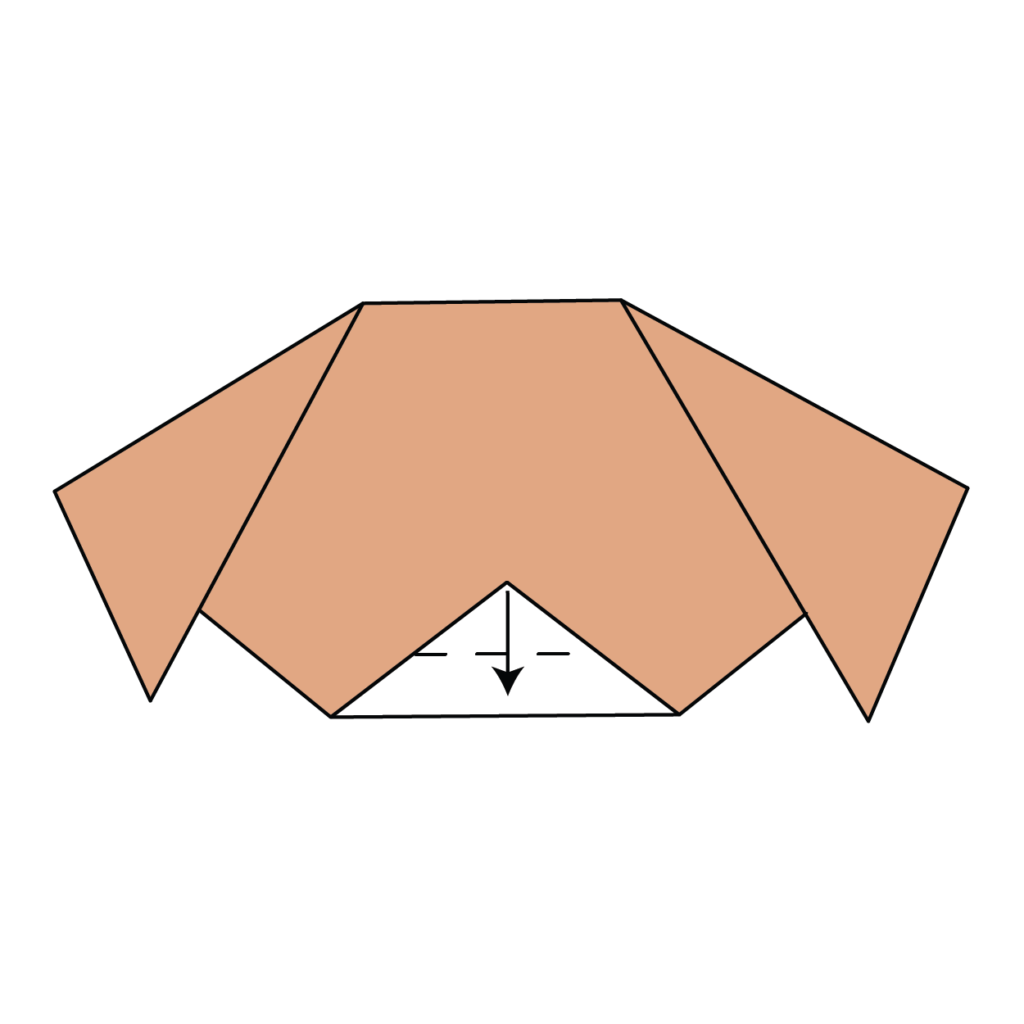
If it looks like this then you are going to take the flap that is now above and fold the top point down to meet the bottom edge. Make sure not to let it hang past the edge. Use the dotted line shown above as a reference.
7. Adjusting the Chin
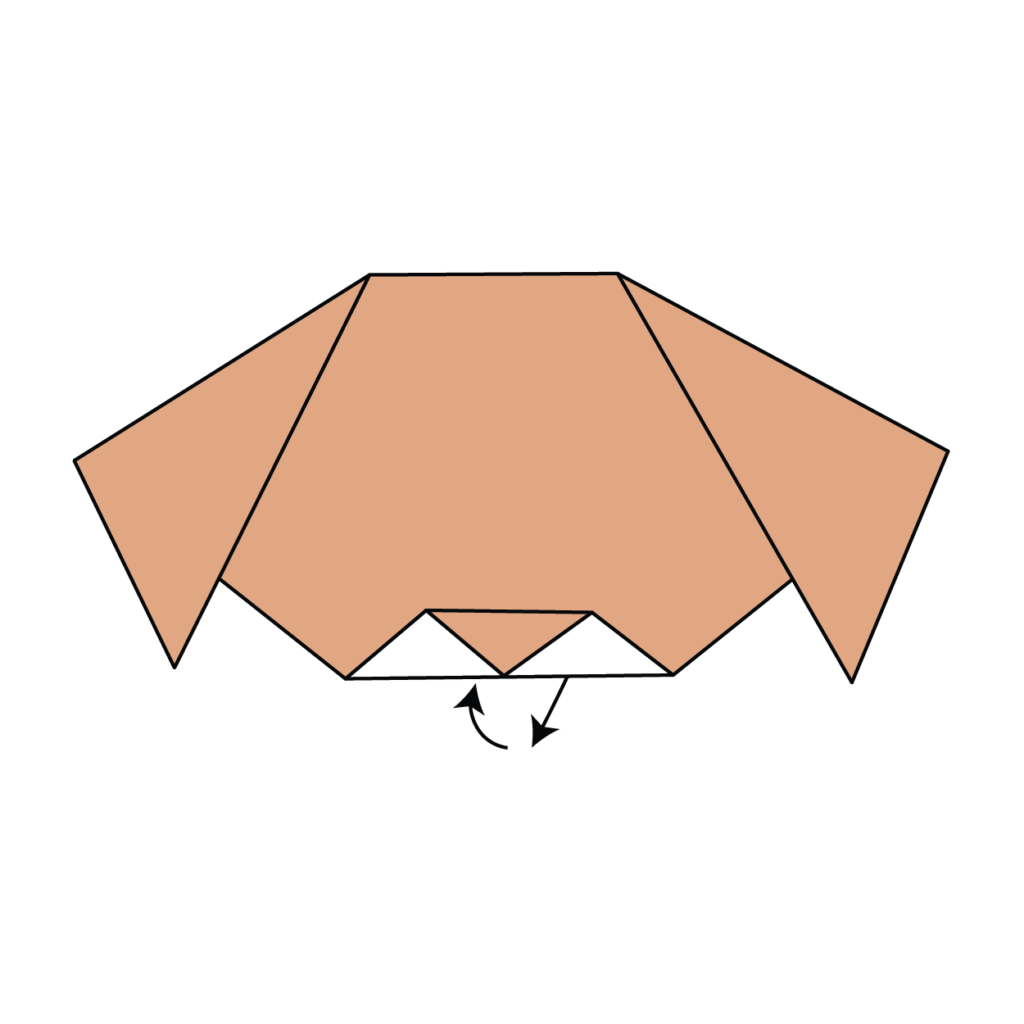
Now that you have finished the nose, to create the chin, take the flap that is underneath and unfold it and refold it a little lower. You should be left with something that looks like the next diagram.
8. Flipping the Dog to the Other Side
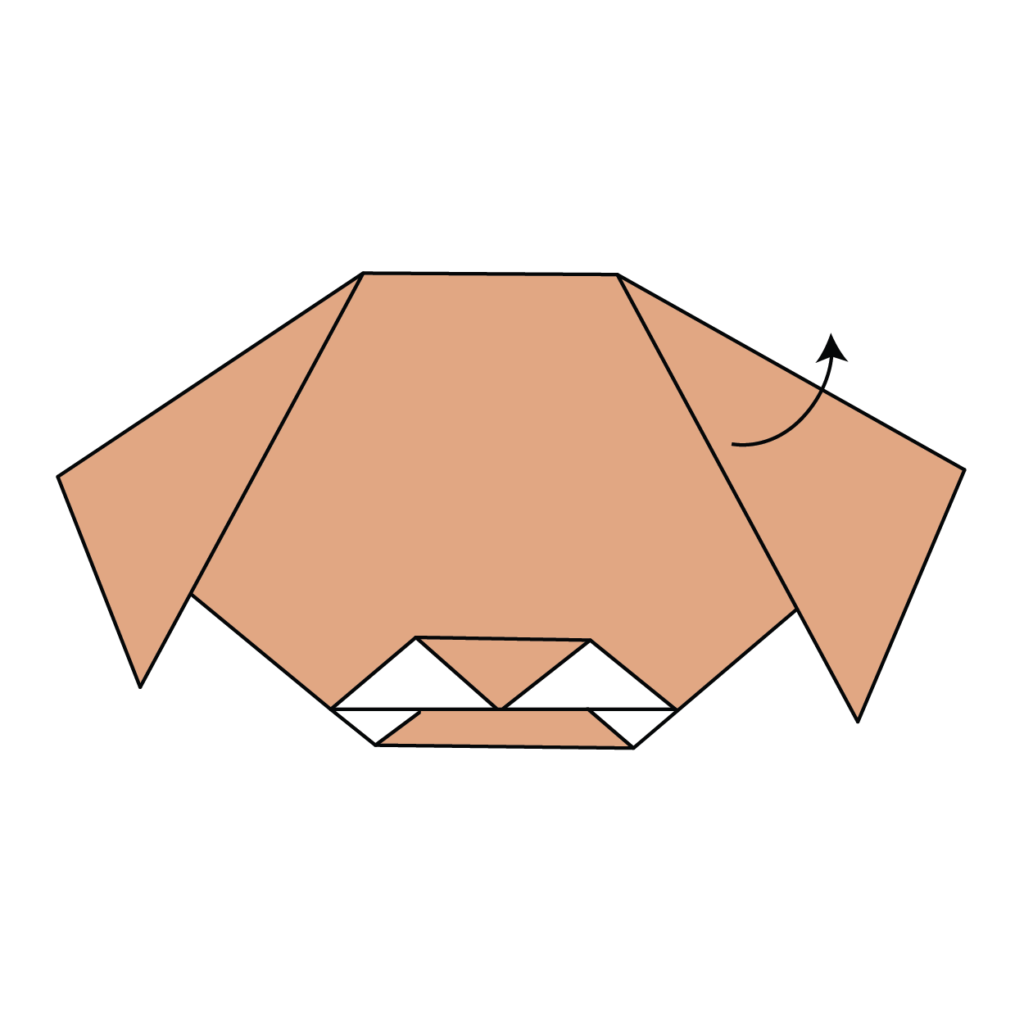
Flip the dog over to the other side now.
9. Folding the Back Diagonal Edges
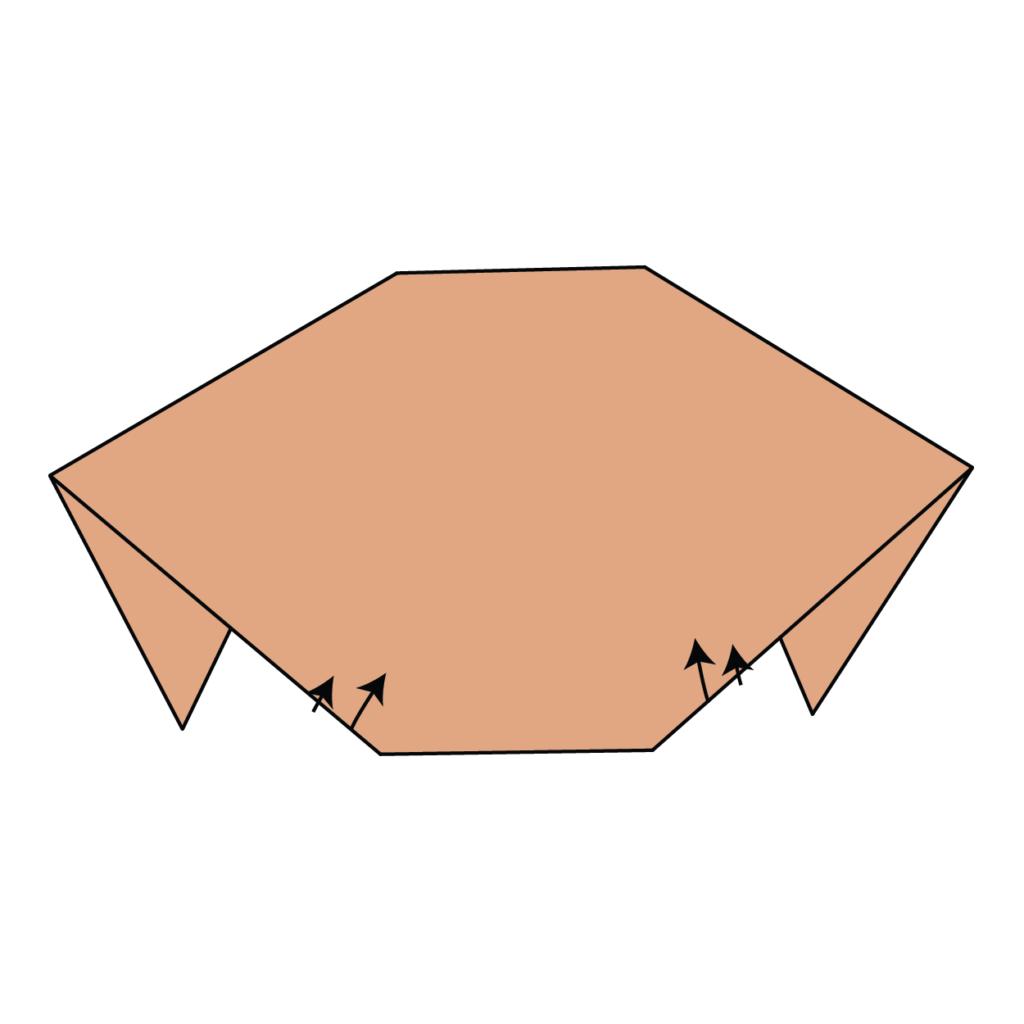
Fold the upper layer of the back left and right diagonal edges up leaving you with something like the next model.
10. Flipping the Dog Back to the Front
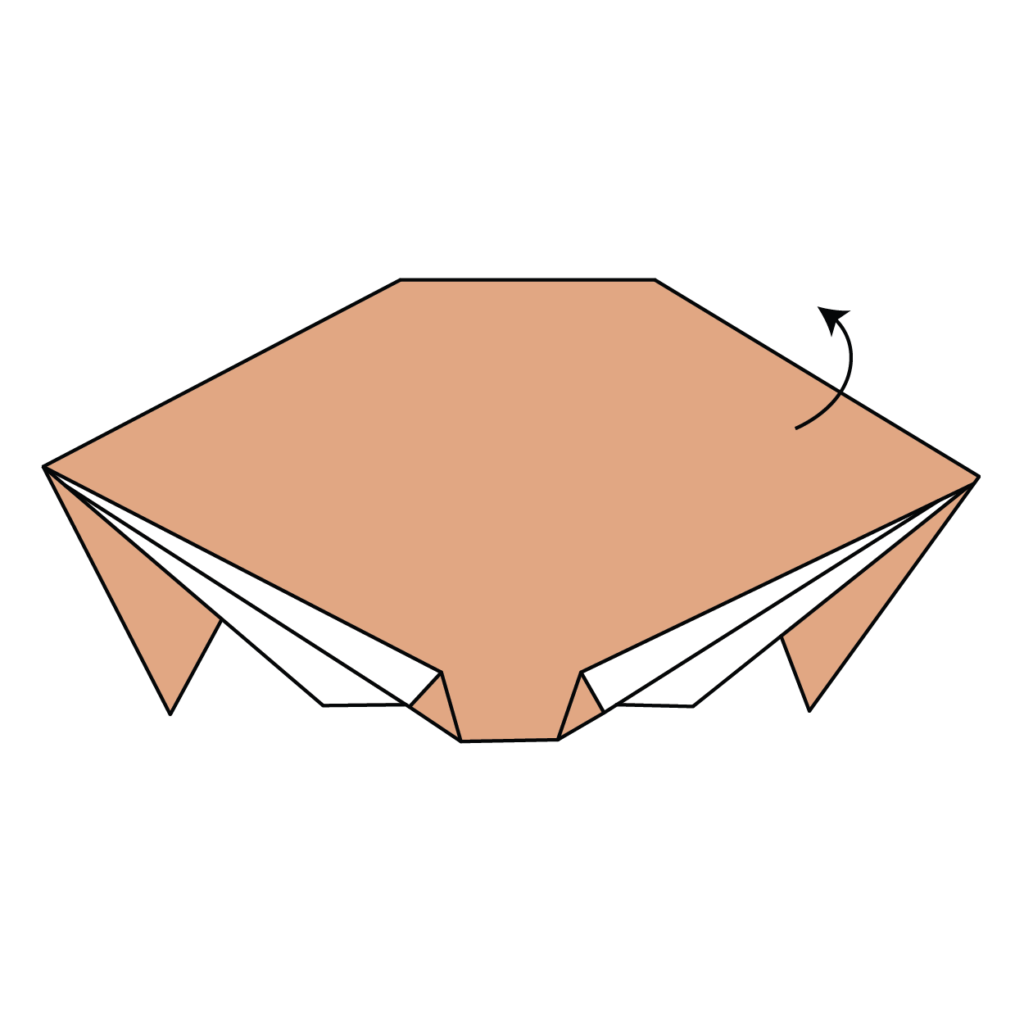
Flip the dog back over to the front.
11. Crafting the Tongue
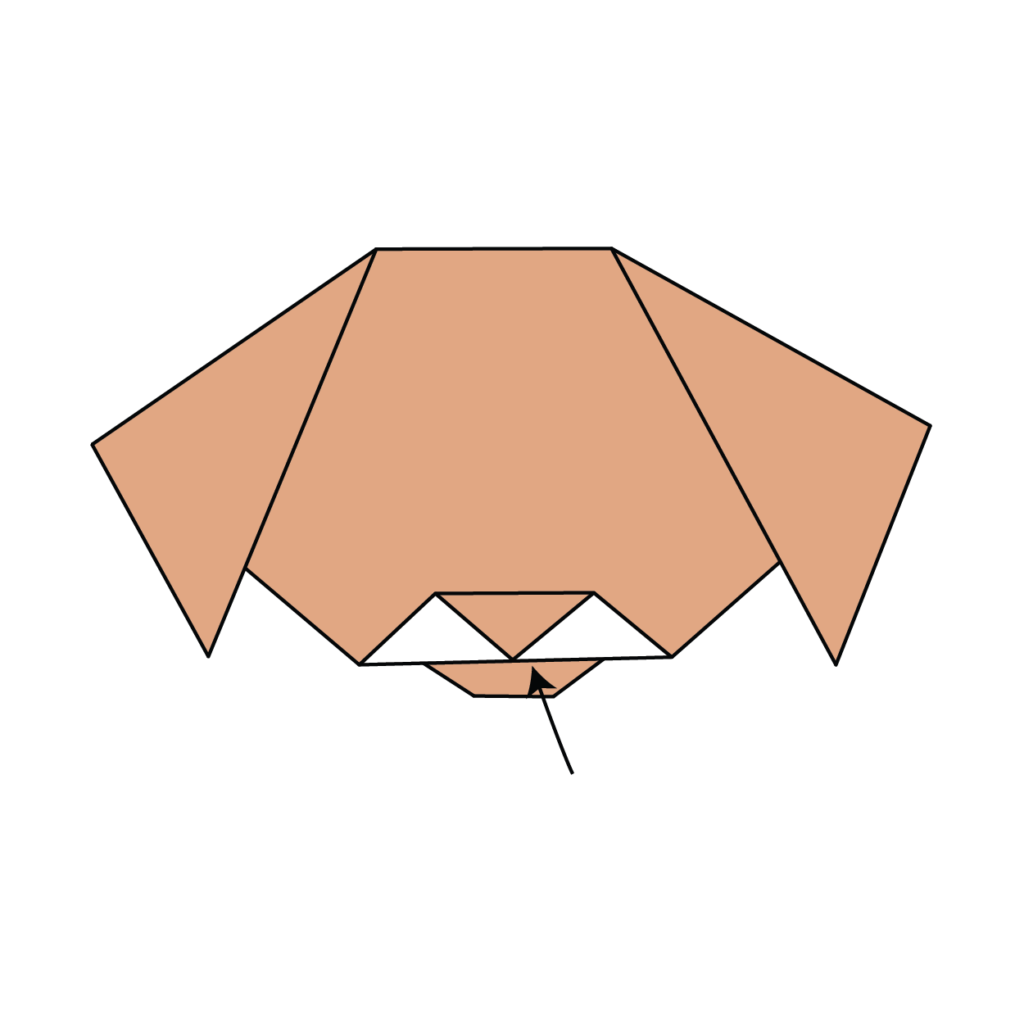
To make the tongue simply fold the point of the chin that’s hidden behind the nose down and color it red.
12. Personalizing Your Origami Dog
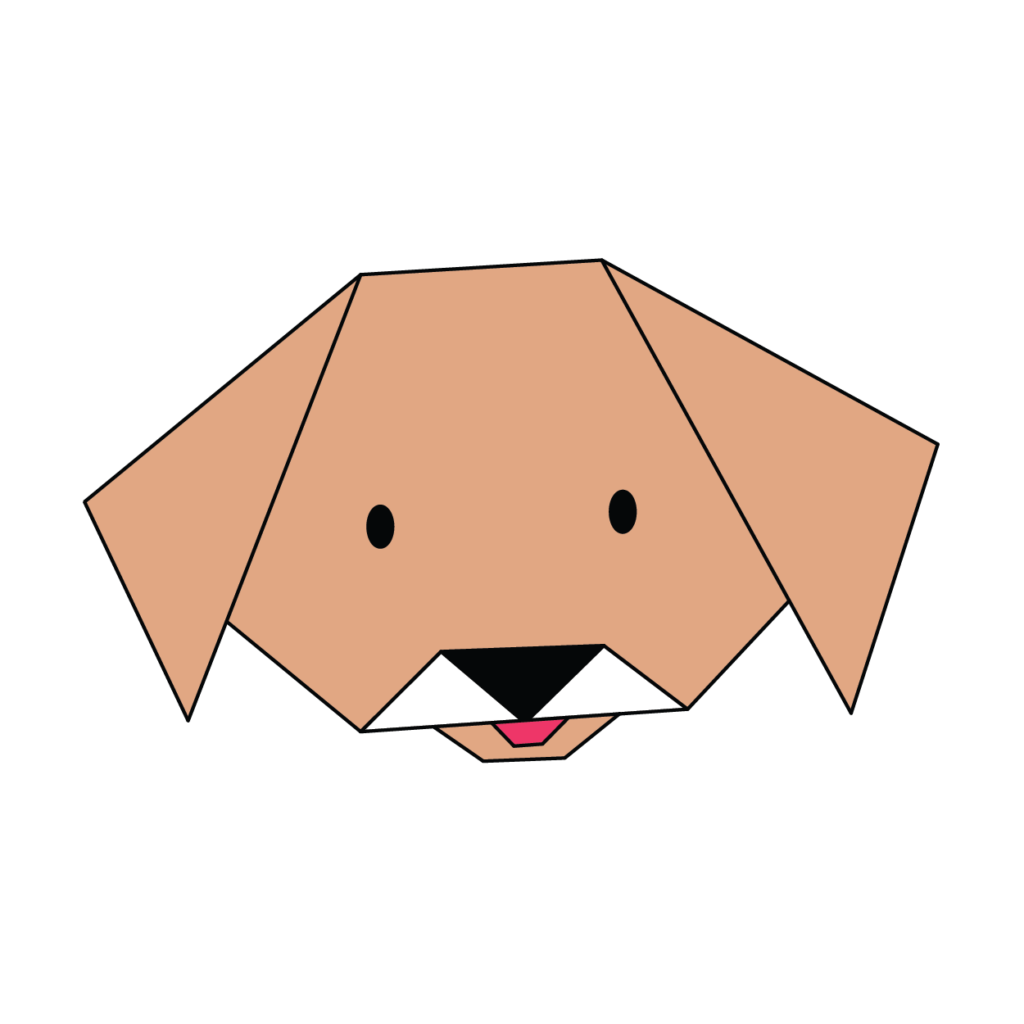
Your origami dog is complete! Add eyes and color to bring your new puppy to life.
There you go! If you enjoy instructions more than videos I hope that these were simple and easy to follow! If you don’t know what you prefer, you should go ahead and try both and get the extra practice in! Bellow you’ll find the same instructions but in one large printable graphic!
How To Make An Origami Dog Face Printable Instructions
So, there you have it – an easy origami dog face tutorial for beginners. Be sure to check out my other origami creations and continue learning the art of origami.
With a little practice, you’ll be able to fold all sorts of different shapes and animals. Who knows – maybe one day you could even enter into an Origami competition! Thanks for reading and happy folding!
