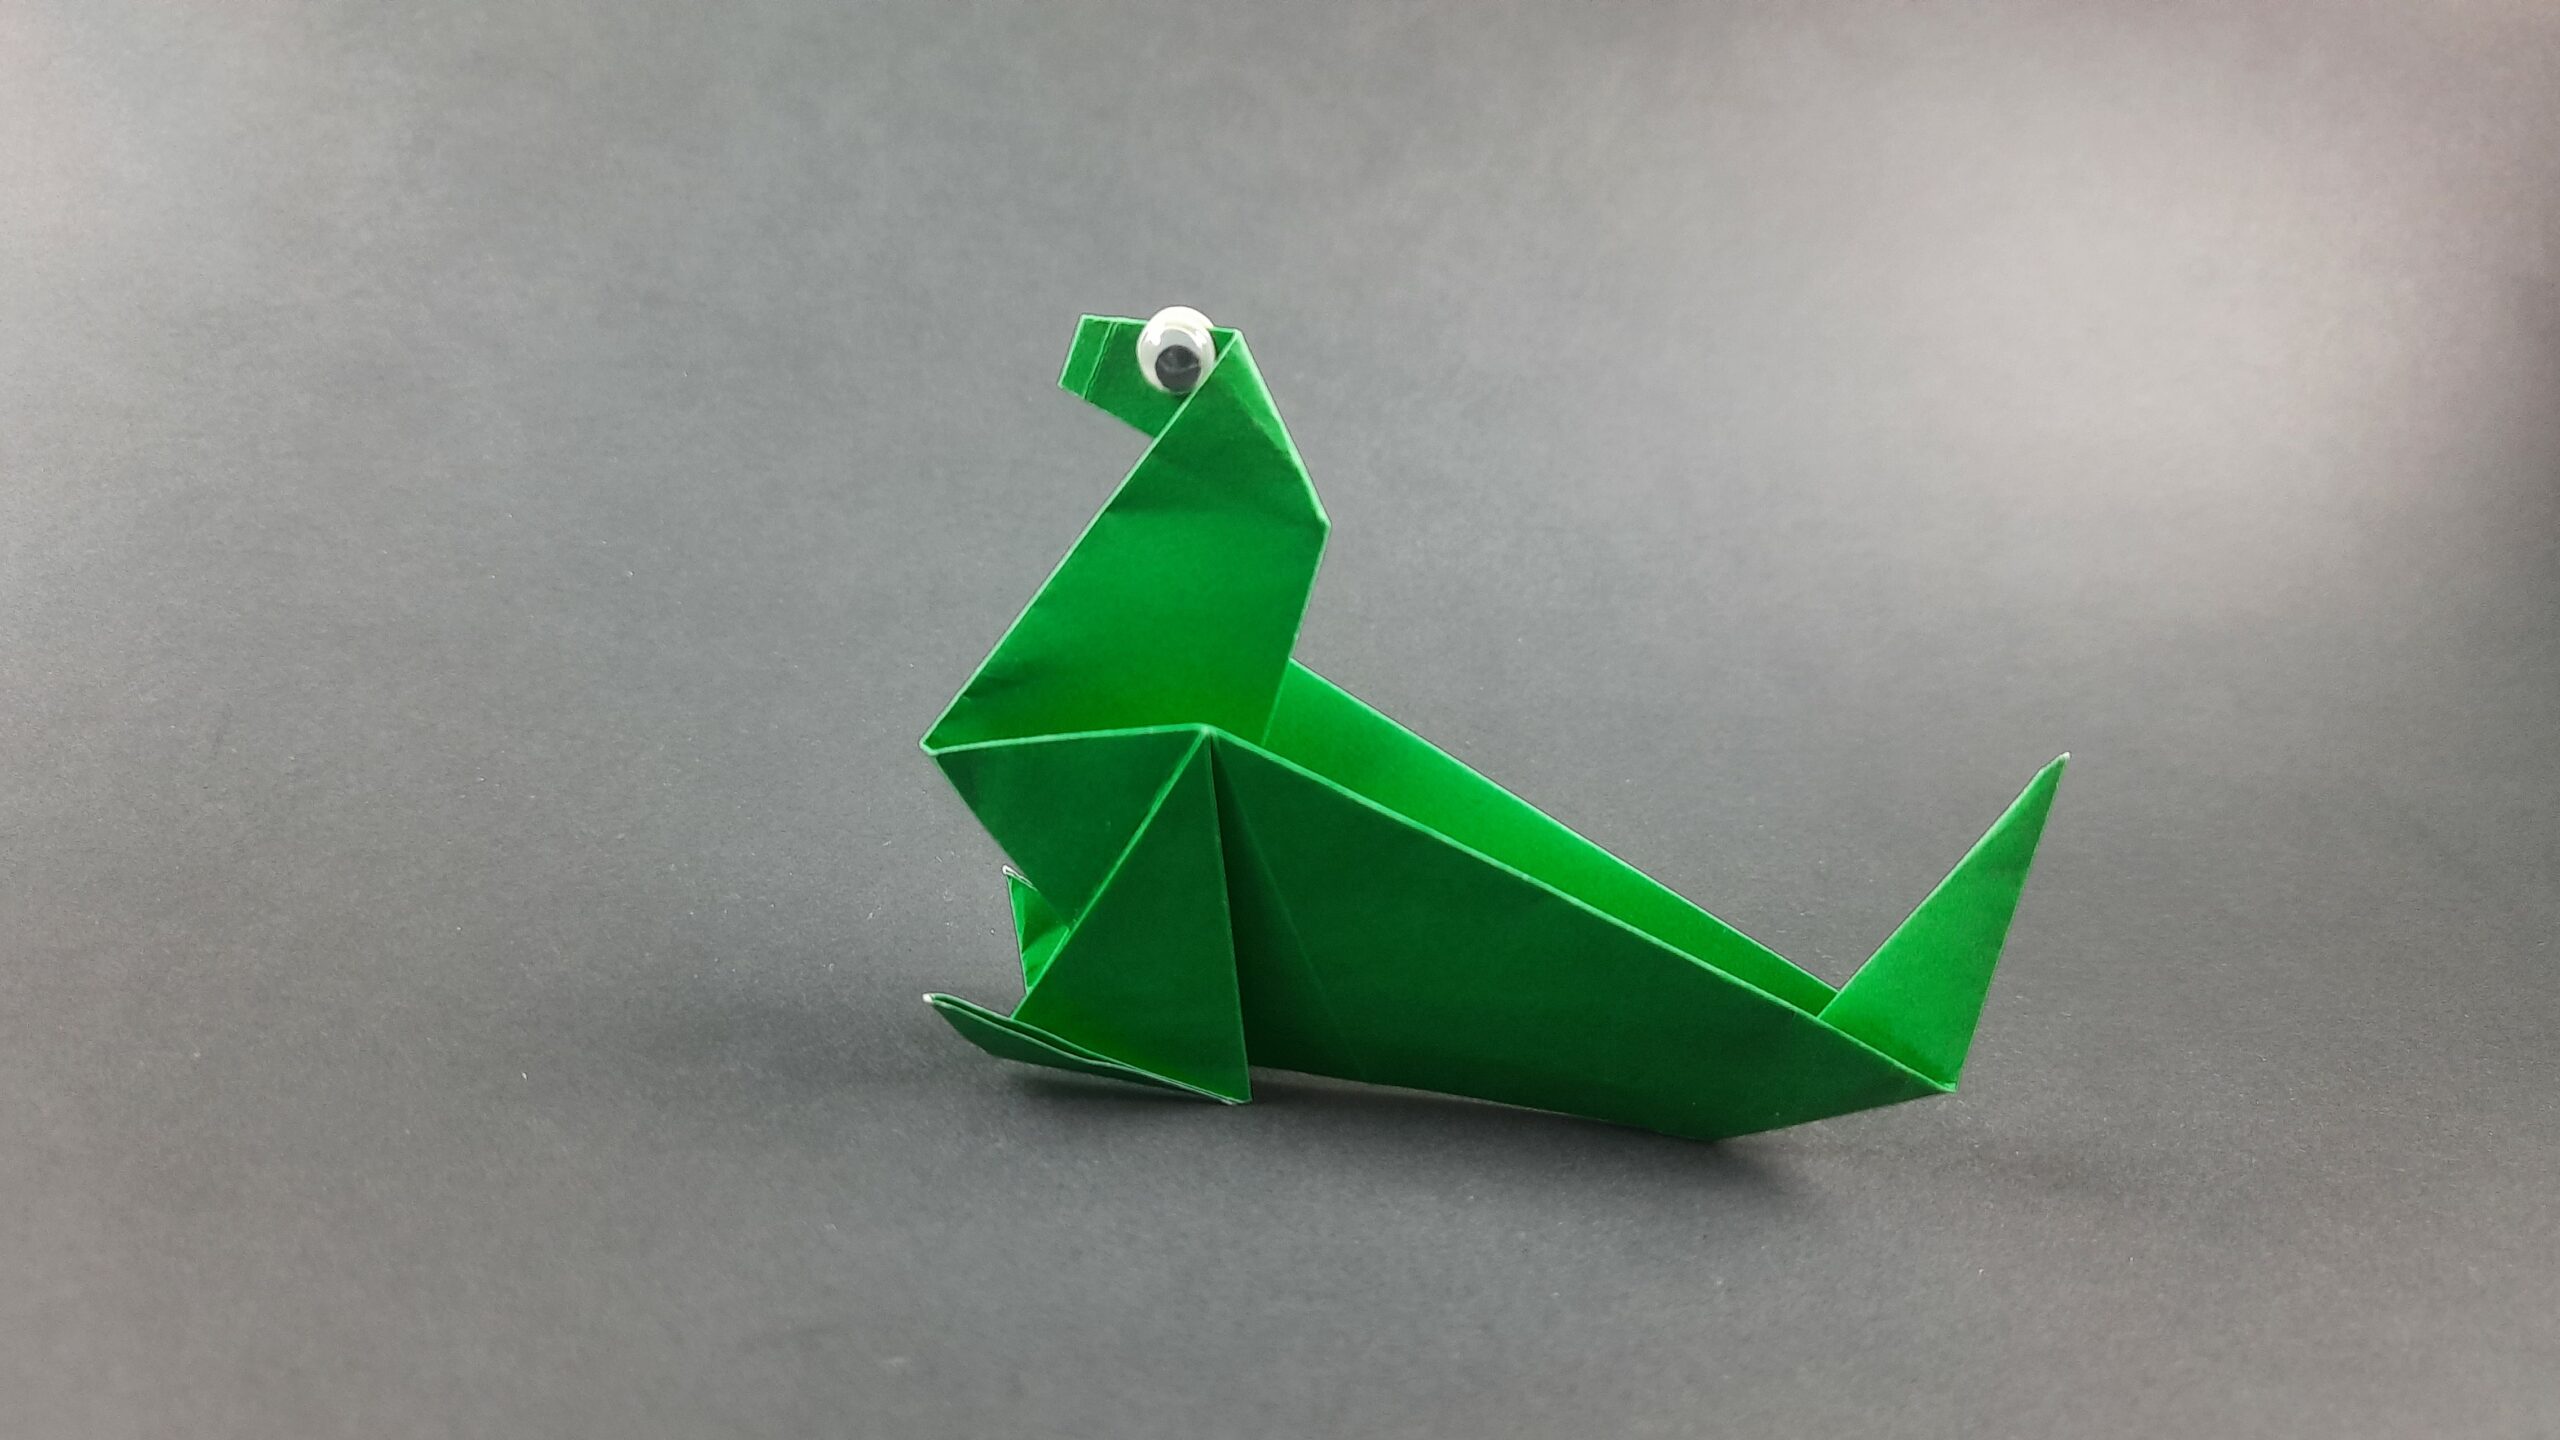
Origami is a great way to pass the time and it’s also a really fun activity for arts and crafters of all levels of experience. In this article, I’m going to show you how to make an easy origami seal. This project is perfect for beginners and it’s a great way to learn some basic origami skills. So, if you’re ready, let’s get started!
How To Make A Simple Origami Seal Video Instructions
There you have it! That easy video guide should have given you everything you need to create your first origami seal! As you can see this origami creation isn’t really complicated whatsoever. As always you can decorate your origami seal and use whatever colored paper you want to make your seal unique to you!
Now, if you prefer to learn a different way, I’ve prepared a set of step-by-step illustrated instructions for you down below. If I were you I would go ahead and give these instructions a shot and continue to practice making another origami seal!
- If you like this design, check out all my other Origami Animals!
How To Make A Simple Origami Seal Step-By-Step Instructions
1. Creating the Initial Crease

Take the top corner of the paper and fold it in half to meet the bottom corner and then unfold it to create a crease.
2. Folding Top and Bottom Corners Inward
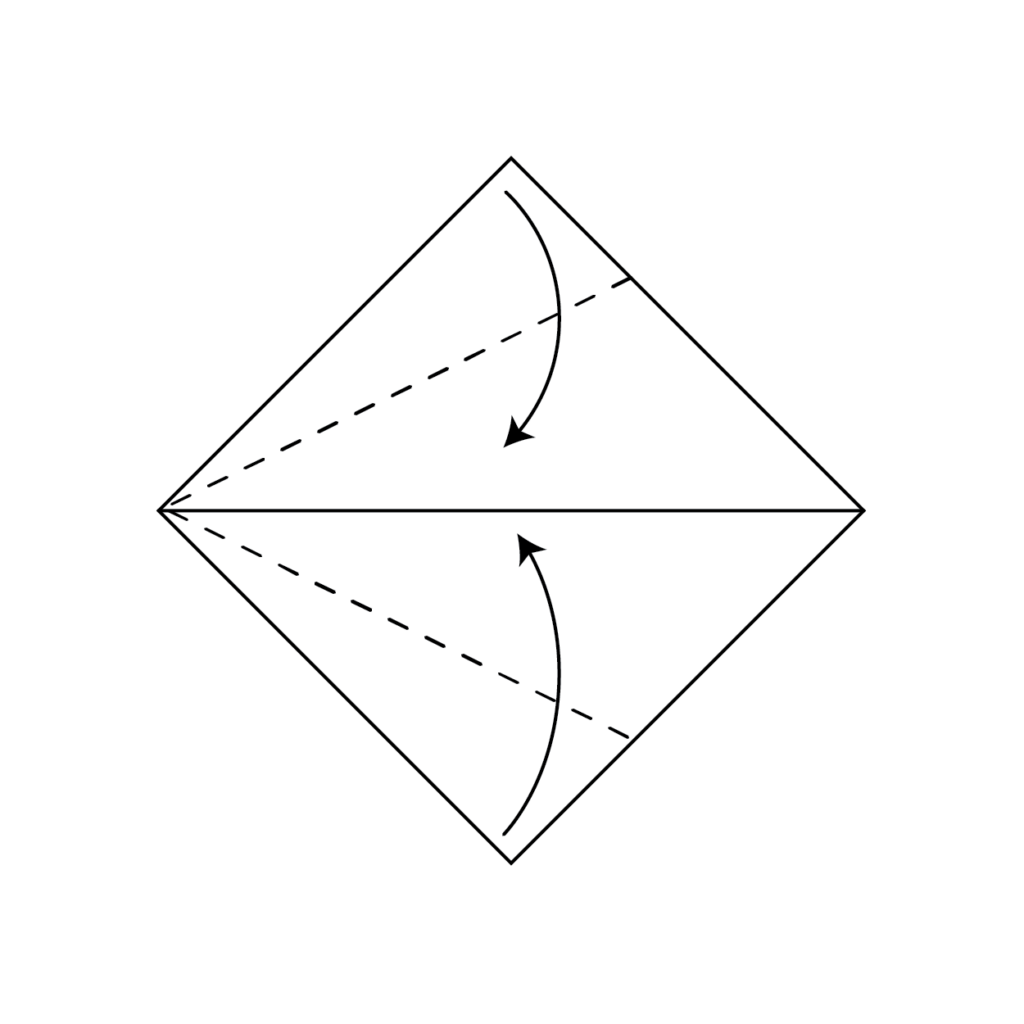
Take both the top corner and bottom corner and fold them across the dotted line to meet them together at the center crease as shown above.
3. Folding the Top Section Inward
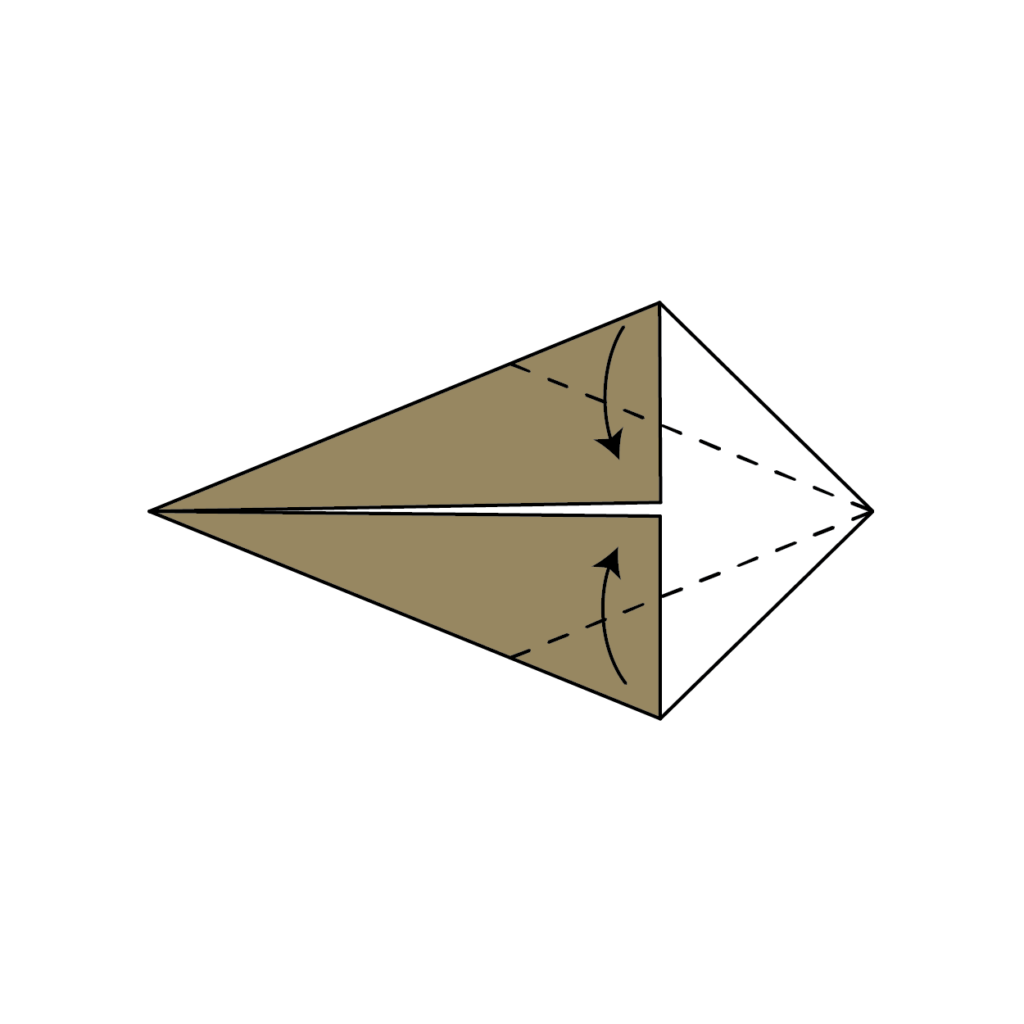
Repeat the same fold except with the top of the paper and fold along the dotted lines you see above.
4. Preparing for the Rabbit Ear Fold
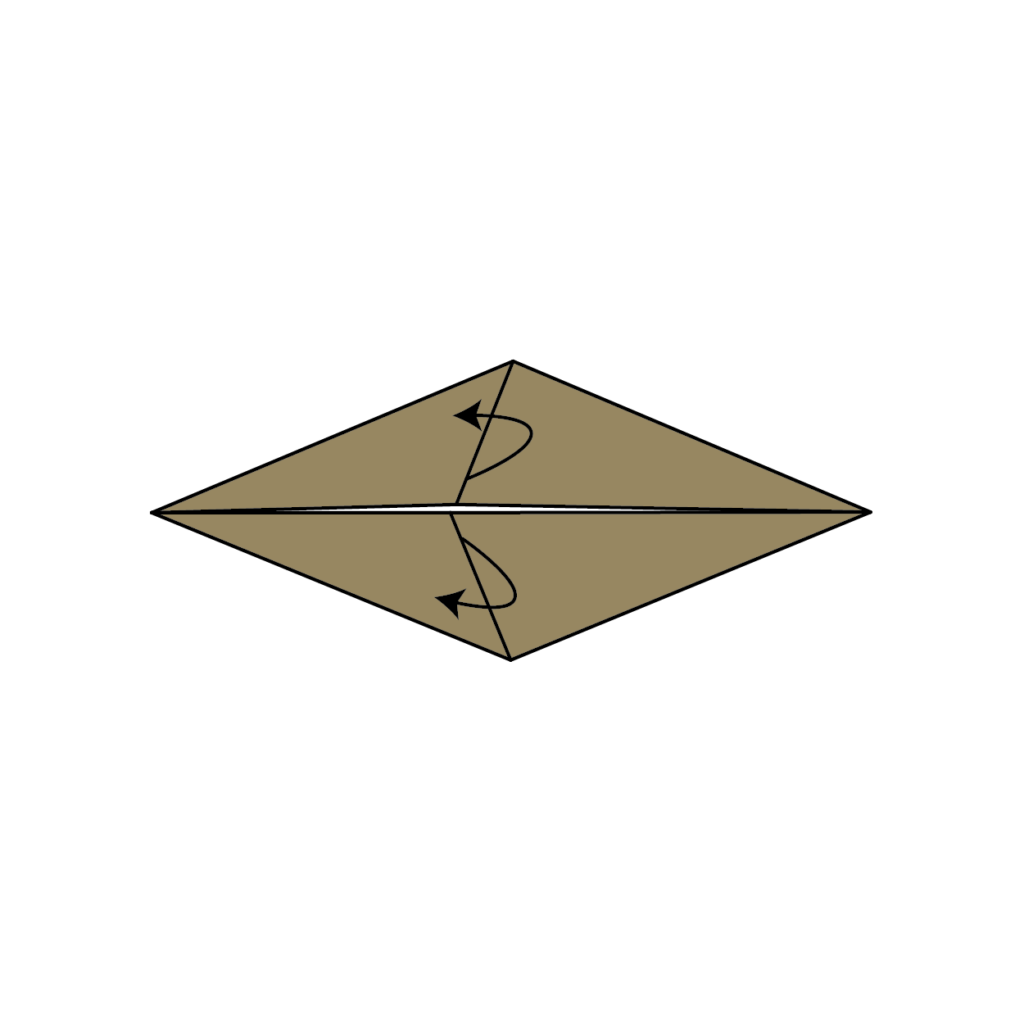
Open up the folded paper to prepare for a rabbit ear fold. Refer to the next step to see what opening it up should look like.
5. Completing the Rabbit Ear Folds
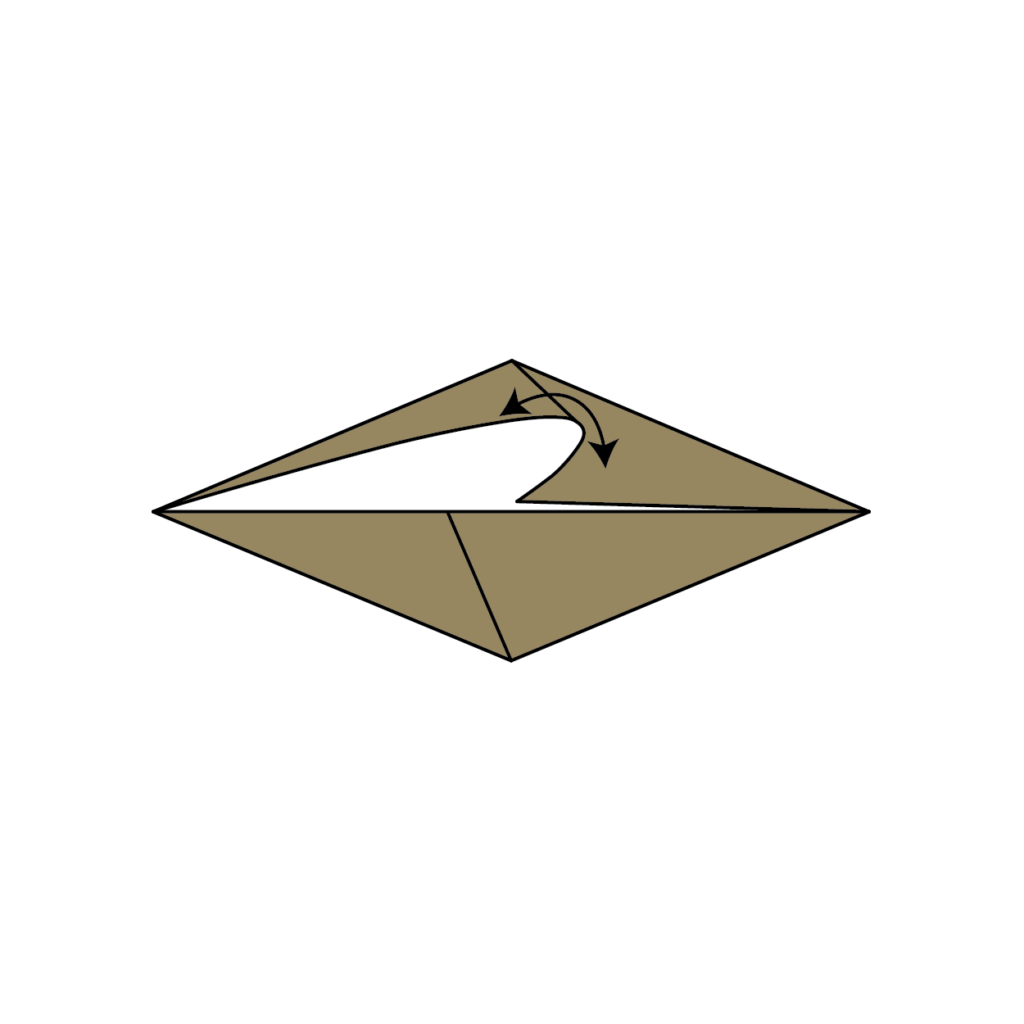
Fold both of the openings flat to complete the rabbit ear folds and now you should be left with a fish base.
6. Folding the Paper in Half
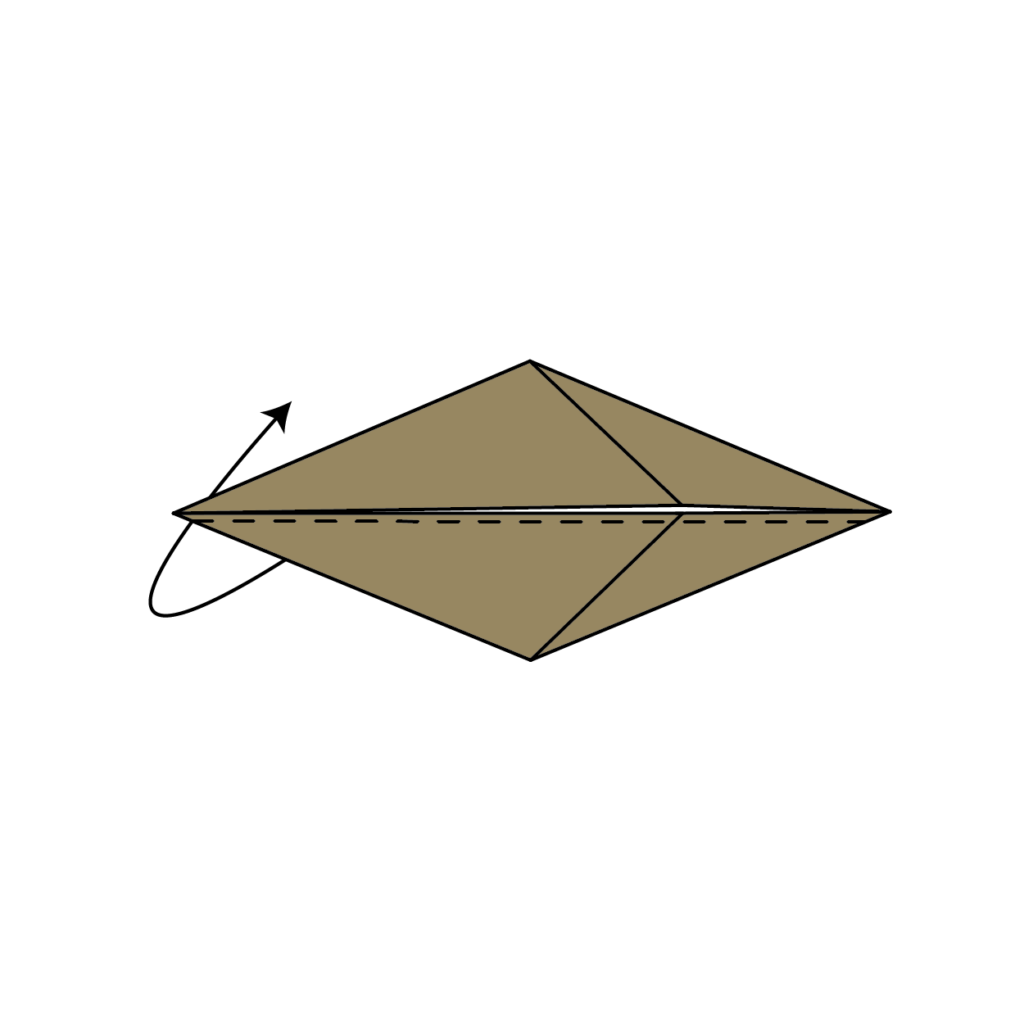
Next, fold the paper in half by bringing the bottom half behind the top half, so fold it backwards.
7. Creating the Seal’s Neck
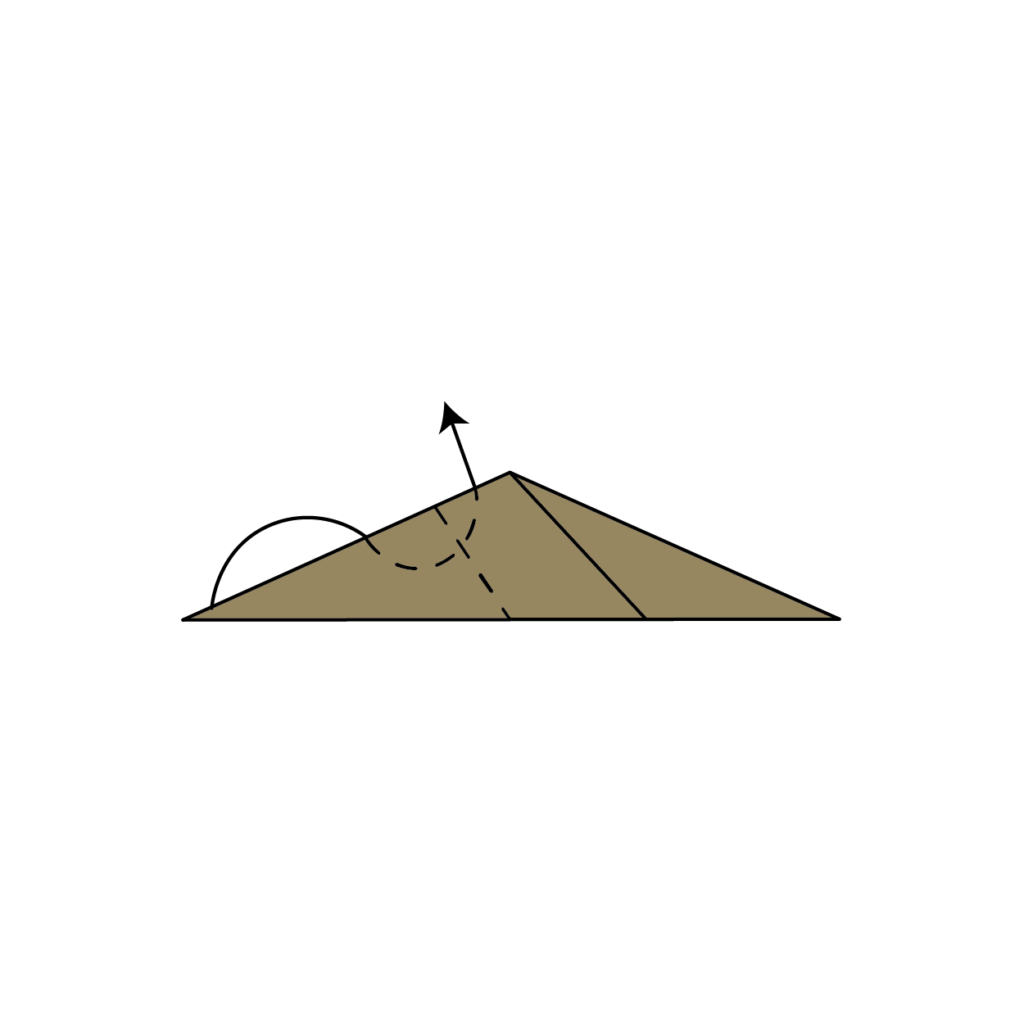
Perform and inside reverse fold along the dotted line to create the seals neck. Refer to the next step to see what you should end up with.
8. Forming the Seal’s Head
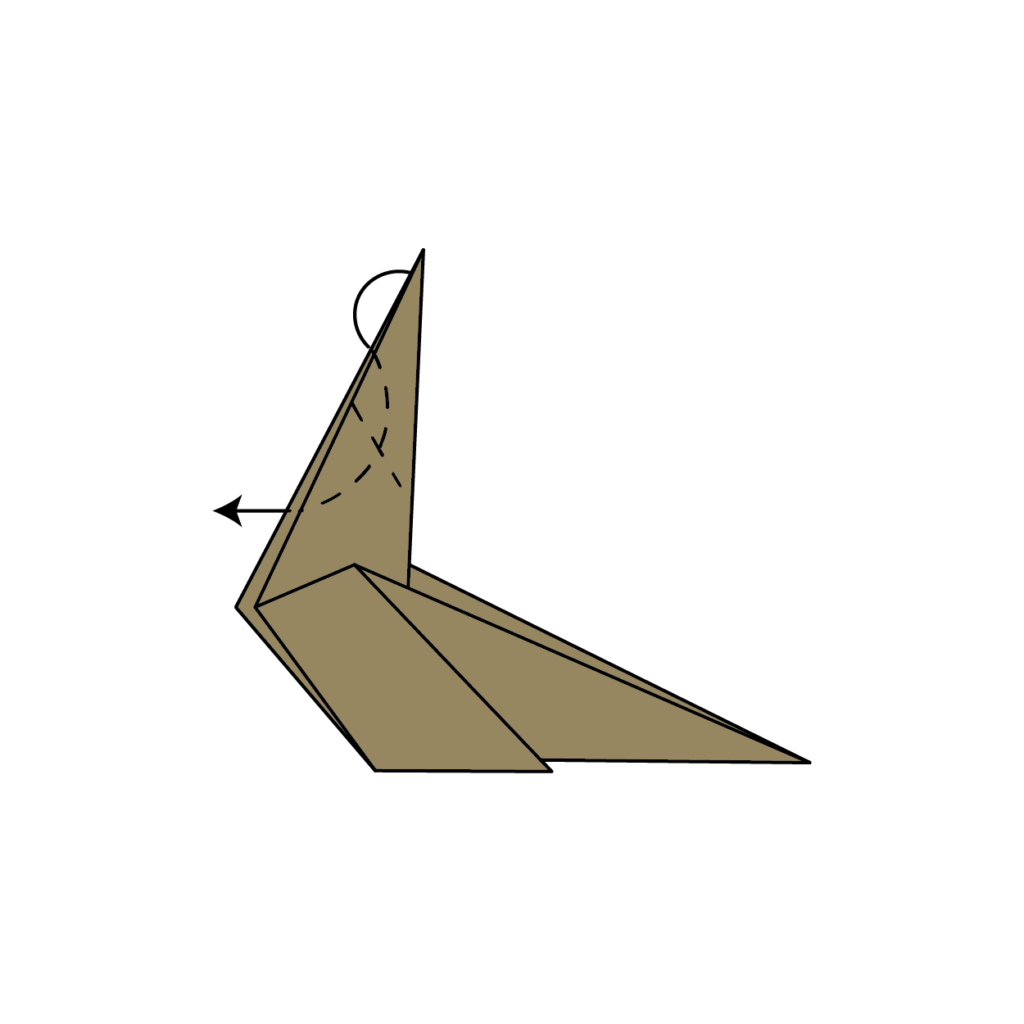
Perform an inside reverse fold along the dotted line again to create the seals head. Look at the next step to see what it should end up looking like.
9. Flattening the Seal’s Nose
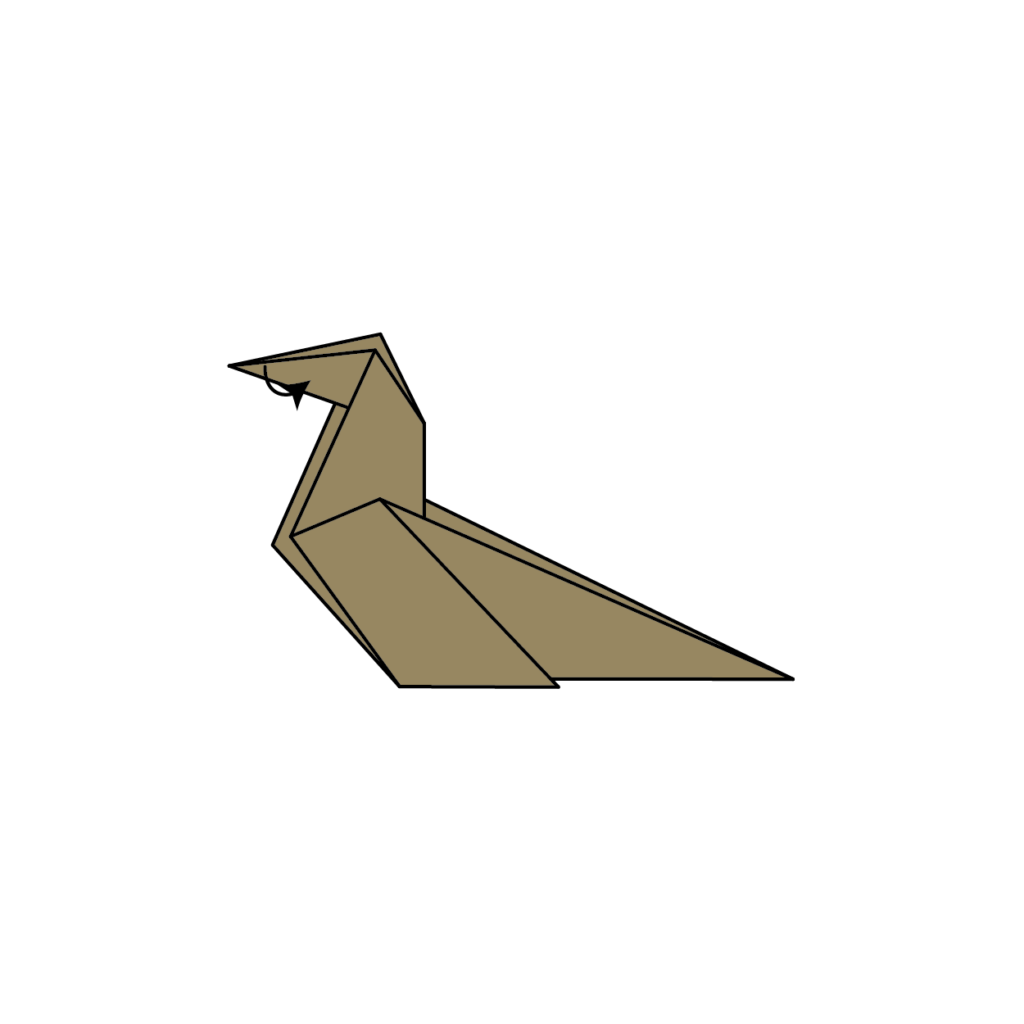
Make a third inside reverse fold along the beak of the head to flatten out the seals nose. It should look like what step 10 looks like now.
10. Folding the Flaps
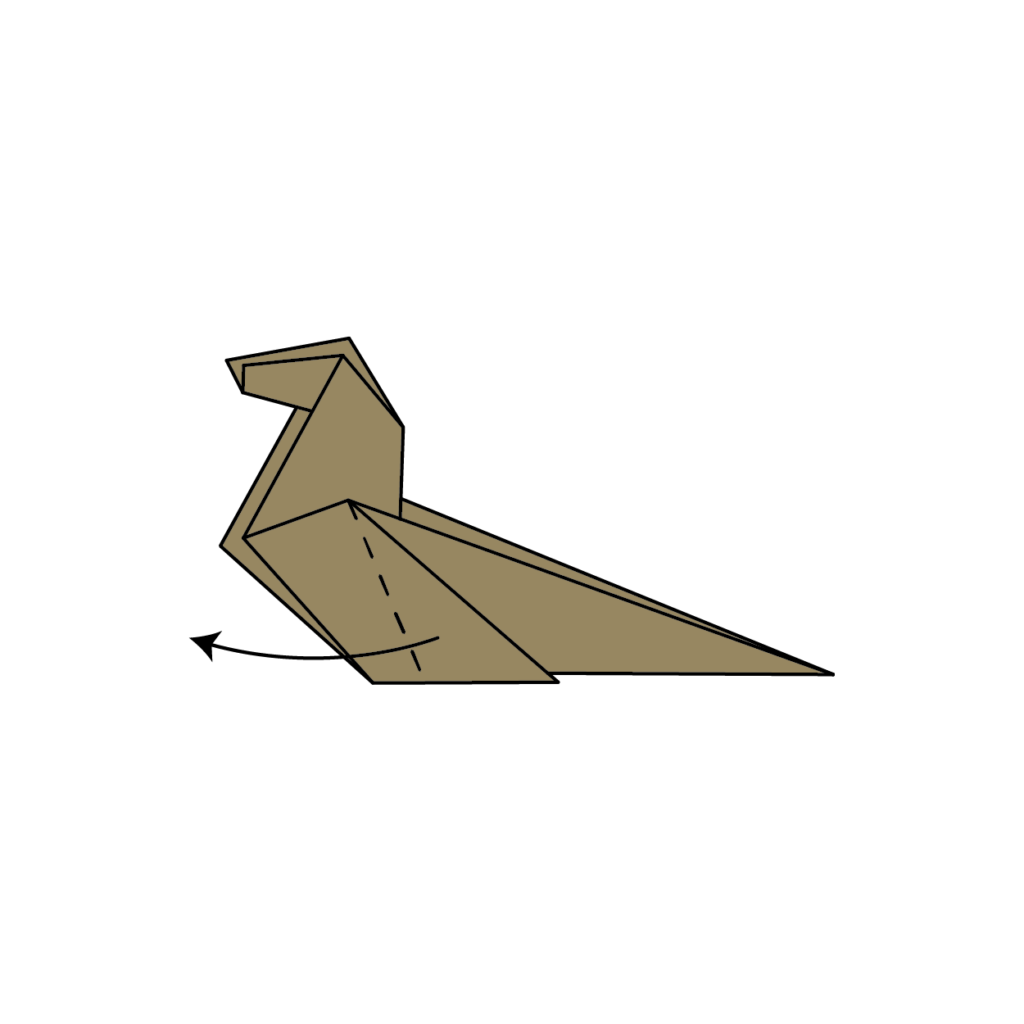
Fold the flap along the dotted line and do it on both sides of the seal.
11. Shaping the Seal’s Tail
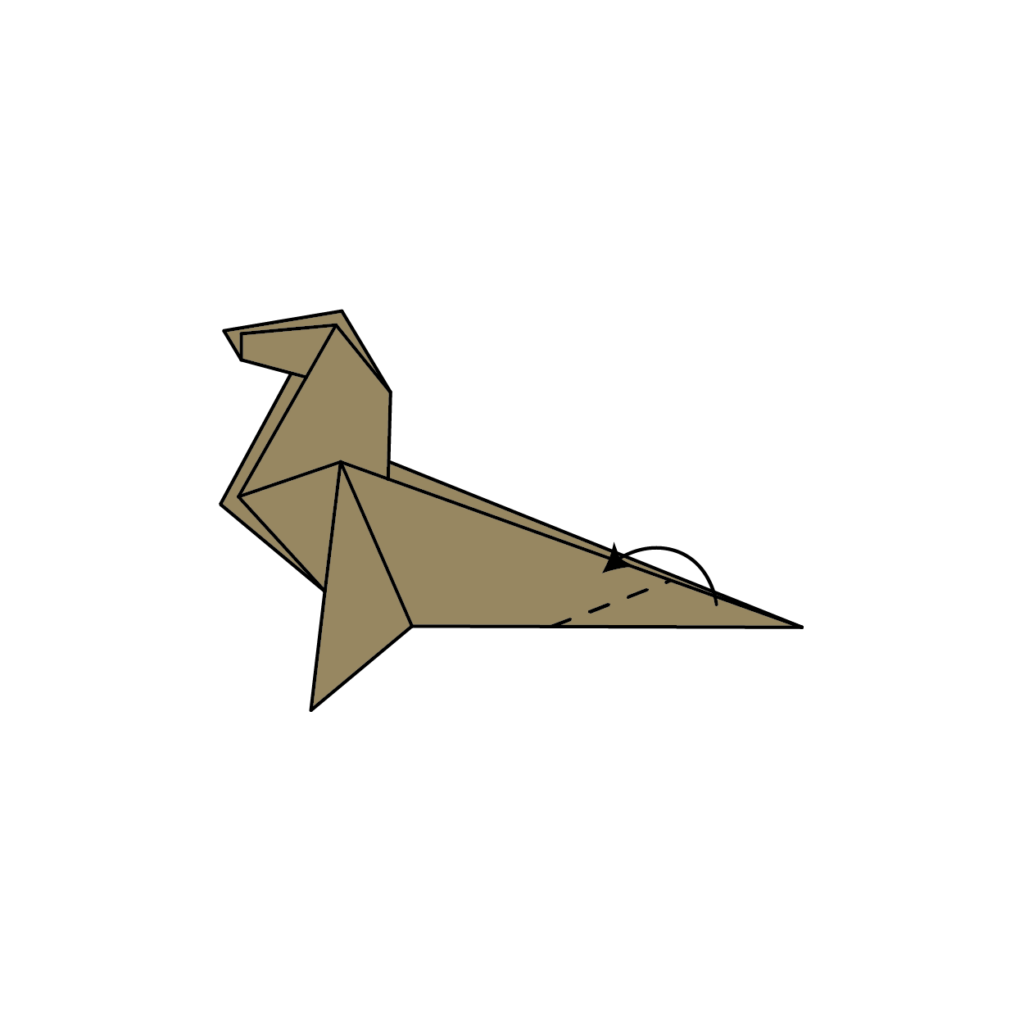
Make another inside reverse fold along the dotted line to create the seals tail.
12. Creating the Seal’s Flippers

Fold thee flap along the dotted line to create the seals flipper and repeat on both sides.
13. Presenting the Final Product
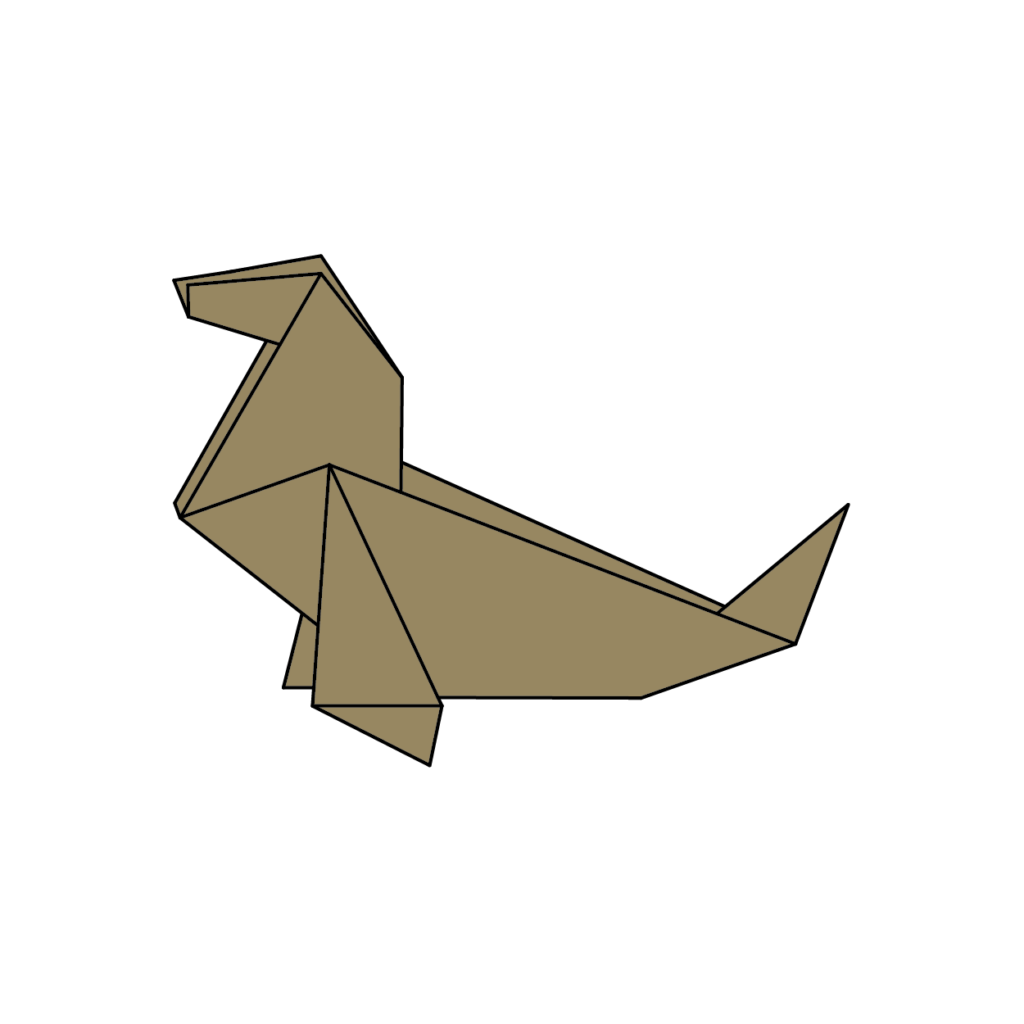
Your origami seal is complete! Enjoy your adorable new creation.
You’ve now made it through a video and step-by-step instructions! You should be amazing and folding origami seals at this point!
You should still keep practicing till you can create this seal without the need for any instructions! Down below you’ll find the same set of instructions but in a downloadable and printable format!
How To Make A Simple Origami Seal Printable Instructions
Well, there you have it! An easy origami seal that even a beginner can make. Be sure to check out my other origami creations and keep learning the art of origami.
It’s a great way to relax and de-stress after a long day. And though it can be a challenging activity, it’s always rewarding in the end, and it can be done with just a few pieces of paper and some patience. Stay crafty!

