
Do you want to learn how to make a simple origami dragon? It’s easier than you might think! In this step-by-step guide, I will show you how to create this iconic paper dragon. You only need a few basic materials and a little bit of patience. So get ready to amaze your friends and family with your new skills!
How To Make A Simple Origami Dragon Video Instructions
This video should have made it more than easy enough to create your first origami dragon! You can make your new pet any color you want and customize it however you want! Get as creative as possible with this! Maybe even cut out the shape of a breath of fire and glue it to the dragon’s mouth! If you prefer to learn in a different way other than a video then I’ve also made a step-by-step illustrated guide you can follow down below!
How To Make A Simple Origami Dragon Step-By-Step Instructions
1. Initial Folds and Unfolding
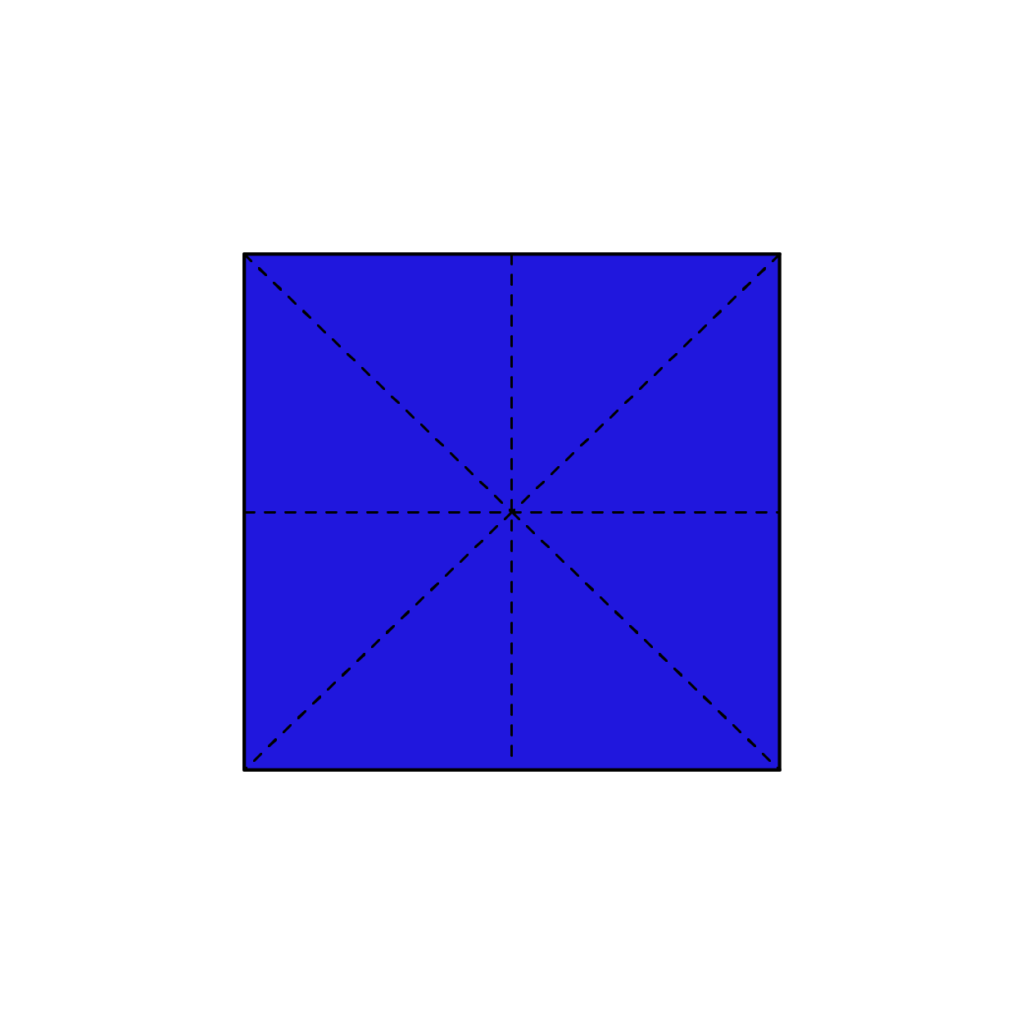
Begin by folding along all the dotted lines indicated on the paper. Make sure to press the folds firmly. Once you’ve completed all the folds, unfold the paper to reveal the crease pattern.
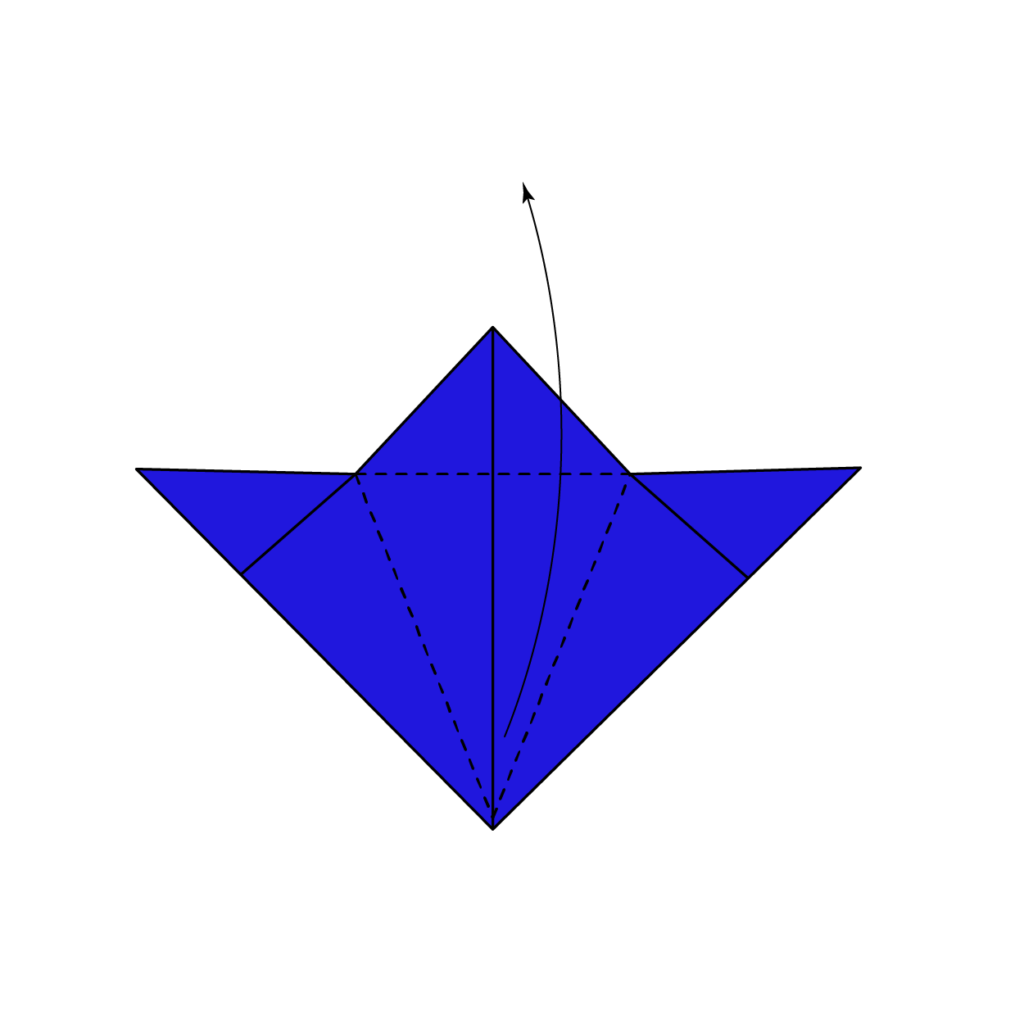
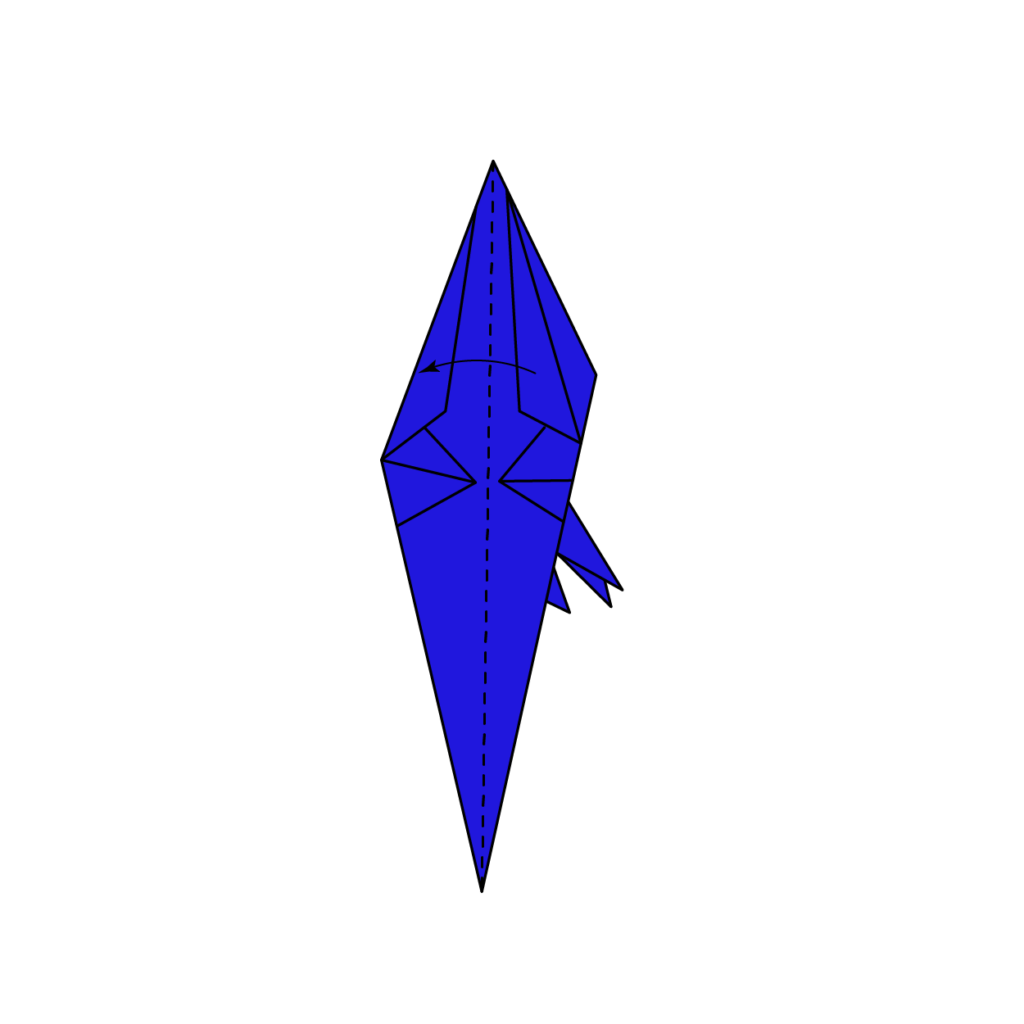
2. Folding Along the Dotted Lines
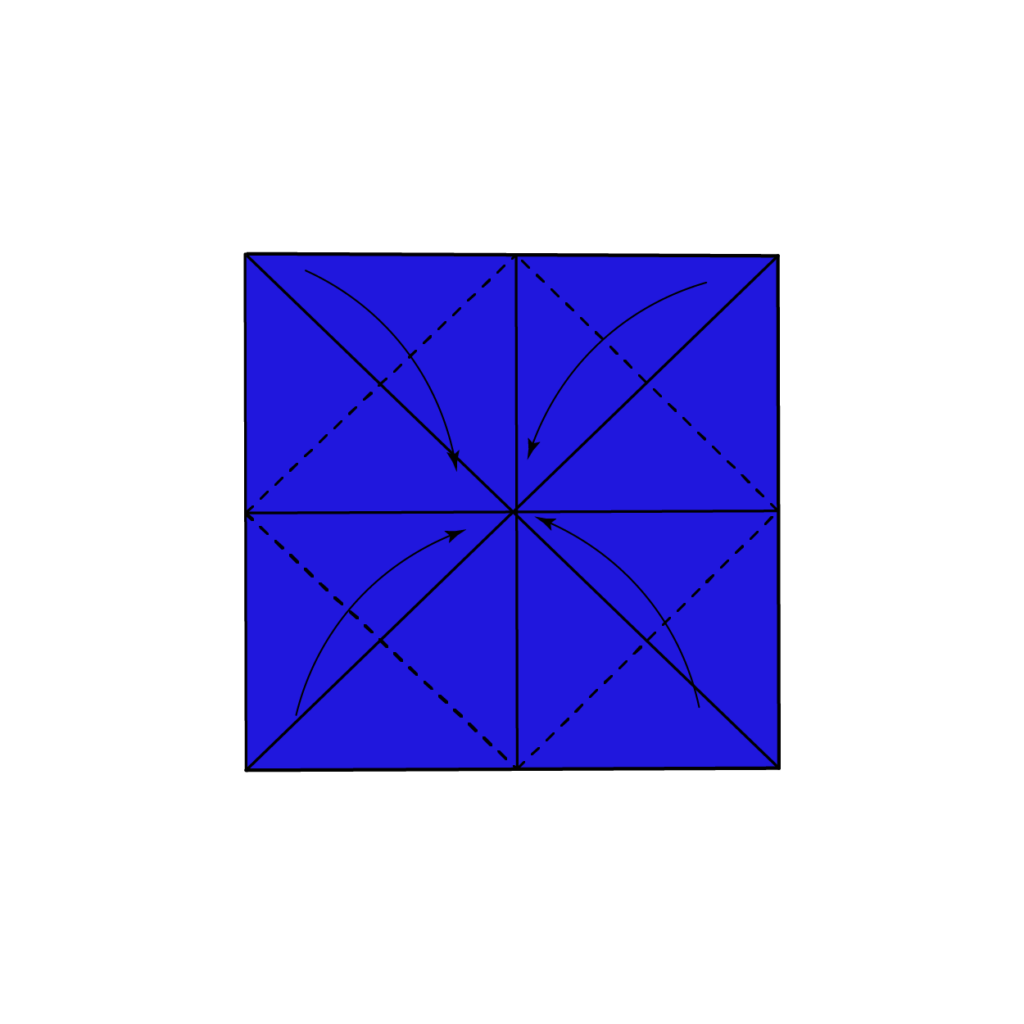
Now, fold the paper again along the dotted lines shown in the reference image. Press the folds firmly to ensure sharp creases.
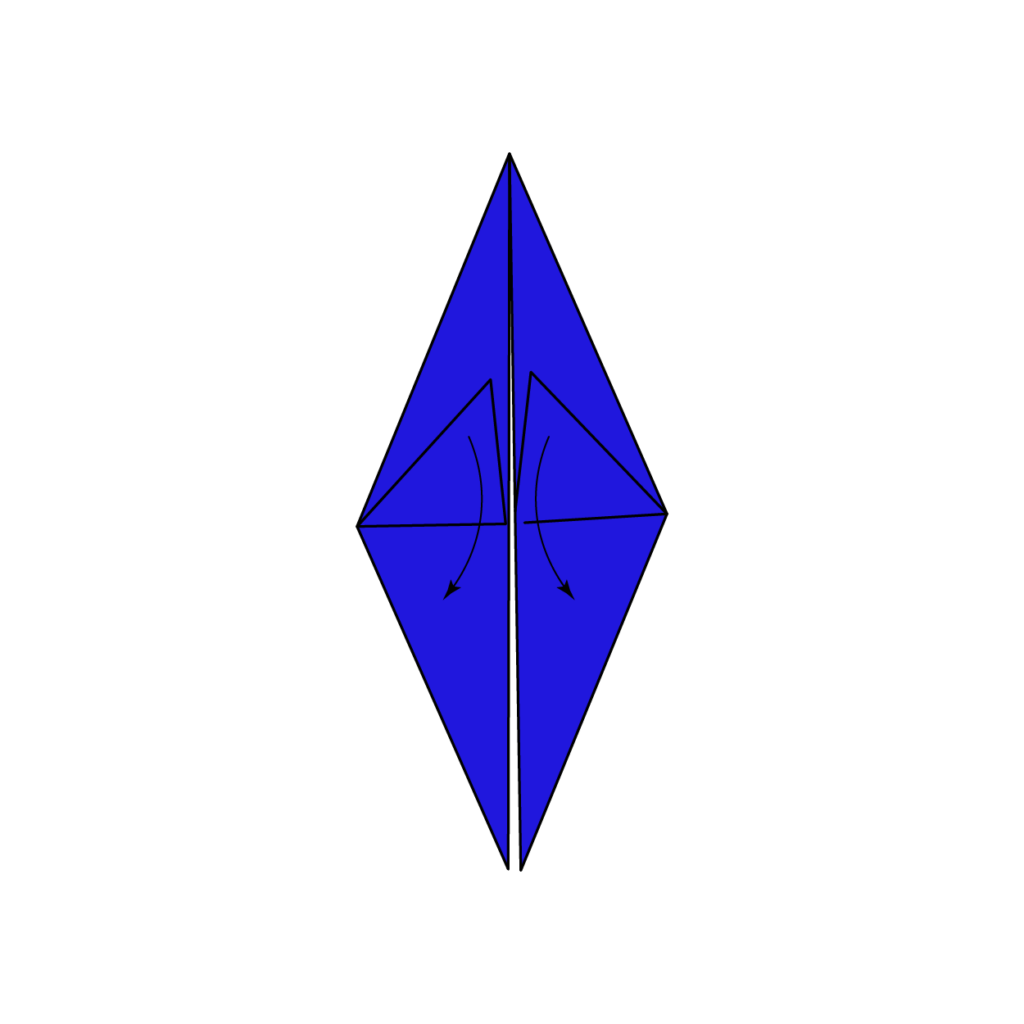
3. Folding Corners Towards the Center
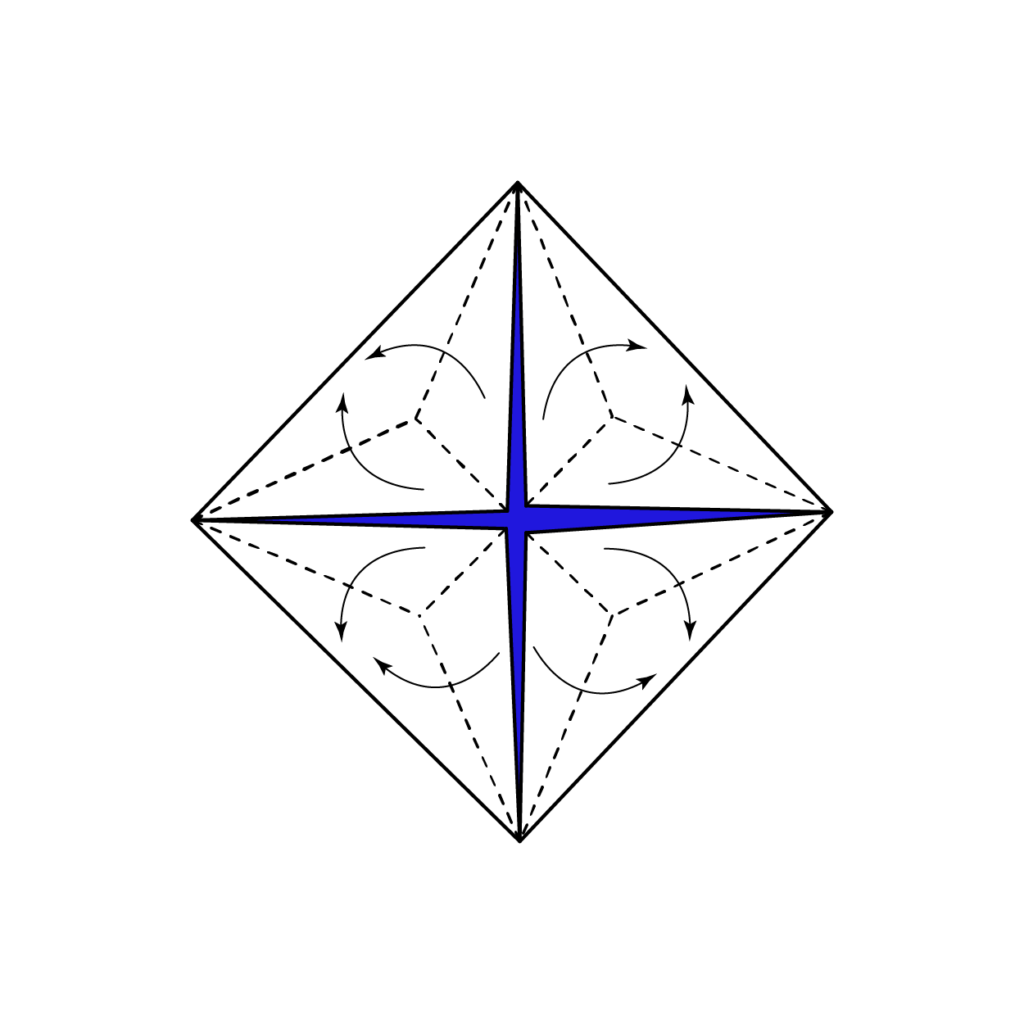
Fold each corner from the center in the dotted lines.
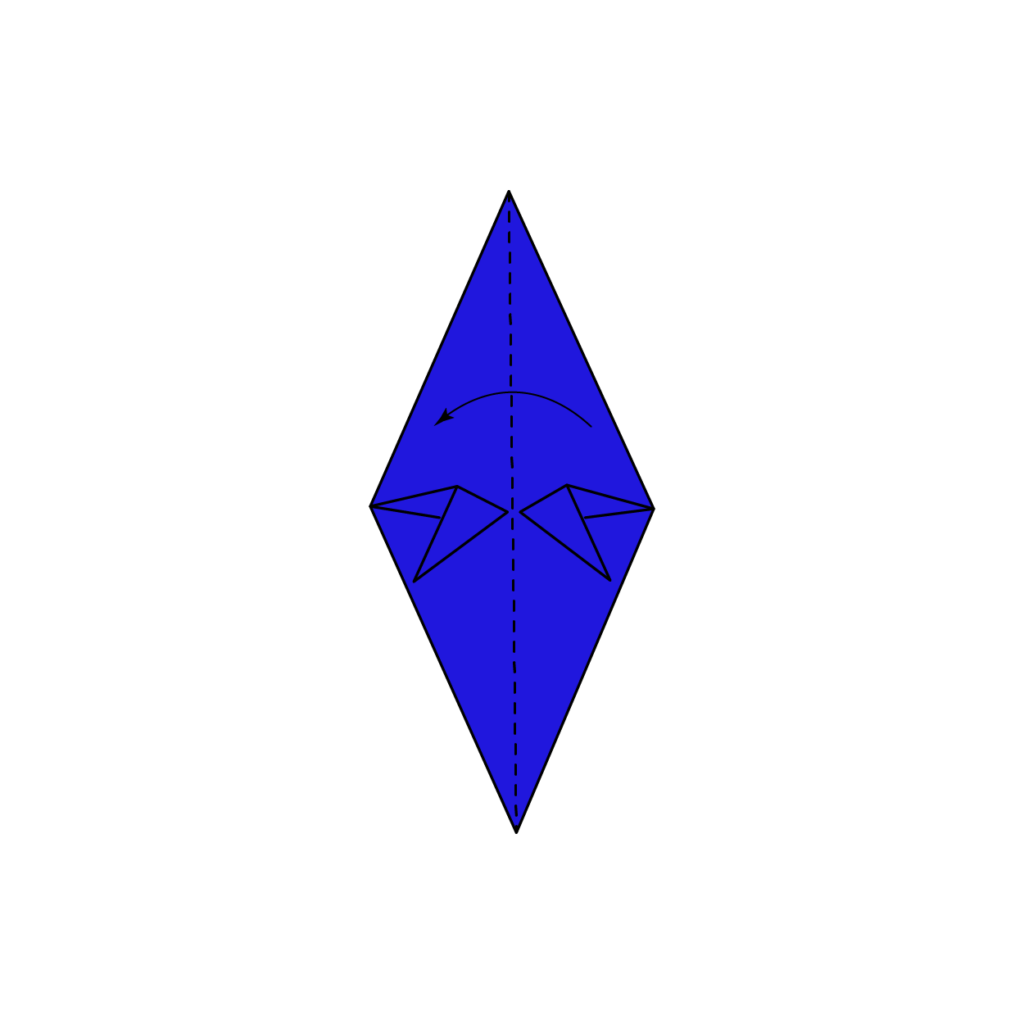
4. Flipping the Paper Over
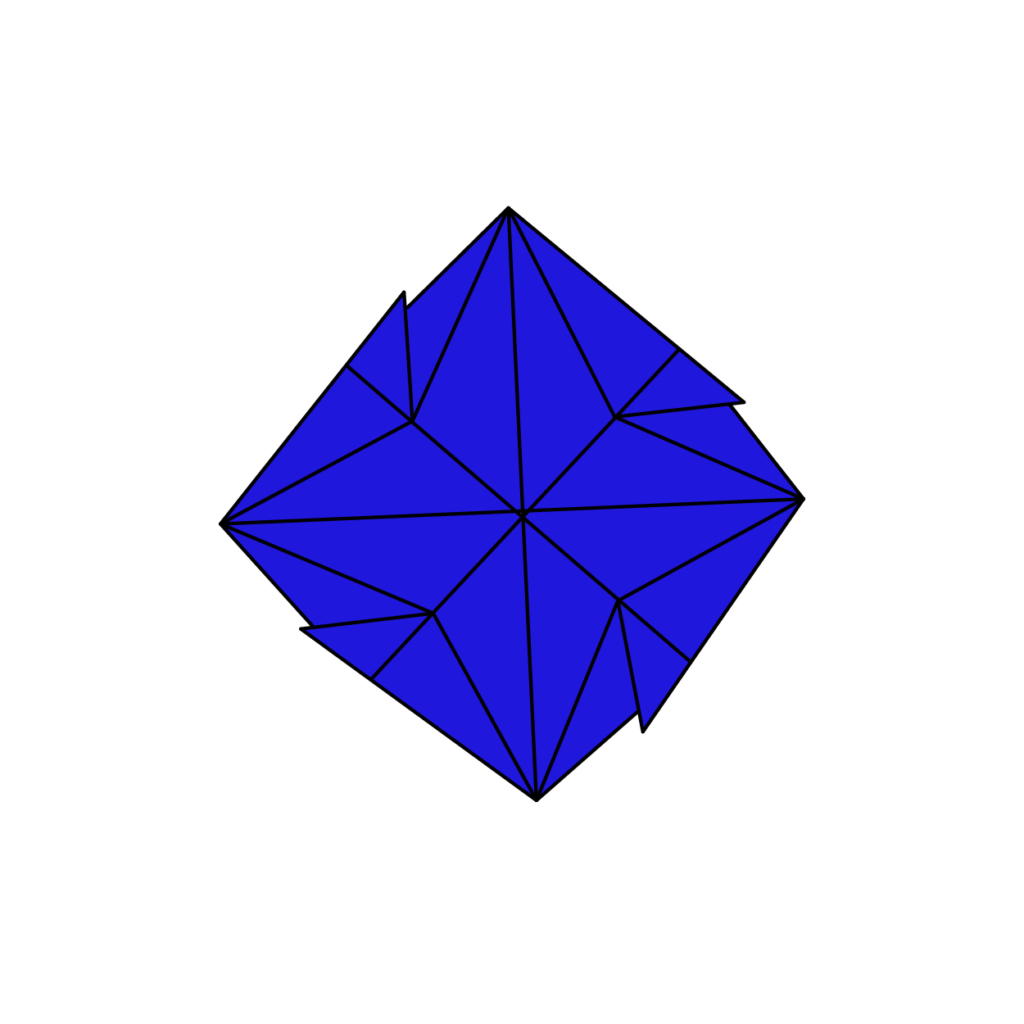
Carefully turn the paper over, making sure not to disturb the folds you’ve made so far.
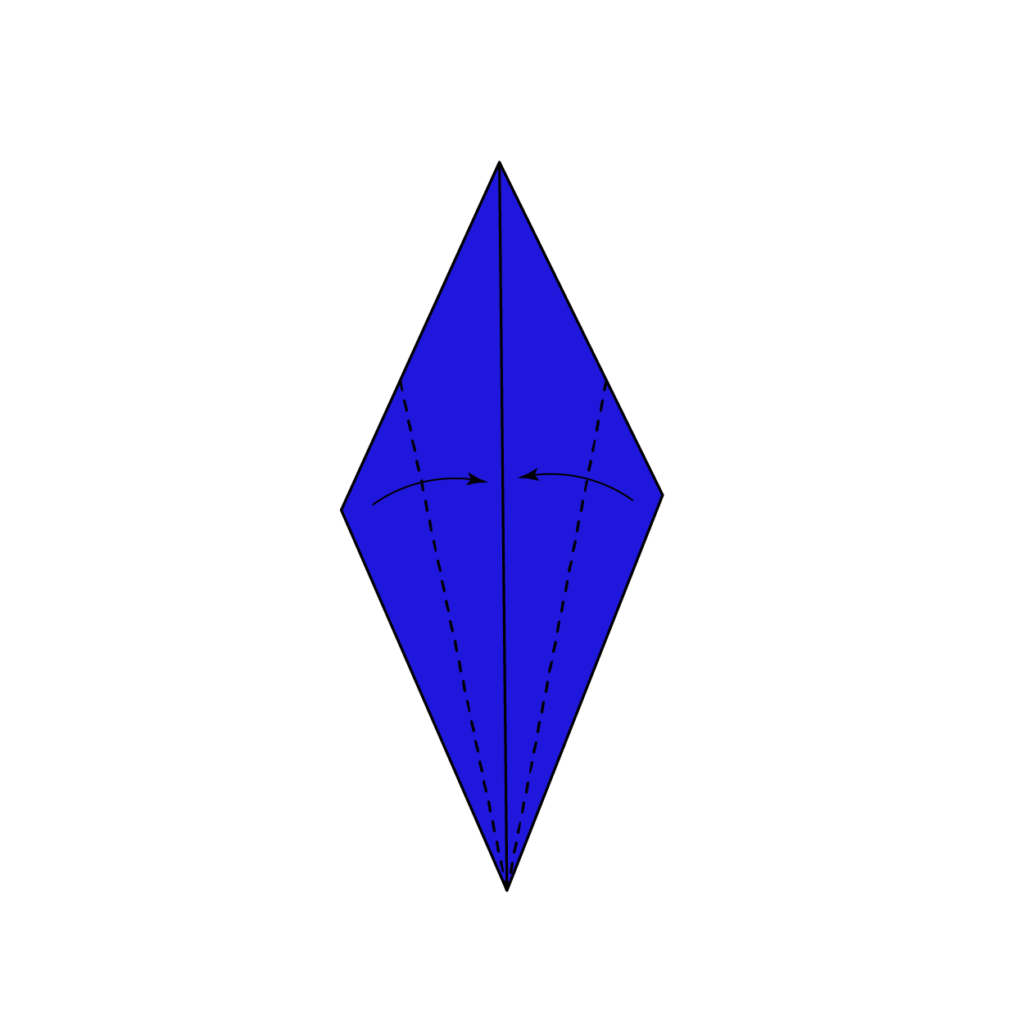
5. Folding Edges Towards the Center

Following the dotted lines in the reference image, fold the edges of the paper towards the center. Press the folds firmly.
6. Folding Upwards Along the Dotted Lines
Now, fold the paper upwards along the dotted lines shown in the image. Press the folds firmly.
7. Bringing Triangular Tips Downwards
Take the tip of the two triangles formed in the previous step and gently pull them downwards. Press the folds firmly.
8. Opening the Model Along the Dotted Lines
Carefully open the model along the dotted lines indicated in the reference image. Be gentle to avoid tearing the paper.
9. Folding Along the Dotted Lines
Fold the paper along the dotted lines shown in the image. Press the folds firmly.
10. Opening the Model from the Middle
Gently open the model from the middle, taking care not to damage any of the folds you’ve made so far.
11. Folding the Dragon’s Legs Upwards

Fold the legs upwards.
12. Step-Folding the Dragon’s Head

Using a step-folding technique, create the head of the dragon.
13. Step-Folding the Dragon’s Legs
Similarly, use the step-folding technique to shape the legs of the dragon.
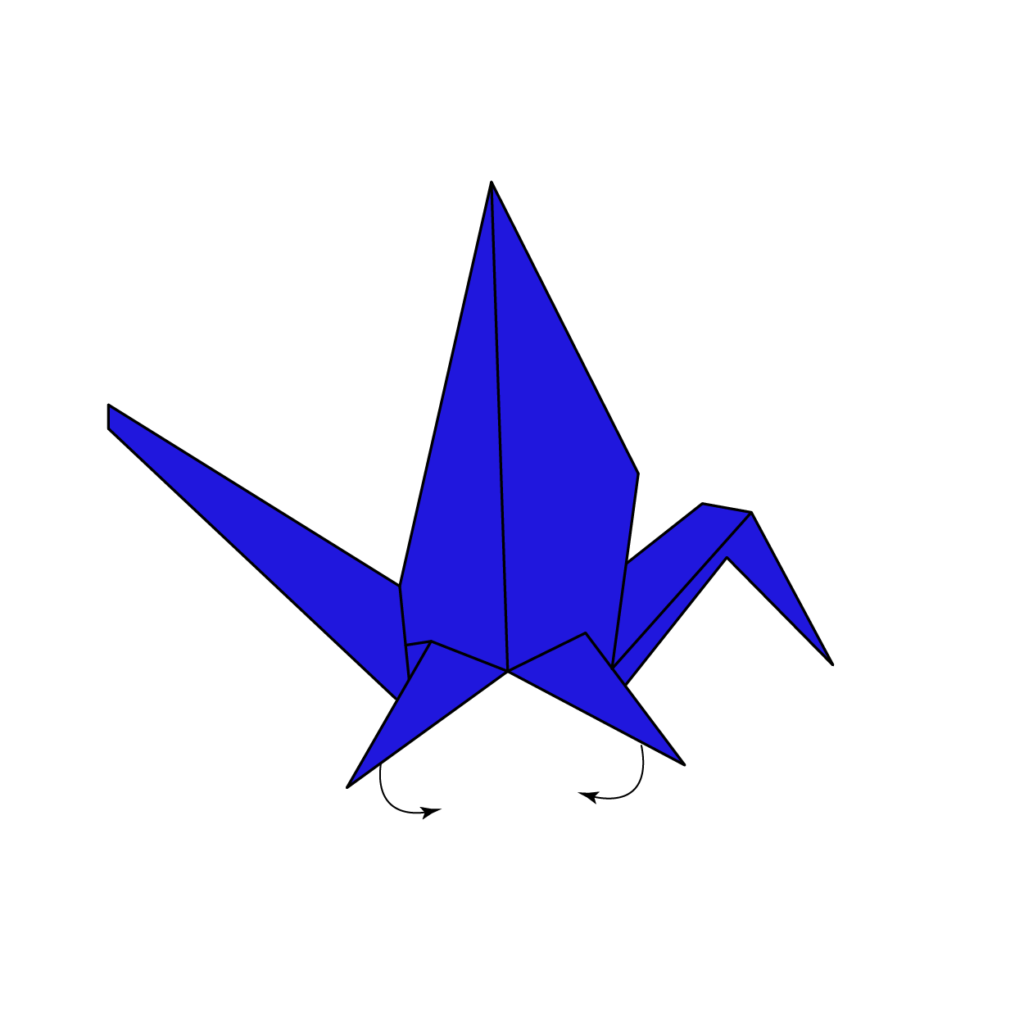
14. Lowering the Dragon’s Wings

Bring down the wings of the dragon by folding along the dotted lines shown in the reference image. Press the folds firmly.
15. Admiring Your Completed Origami Dragon
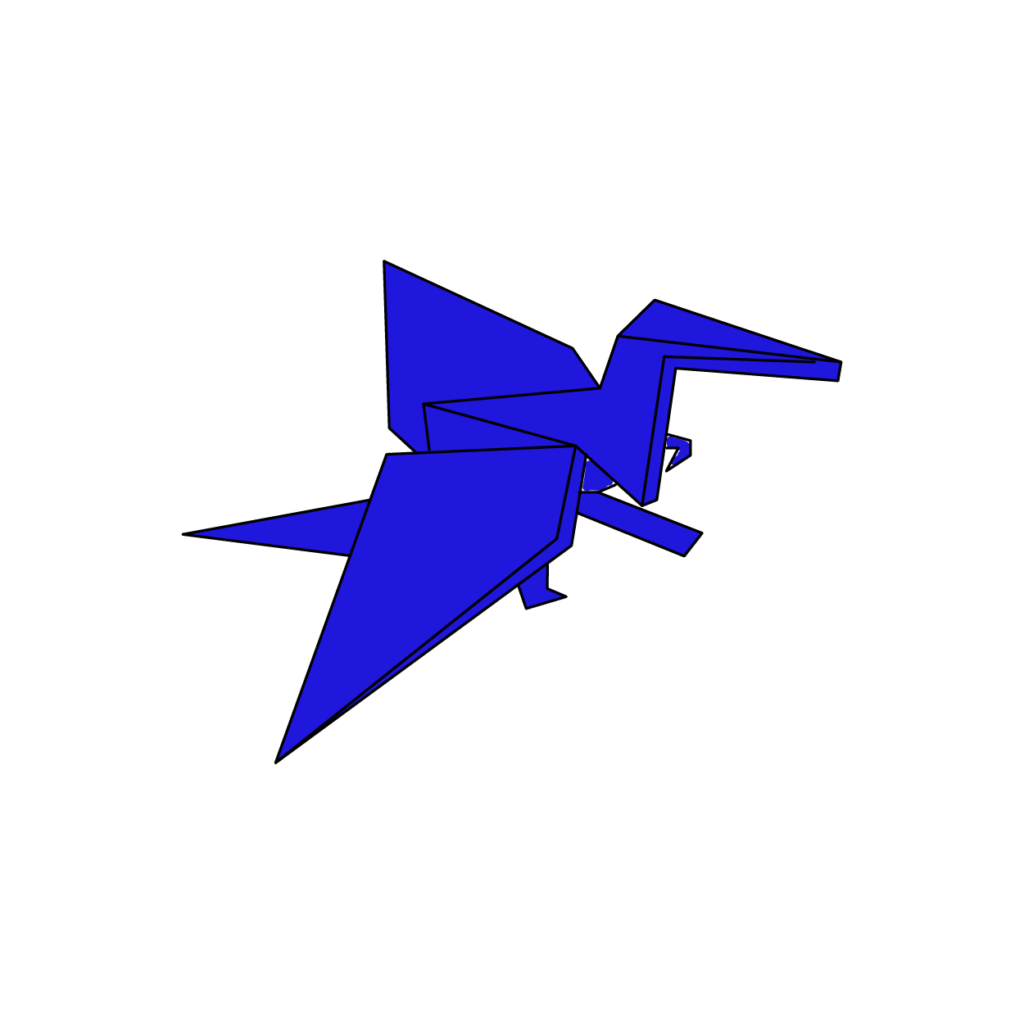
Congratulations! You’ve successfully completed your origami dragon. Take a moment to appreciate your intricate creation and consider making more dragons to form a majestic fleet.
There you go! You now have 2 different ways to learn how to make an origami dragon! This truly is an impressive design and anyone who sees it will be left with their jaws dropped! You should try to make this design a few times till you get it just right. It’s not a super hard design but some of the steps may take a little practice. Down below you’ll find the same instructions but in a downloadable and printable format.
How To Make A Simple Origami Dragon Printable Instructions
Now that you’ve mastered the origami dragon, check out my other origami creations and keep learning the art of origami. Who knows, maybe you can create an even more impressive origami masterpiece! Thanks for following along on this journey and I hope you had as much fun folding your own paper dragon as I did creating this guide.


